|
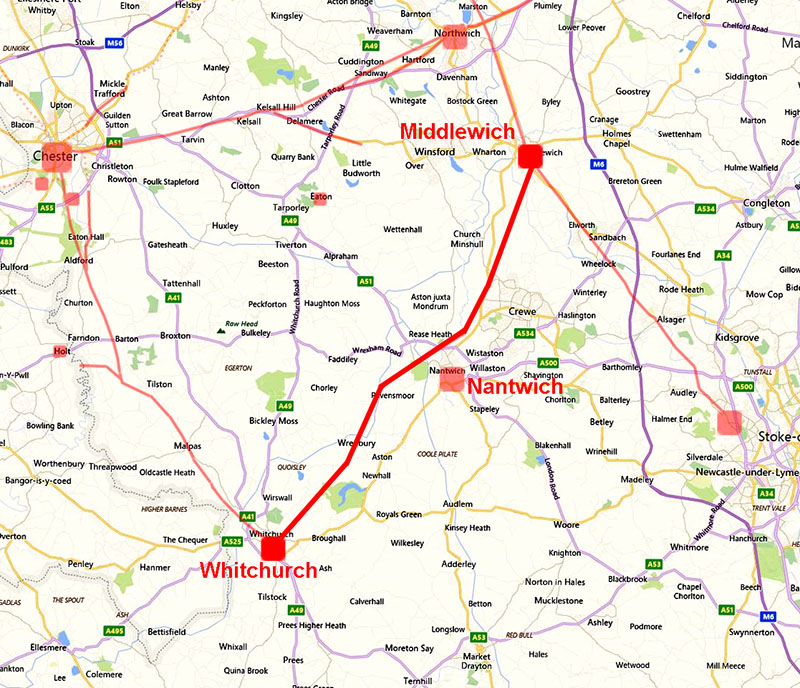
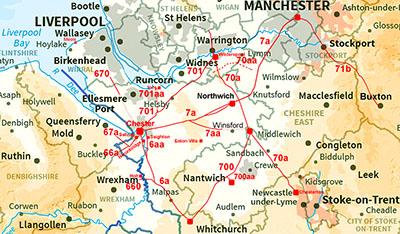
The Roman Road from Middlewich to WhitchurchMargary Number: 700Distance: 20 milesThe course of this road is well attested in the northern half but less so the nearer it gets to Whitchurch. Modern OS mapping shows it as far as Nantwich and Jermy found evidence on aerial photographs for parts of the middle section. Alex York made an attempt to plot its course south of Wrenbury but as we shall see this turned out to be not correct. With Lidar we can now confirm the line all the way to Whitchurch with reasonably high confidence. The logic of the choice of alignments for this road is somewhat puzzling. Its first direction is clearly aiming for Nantwich but it then swings westward in effect to bypass what was a Roman (salt production) site before taking aim again for Whitchurch. For the Nantwich link Roman road to this road see M700aa Note: Margary extends this road north of Middlewich via Byley to Lower Peover along the line of the modern road. However, there does not appear to be any real evidence for this other than it is supposedly the same alignment projected north-east. This is not actually the case and the alignment is not identical. Having a single alignment either side of a site is a common Roman trait but here it is not true. In addition, the north-east extension would need a destination and so far the only (slight) evidence is the name Pavement Lane, Mobberley. Perhaps the forthcoming new Lidar coverage will resolve this puzzle.
|
Historic Counties: Cheshire & Shropshire Current Counties: Cheshire & Shropshire HER: Cheshire & Shropshire
|
|
|
|
|
|
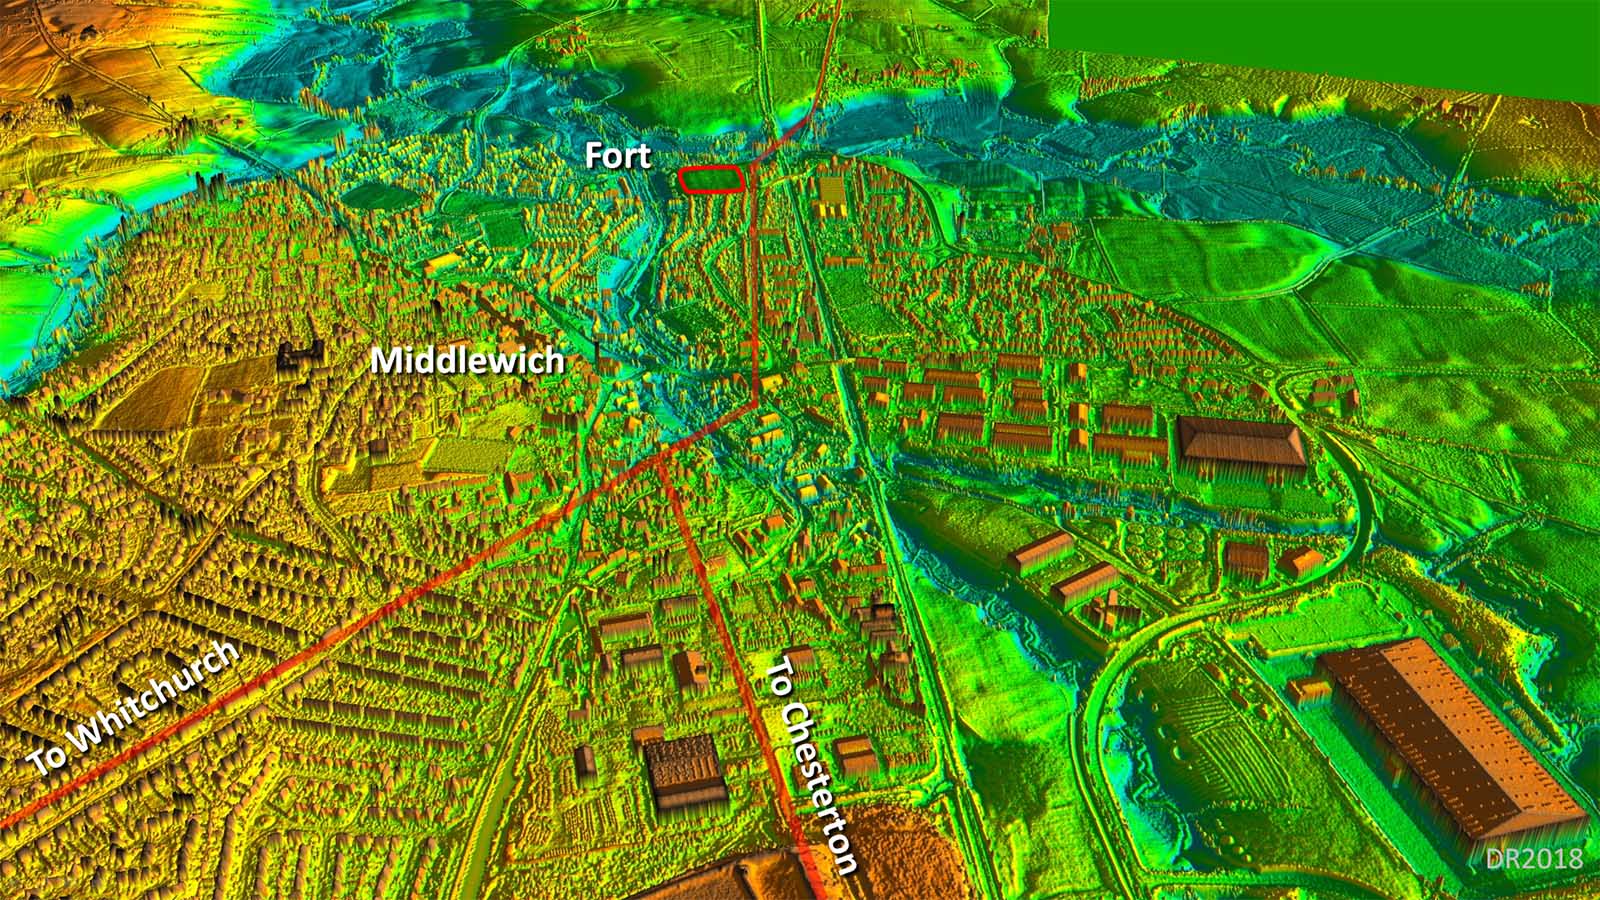
Oblique 3D lidar View - Middlewich looking North The road arrangement south of the fort site may seem a little odd but there would have been the need for a dog-leg in King Street (for Chesterton) to cross the valley now occupied by the Trent & Mersey Canal. The Whitchurch road would have been a branch off King Street and diverged once the valley was crossed. Its precise course is somewhat uncertain but what is shown is probably close to the truth.
|
Click for larger view
|
 |
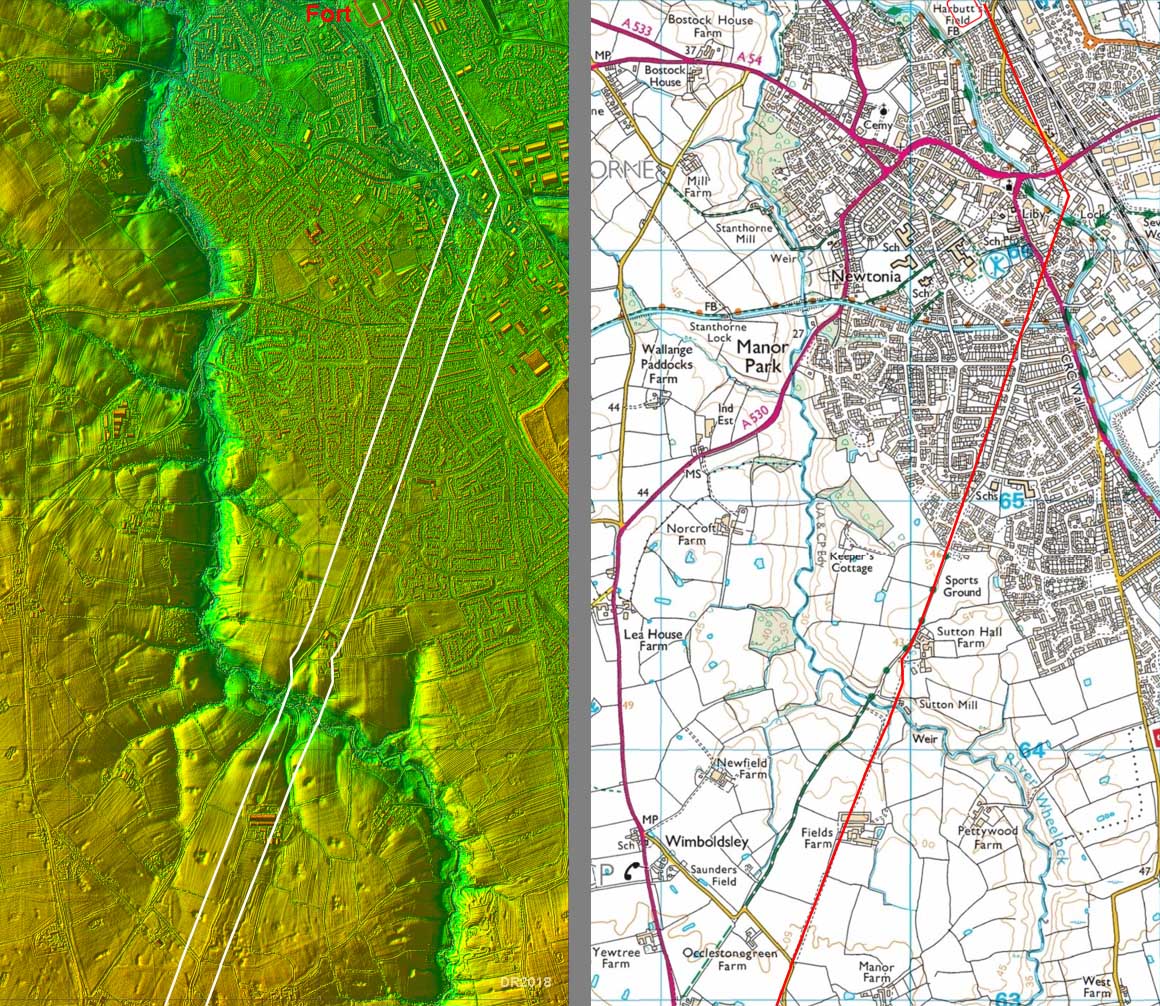
Lidar Image and Route Map - Middlewich The first main alignment is well attested and shown on modern maps. Lidar indicates a slightly different route to cross the River Wheelock. |
Click for larger view |
 |
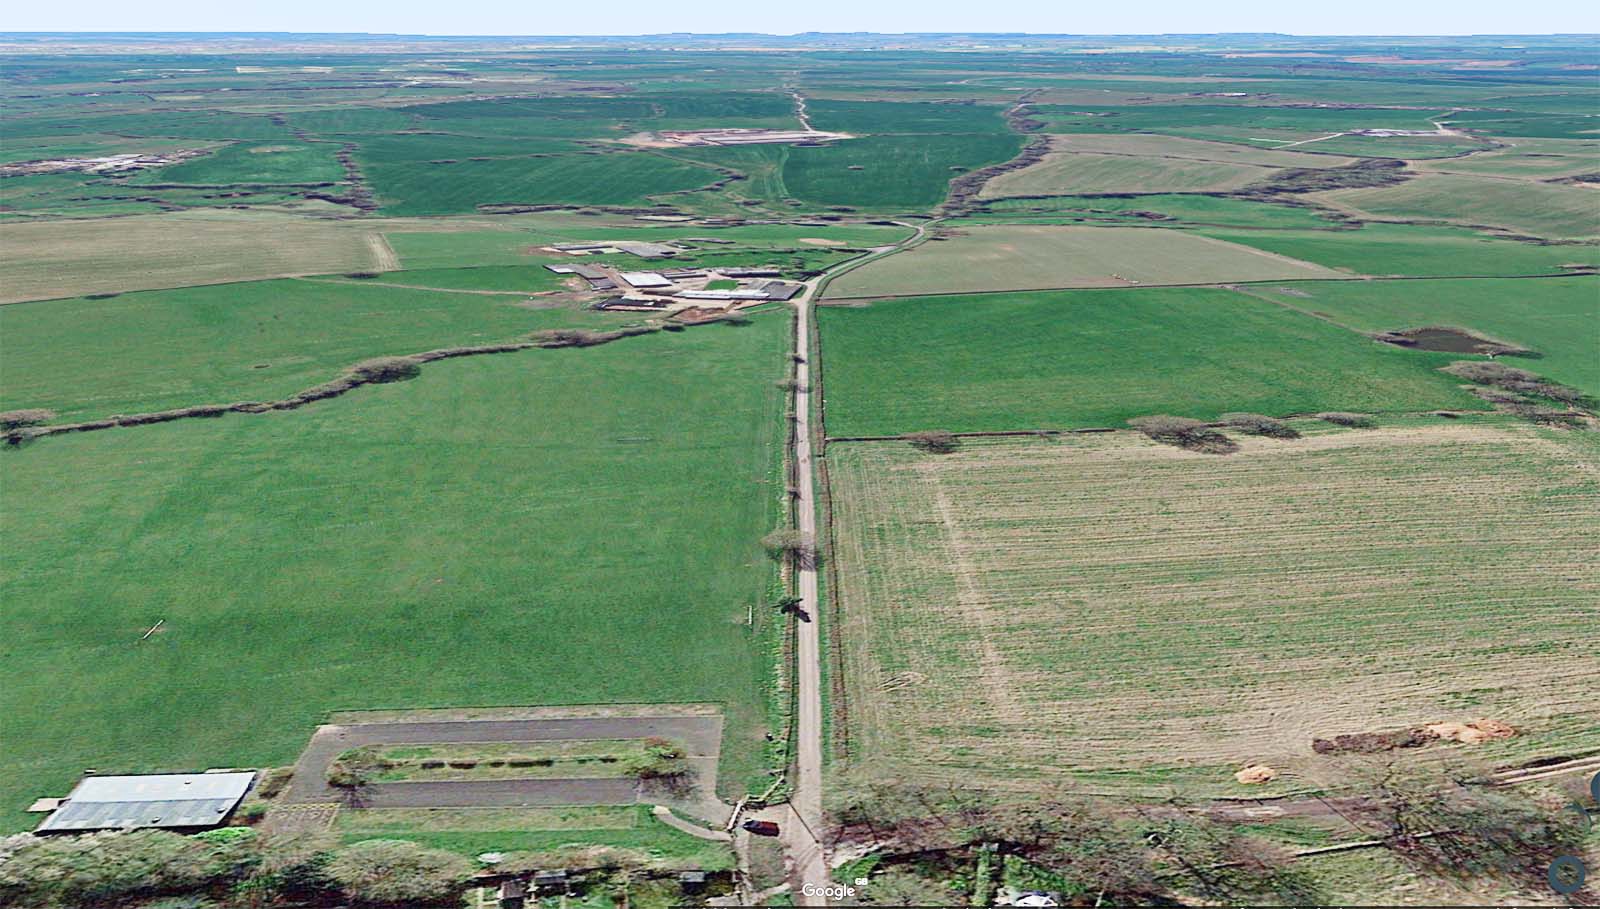
Google 3D Image - Sutton Hall Farm A farm track follows the road to Sutton Hall Farm but then drifts off line but the Roman alignment carries on its straight course into the distance.
|
 |
|
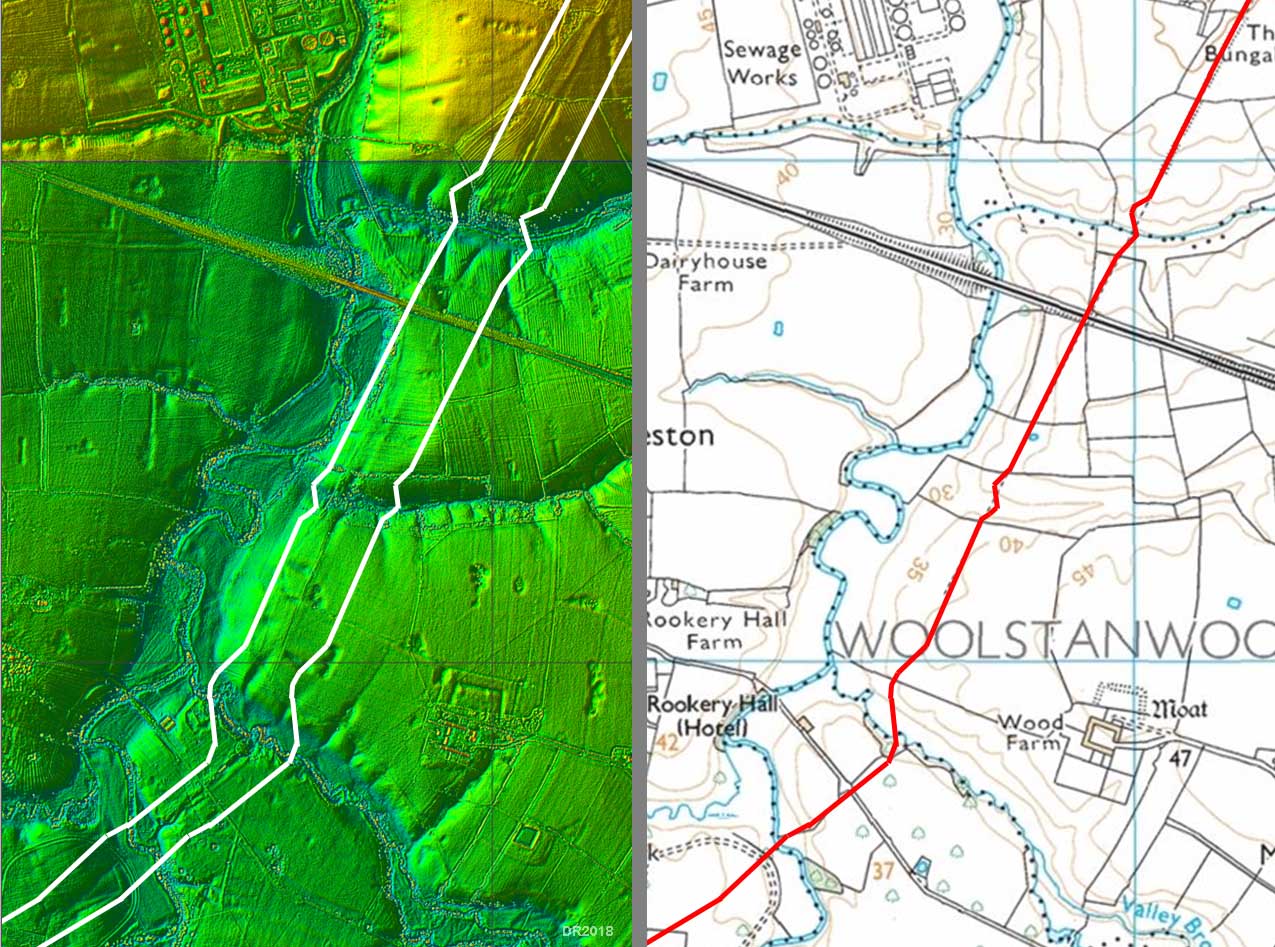
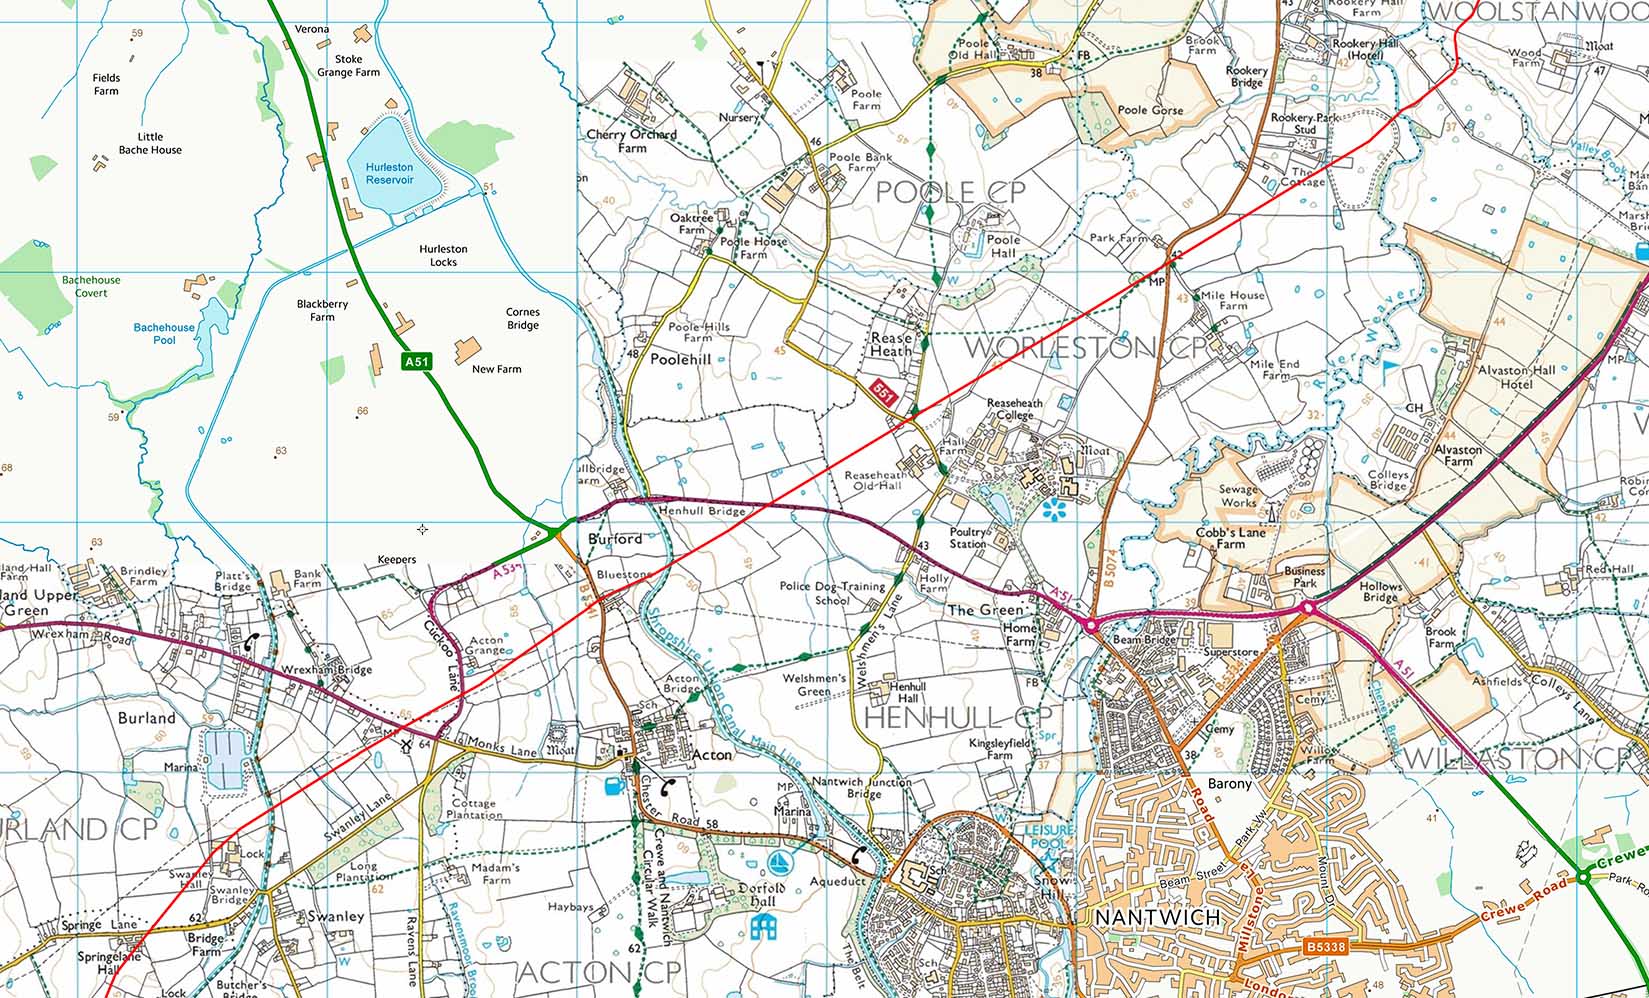
Lidar Image and Route Map - Woolstanwood After an alignment that appears to have been aiming at Nantwich, the road makes a significant change of direction at Woolstanwood. The section also features typical dog-legs to ease the gradients down to the crossing points of streams and rivers. Modern Ordnance Survey maps give up on plotting this road any further than Woolstanwood.
|
 |
|
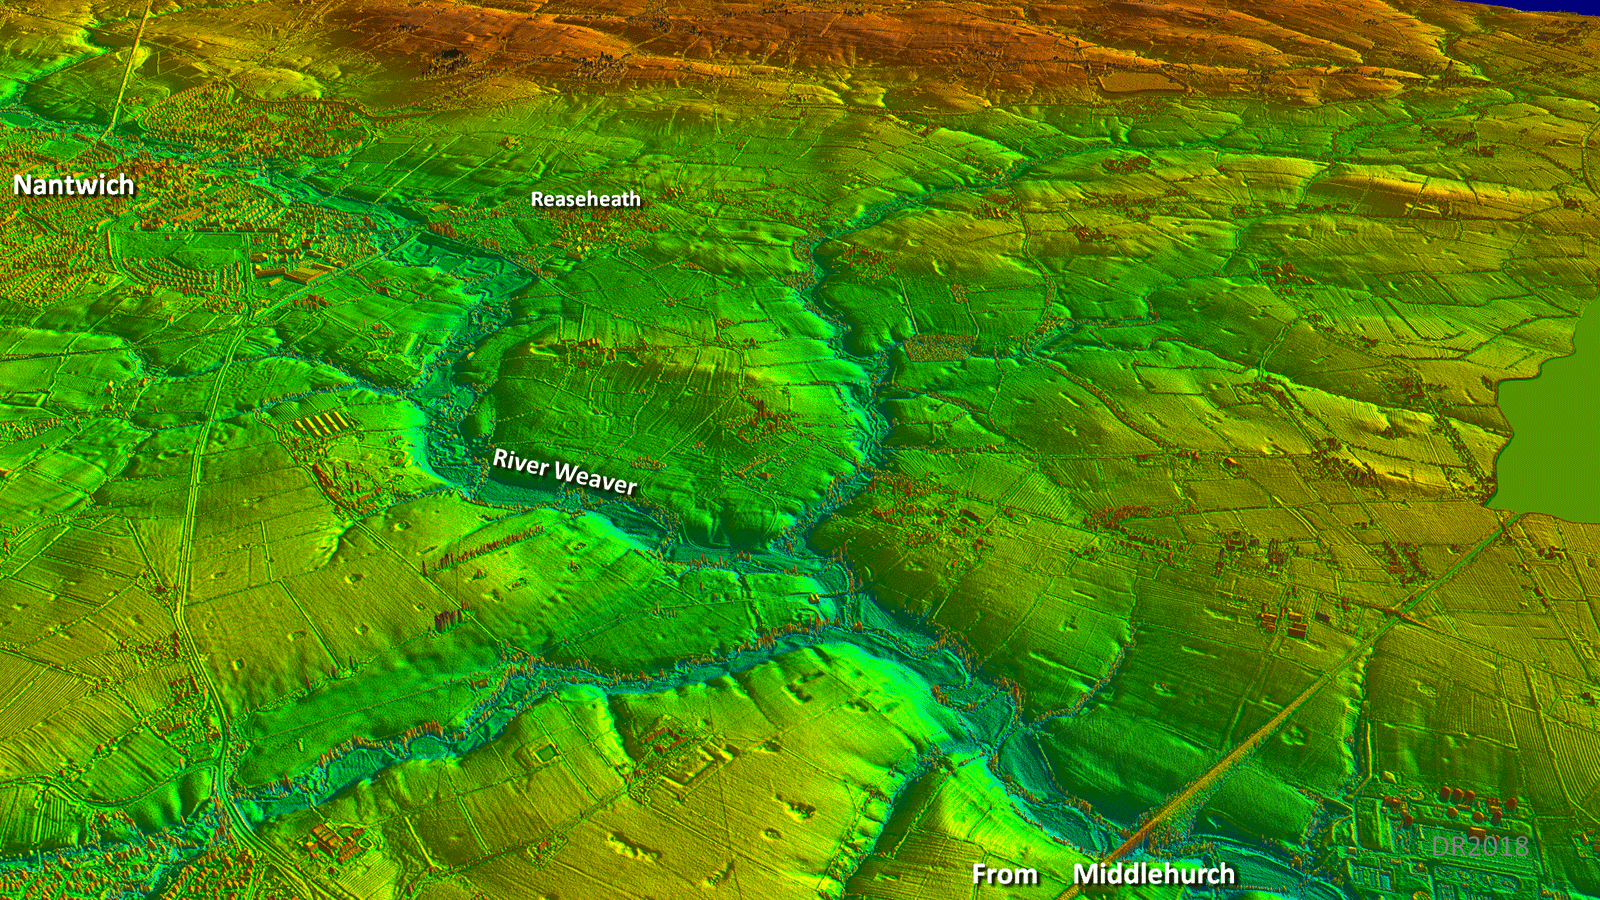
Oblique 3D Lidar Image - The Nantwich Turn This oblique view perhaps offers an explanation for the change of direction north of Nantwich. Carrying straight-on would perhaps have resulted in a route coinciding with the the River Weaver. Even so it seems a bigger deviation than necessary. |
Click for larger view |
 |
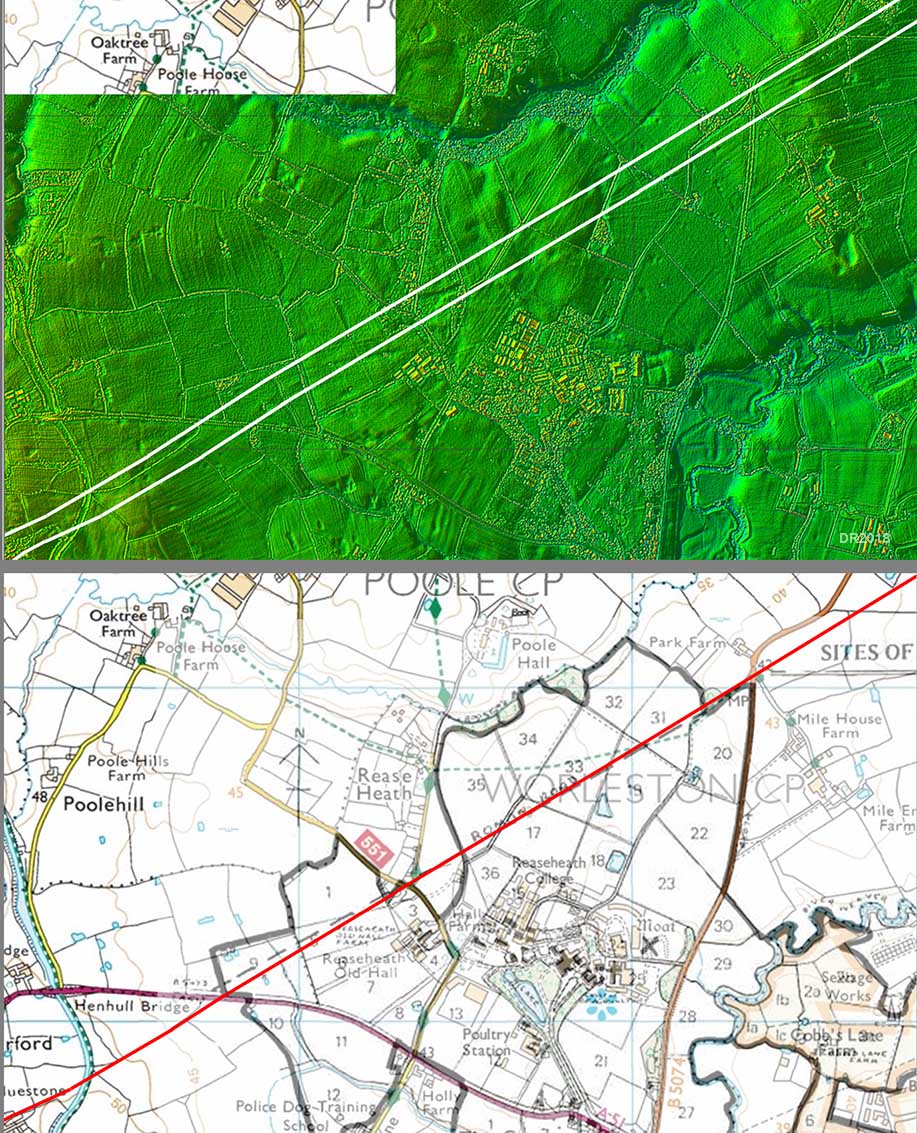
Lidar Image and Route Map - Reaseheath This stretch passing through Reaseheath parish was investigated where it passes through the grounds of Reaseheath College by John Whittingham, Alex York and Justin Connor. Their map is superimposed on the modern map (bottom) and is in good agreement with what is visible in the lidar image (top) For more information of the Reaseheath excavation follow this link:- Reaseheath |
Click for larger view |
 |
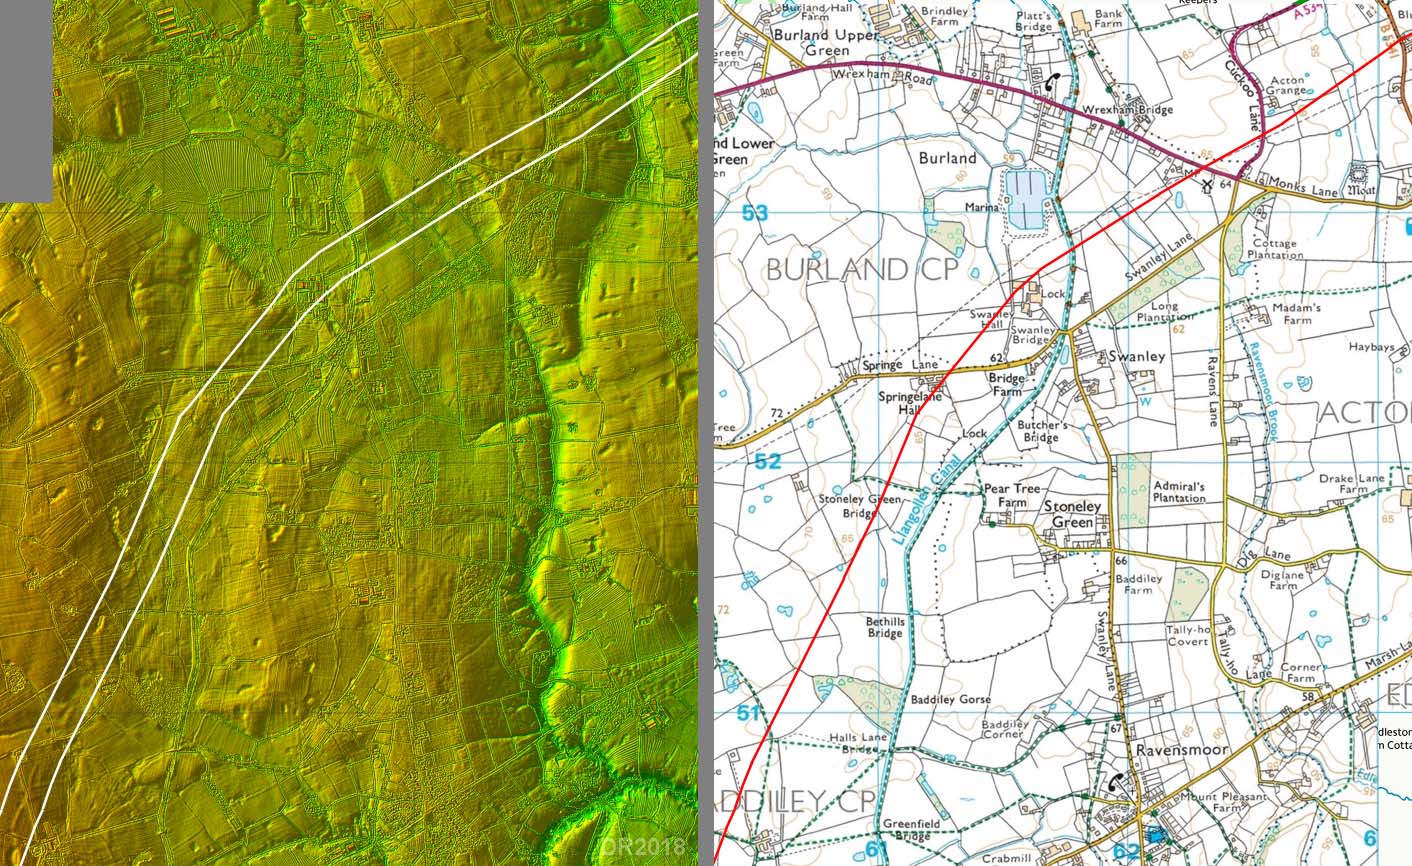
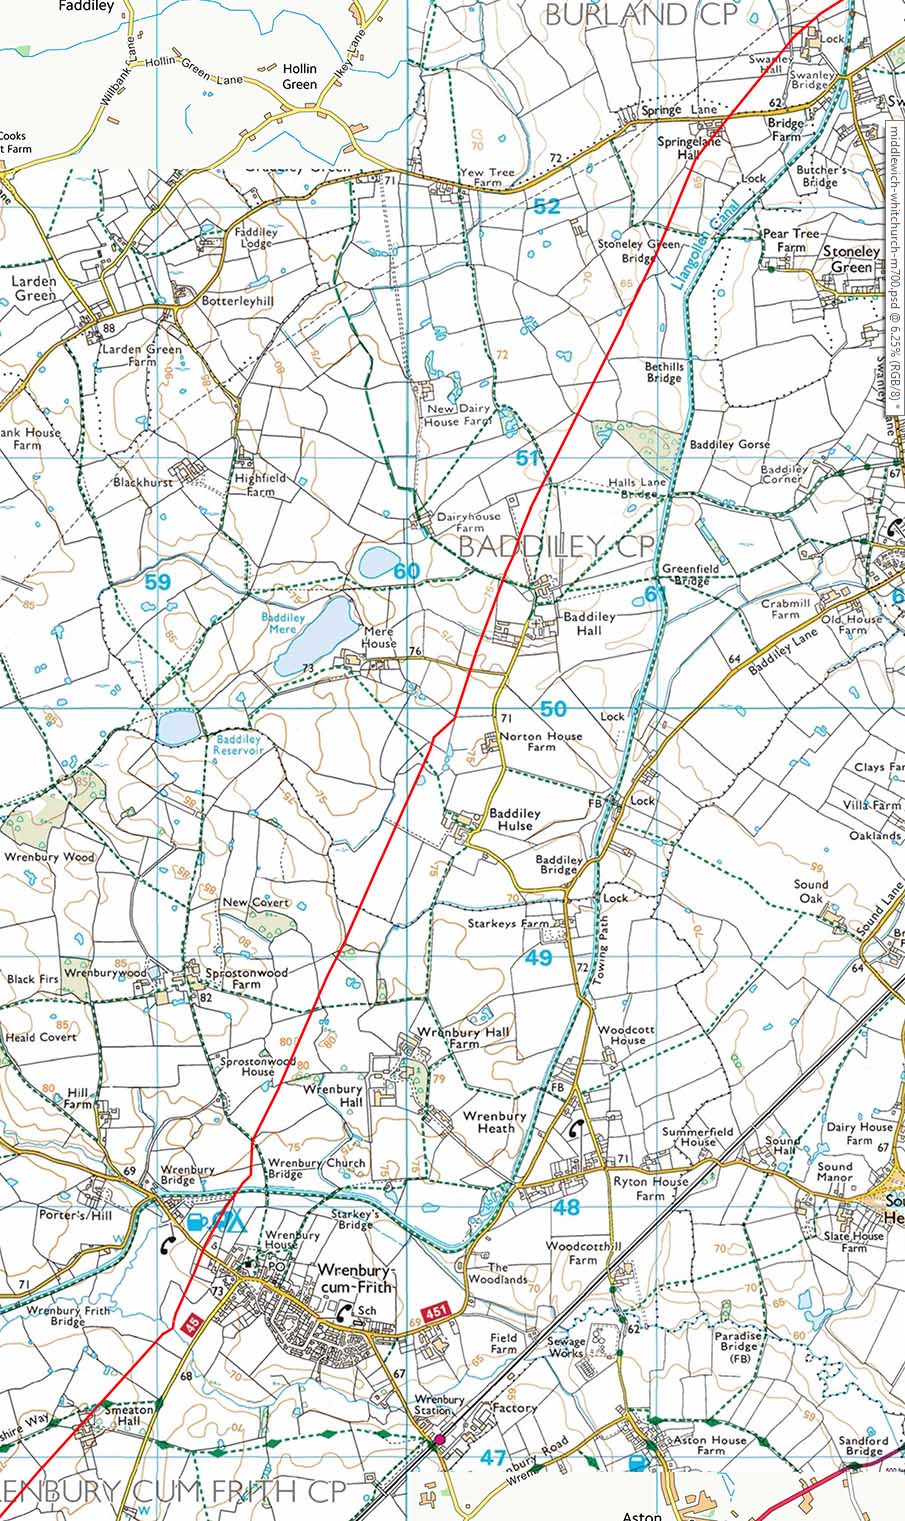
Lidar Image and Route Map - Burland Having bypassed Nantwich - for whatever reason - the road make another significant turn at Burland. Again Lidar shows it well. |
Click for larger view |
 |
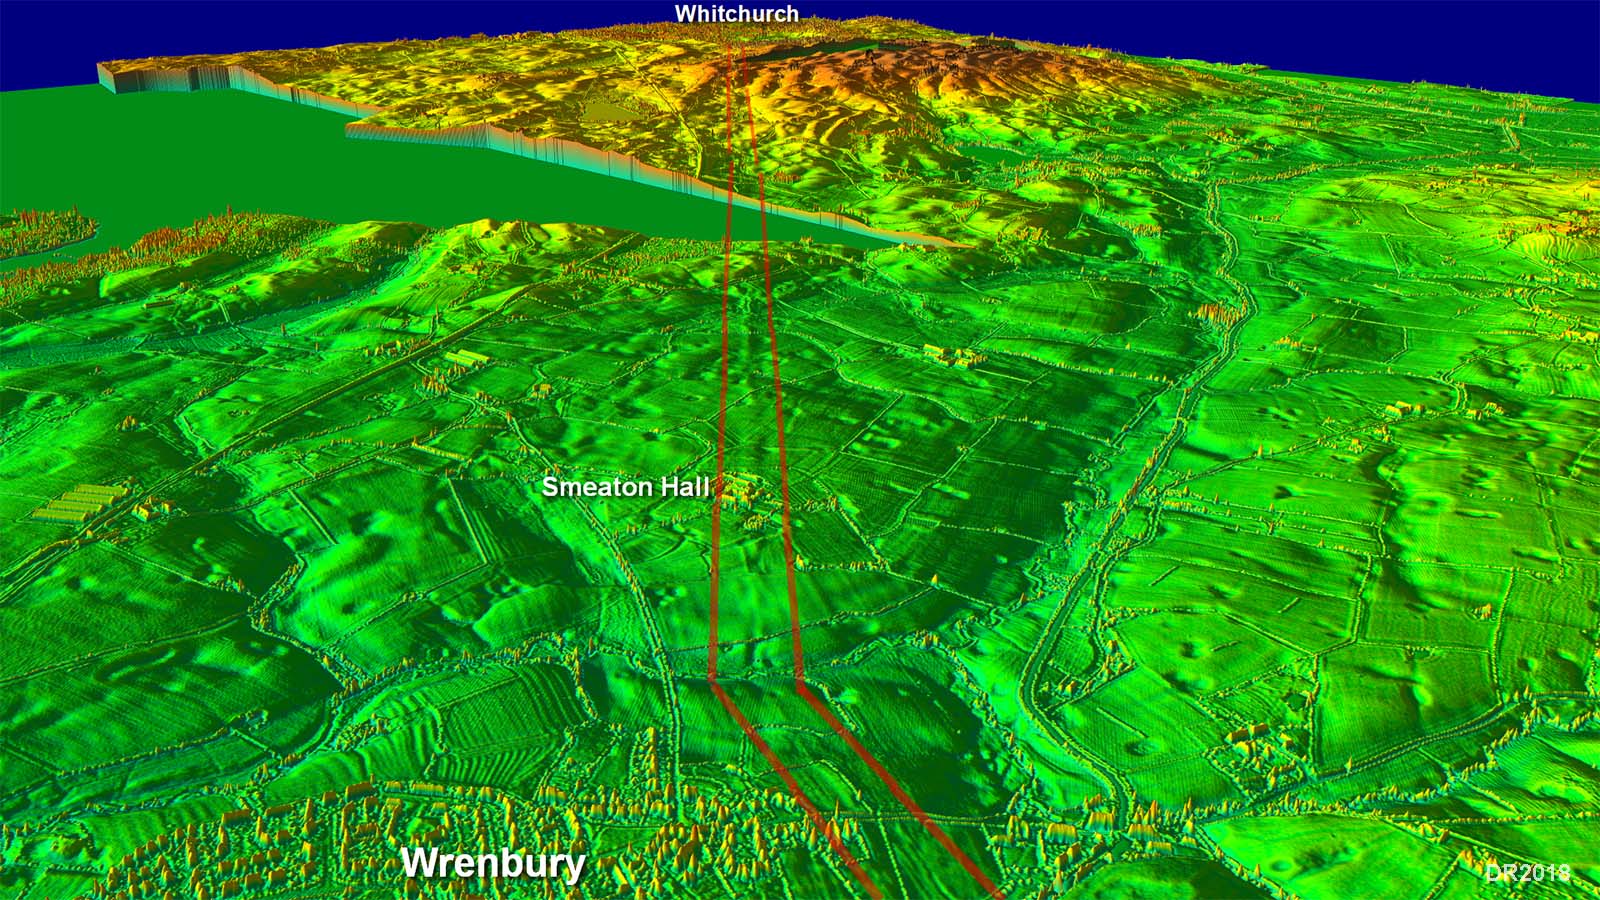
Oblique 3D Lidar Image - Wrenbury to Whitchurch This is where the route starts to get a bit more subtle. This fine length of agger passing Smeaton Hall is the last very obvious stretch. Even this only came to light recently with the advent of Lidar and was probably first spotted by the late Hugh Toller. |
Click for larger view |
 |
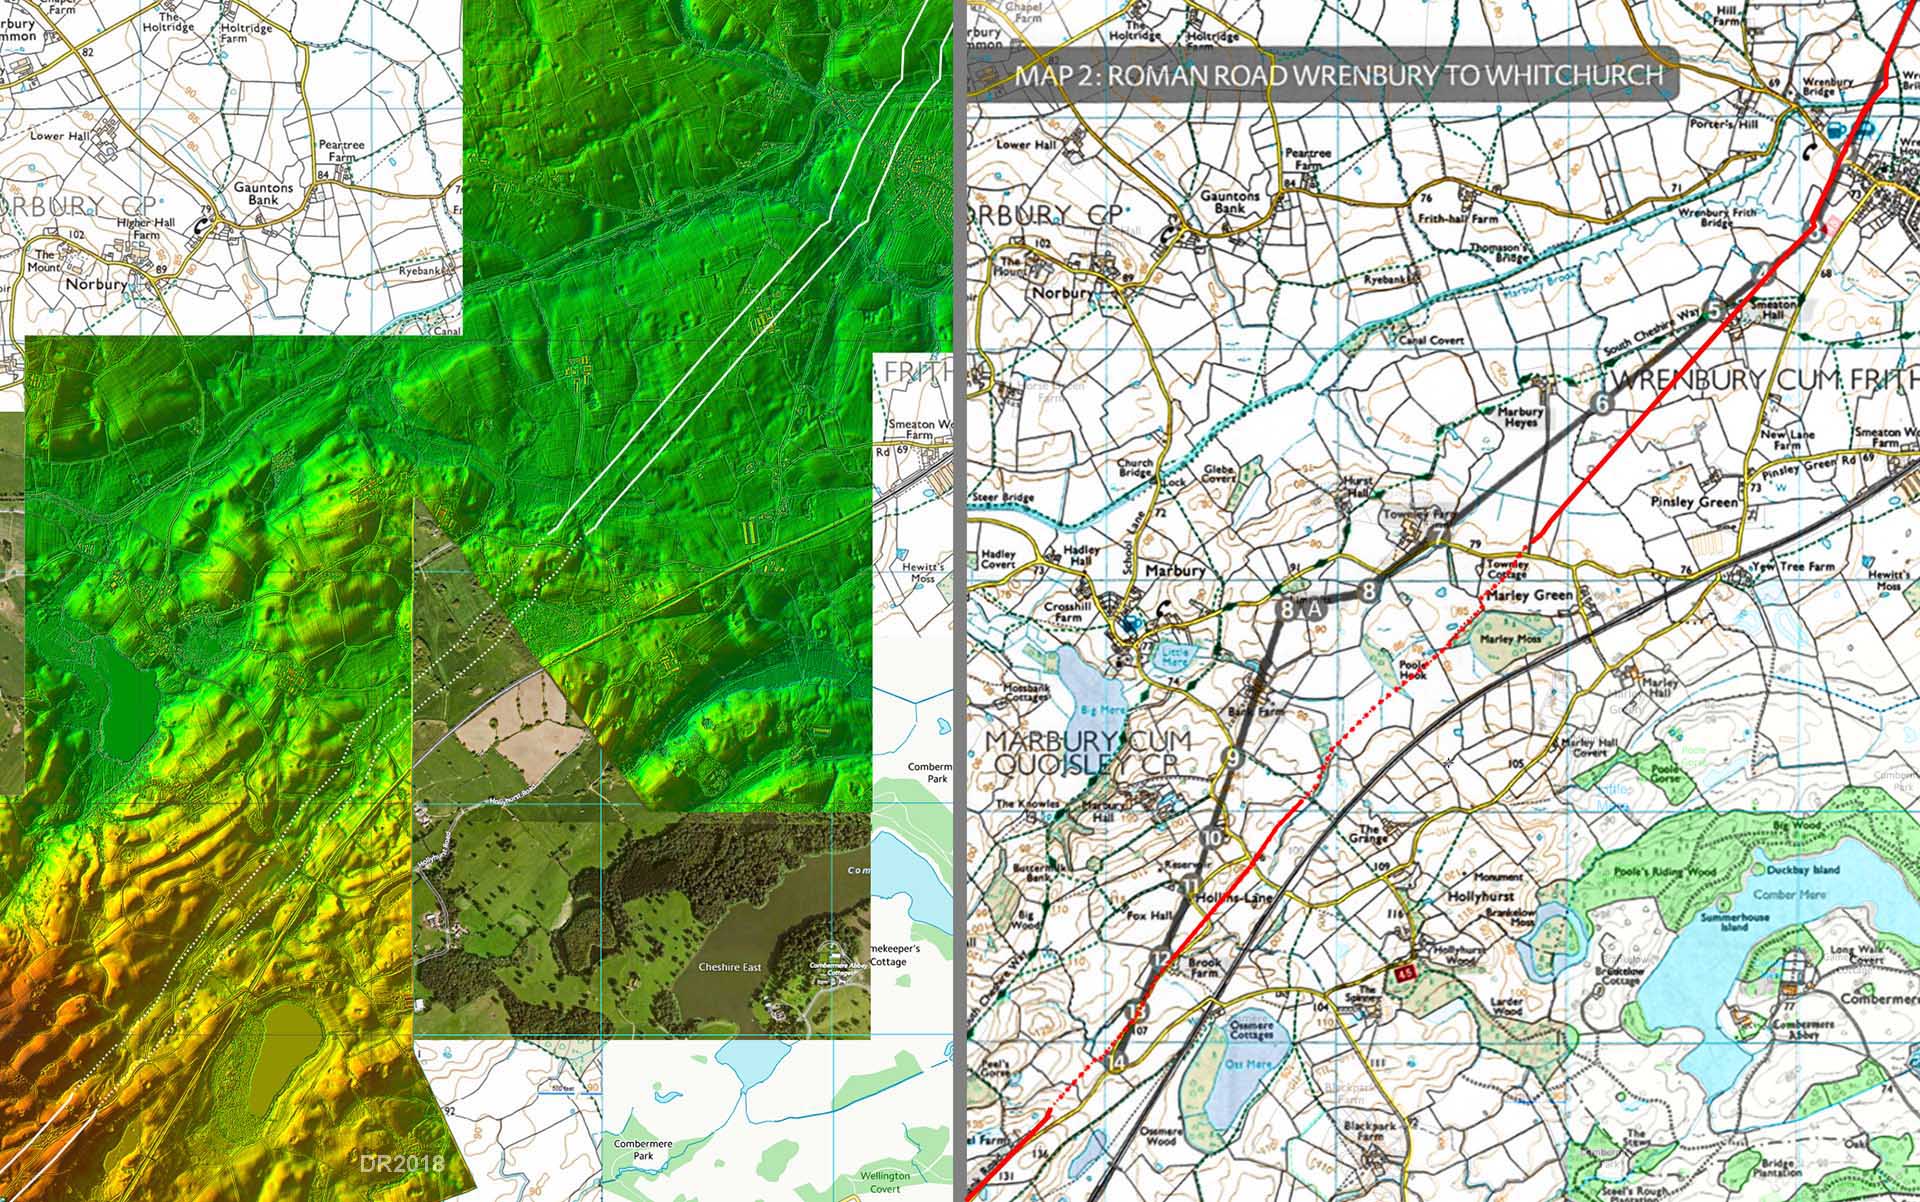
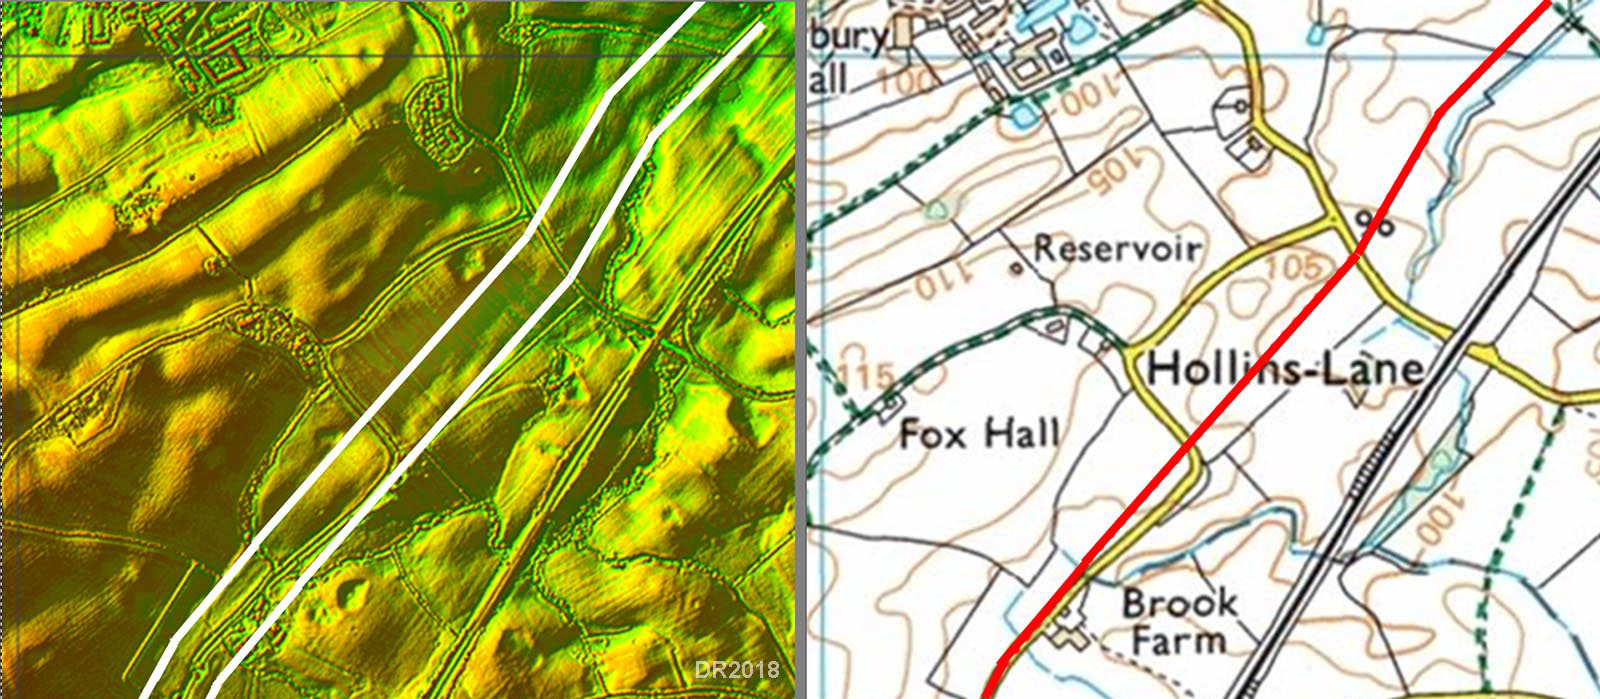
Lidar Image and Route Map - Wrenbury South Alex Young was perhaps the first to make a concerted effort to find the road south of Wrenbury. His route is overlaid on the modern map right. As can been seen he drifted off line but he did not have the benefit of Lidar evidence. Beyond Marley Green then the evidence is somewhat intermittant. The line seems to have been chosen to pass to the north of Marley Moss (see next image) and there is some faint Lidar evidence that this alignment continued until it merges with the modern Mile Bank Road. The latter road almost certainly marks the Roman route into the centre of Whitchurch. |
Click for larger view |
 |
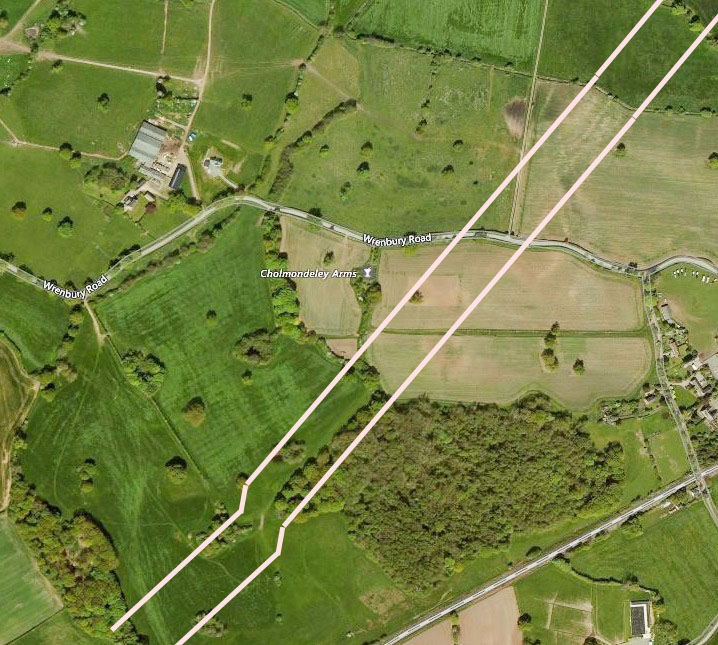
Aerial Photo - Marley Moss Marley Moss is the wooded area and was probably very much wetter in Roman times. The alignment seems to have been chosen to pass alongside its north-western bank which matches the road line. There even looks to be the traces of the road agger there, followed by a little dog-leg to get down the bank. |
Click for larger view |
 |
Lidar Image and Route Map - Brook Farm This is probably the best evidence for the route and it does align well with the Marley Moss section shown above. There are several traces of the route just north of Brook Farm. As this is on the original alignment then we can be reasonably confident here. The road passes into Shropshire at the brook of Brook Farm. |
Click for larger view |
 |
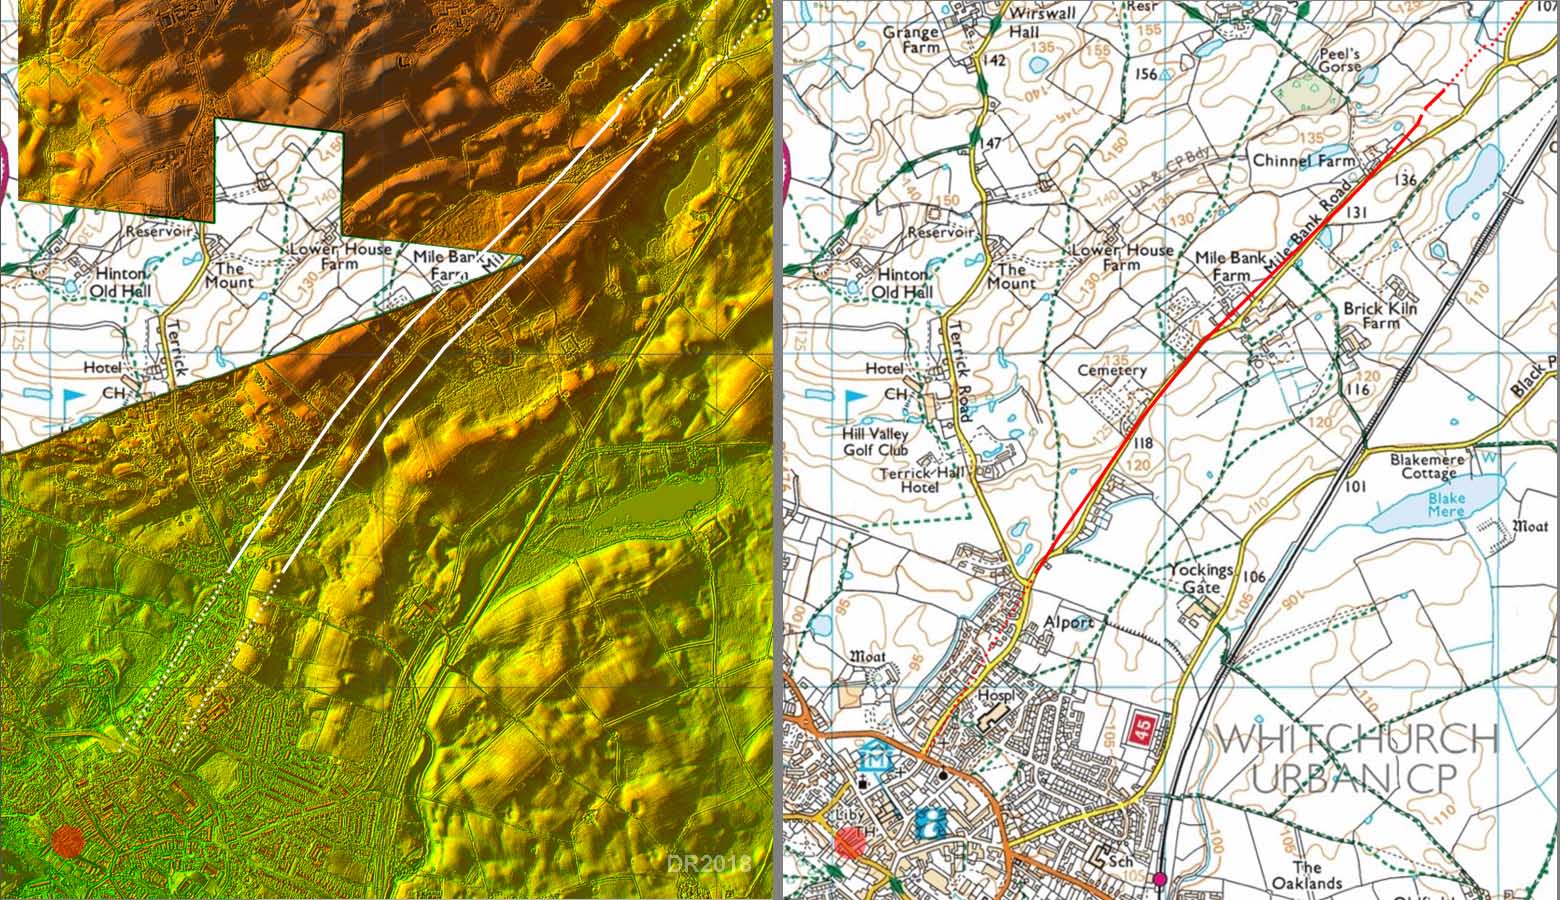
Lidar Image and Route Map - Whitchurch Mile Bank Road is clearly derived from the Roman route for the run into Whitchurch. Perhaps the Roman line was touch straighter and there some traces for this being the case. |
Click for larger view |
 |
Route Map 1 Middlewich to Woolstanwood |
Click for larger view |
 |
Route Map 2 Woolstanwood to Burland |
Click for larger view |
 |
Route Map 3 Burland to Wrenbury |
Click for larger view |
 |
Route Map 4 Wrenbury to Whitchurch |
Click for larger view |
 |
|
|
|
Last update: July 2018 |
© David Ratledge |