
|
Batham Gate: Buxton to BroughMargary Number: 710aDistance: 16 miles (Buxton to Brough) Batham Gate is a well recorded route from Buxton to the Navio Fort at Brough. Amazingling it has survived despite all the mining and quarrying that has taken place and is still taking place. The roads around northern Derbyshire have been researched for over 6 years in conjunction with Neil Buckley, whose assistance is gratefully acknowledged. This road has been written up by Neil, reference "A Lidar Supported Review of Batham Gate, from Buxton to Navio Fort – RR710a", RRRA Newsletter No. 28, 2024. As is Neil's style there is a huge amount of background information so please check it out. We do though differ in the approach to Brough Fort - over Sandy Ford or not?
|
Historic Counties: Derbyshire Current Counties: Derbyshire HER: Derbyshire
|
|
|
|
|
|
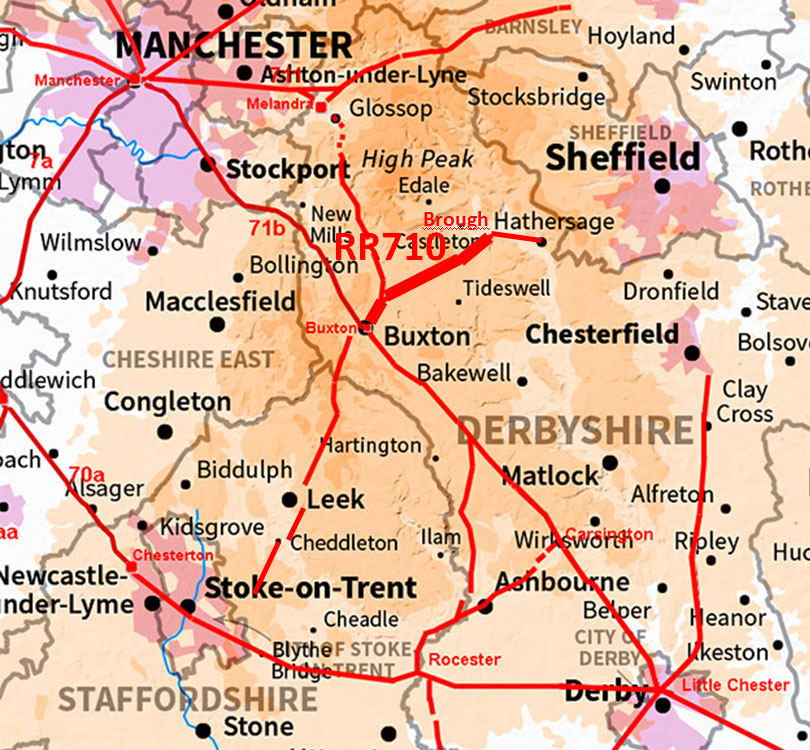
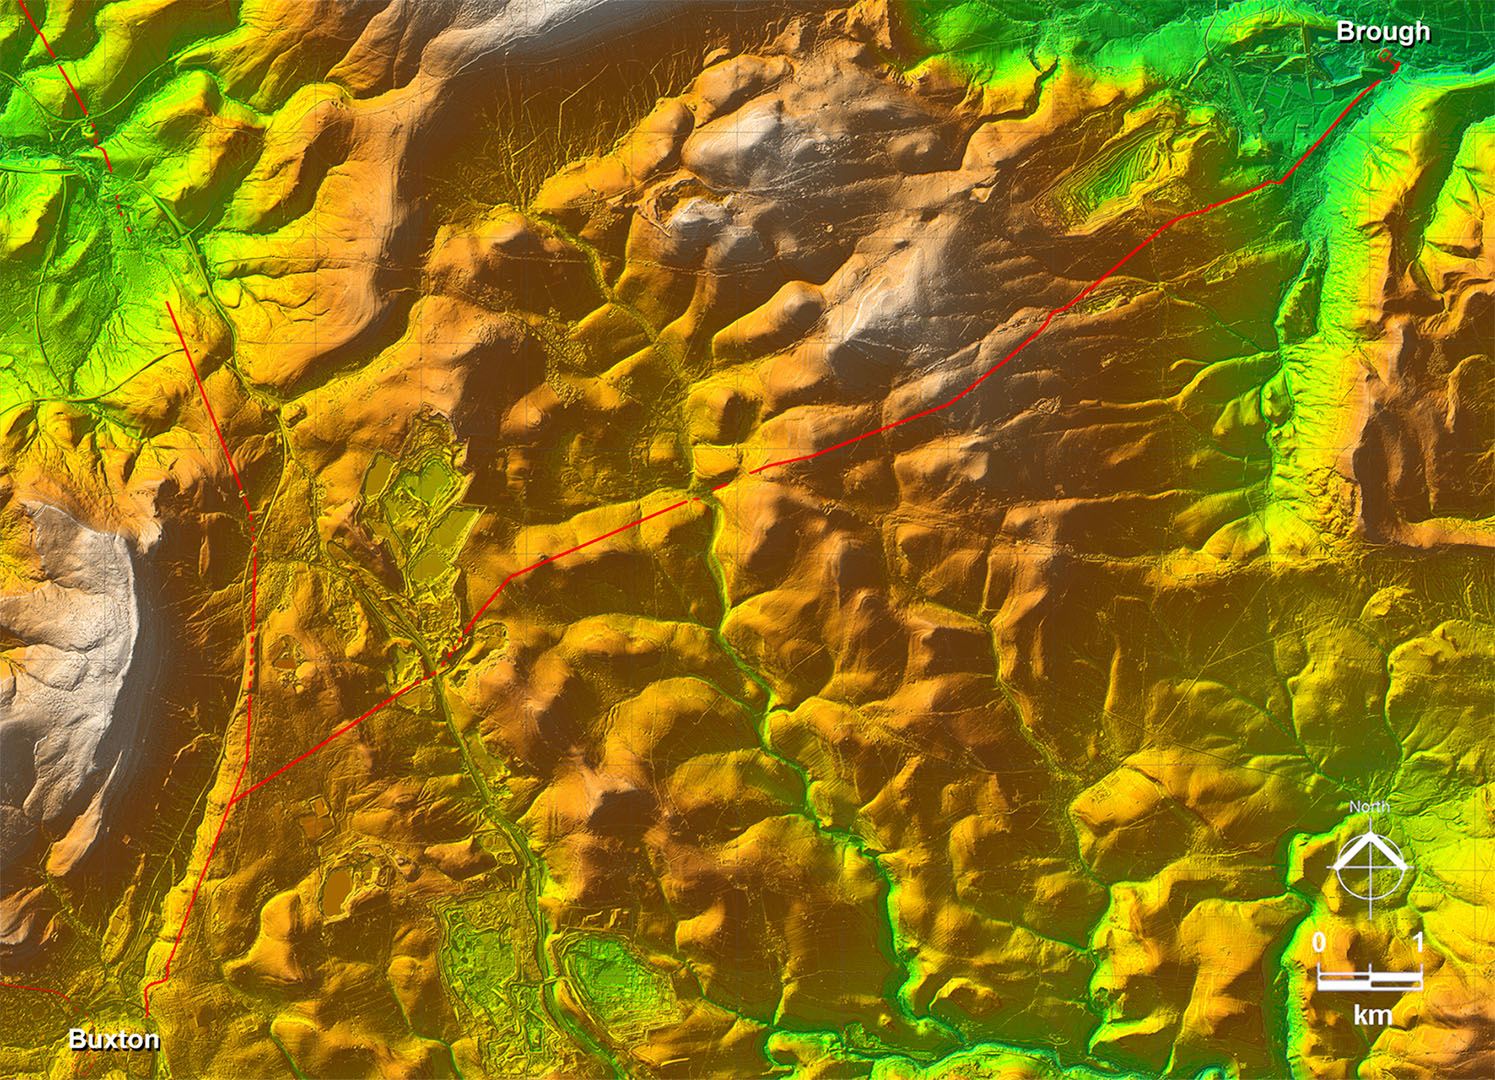
Lidar Image - Full Route Despite the Peak District terrain the road manages a very direct course for Brough. |
Click for larger view |
 |
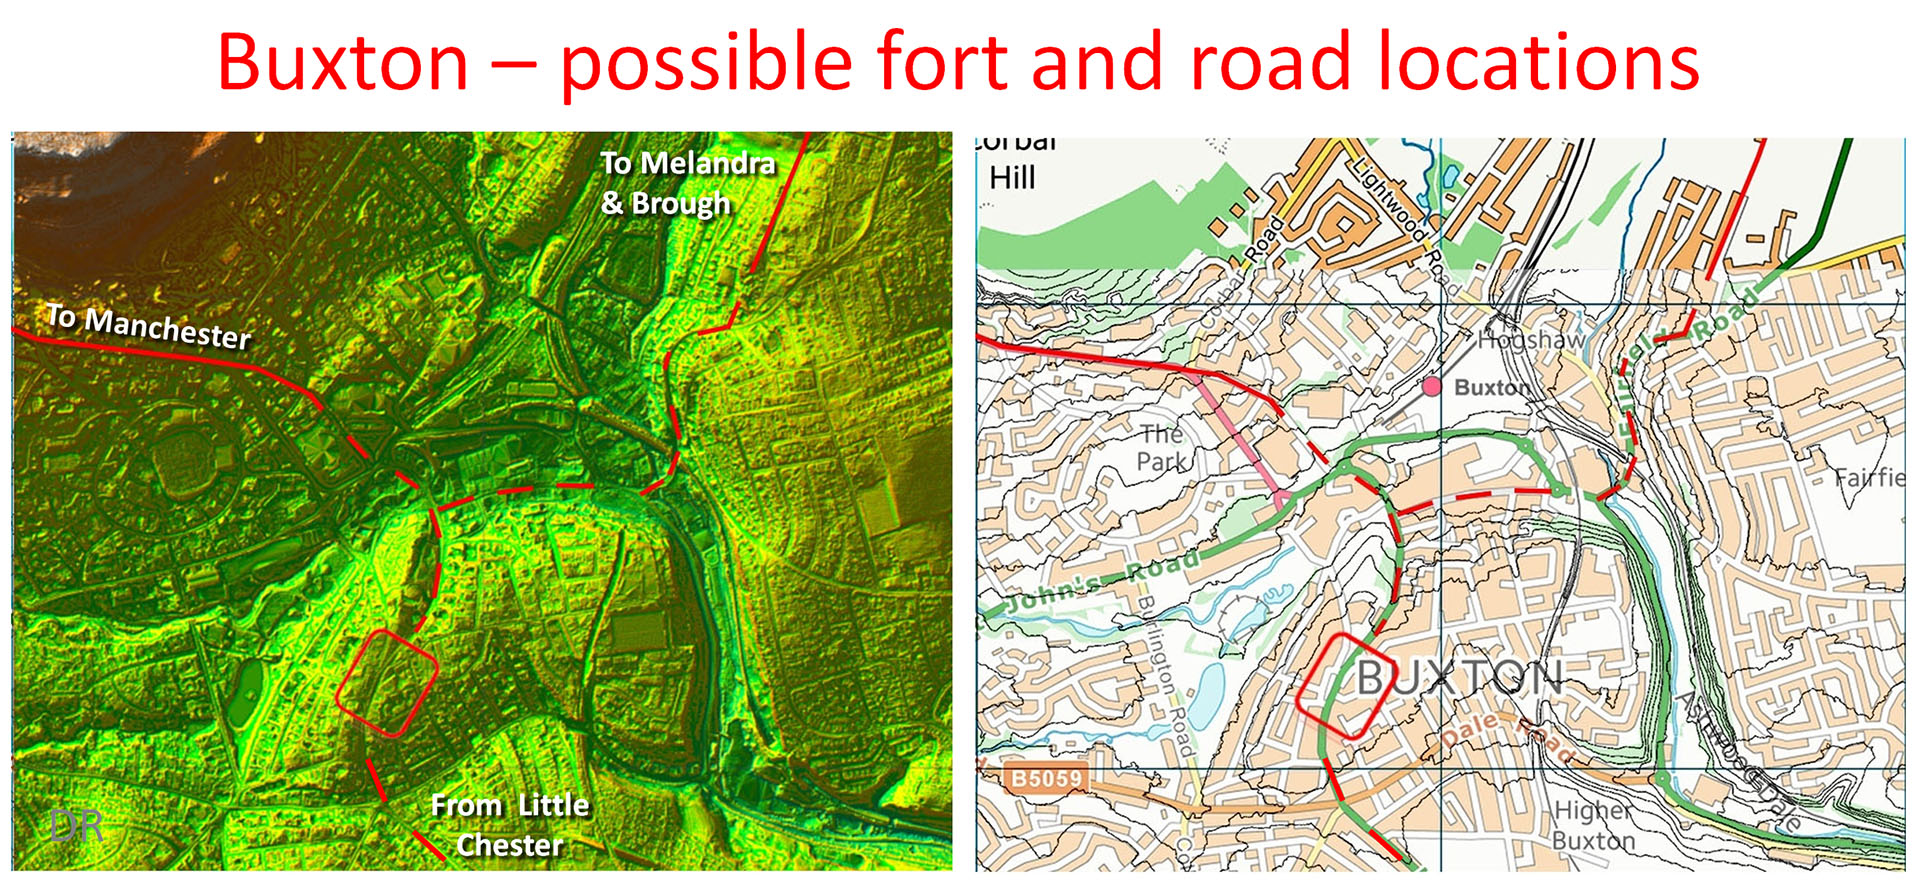
Buxton, Lidar & Map - Possible Fort site and routes The location of the fort is unknown. Based on the Lidar imagery the position shown looks the most strategic. In hilly Buxton here are not many flat alternatives plus it would provide a very commanding position.. |
Click for larger view |
 |
Oblique 3D Lidar Image - leaving Buxton The routes to Melandra and Brough shared a common route for the first mile or so. However, it is clear the route to Brough must have been a later road as it is a branch off the Melandra road.
|
Click for larger view |
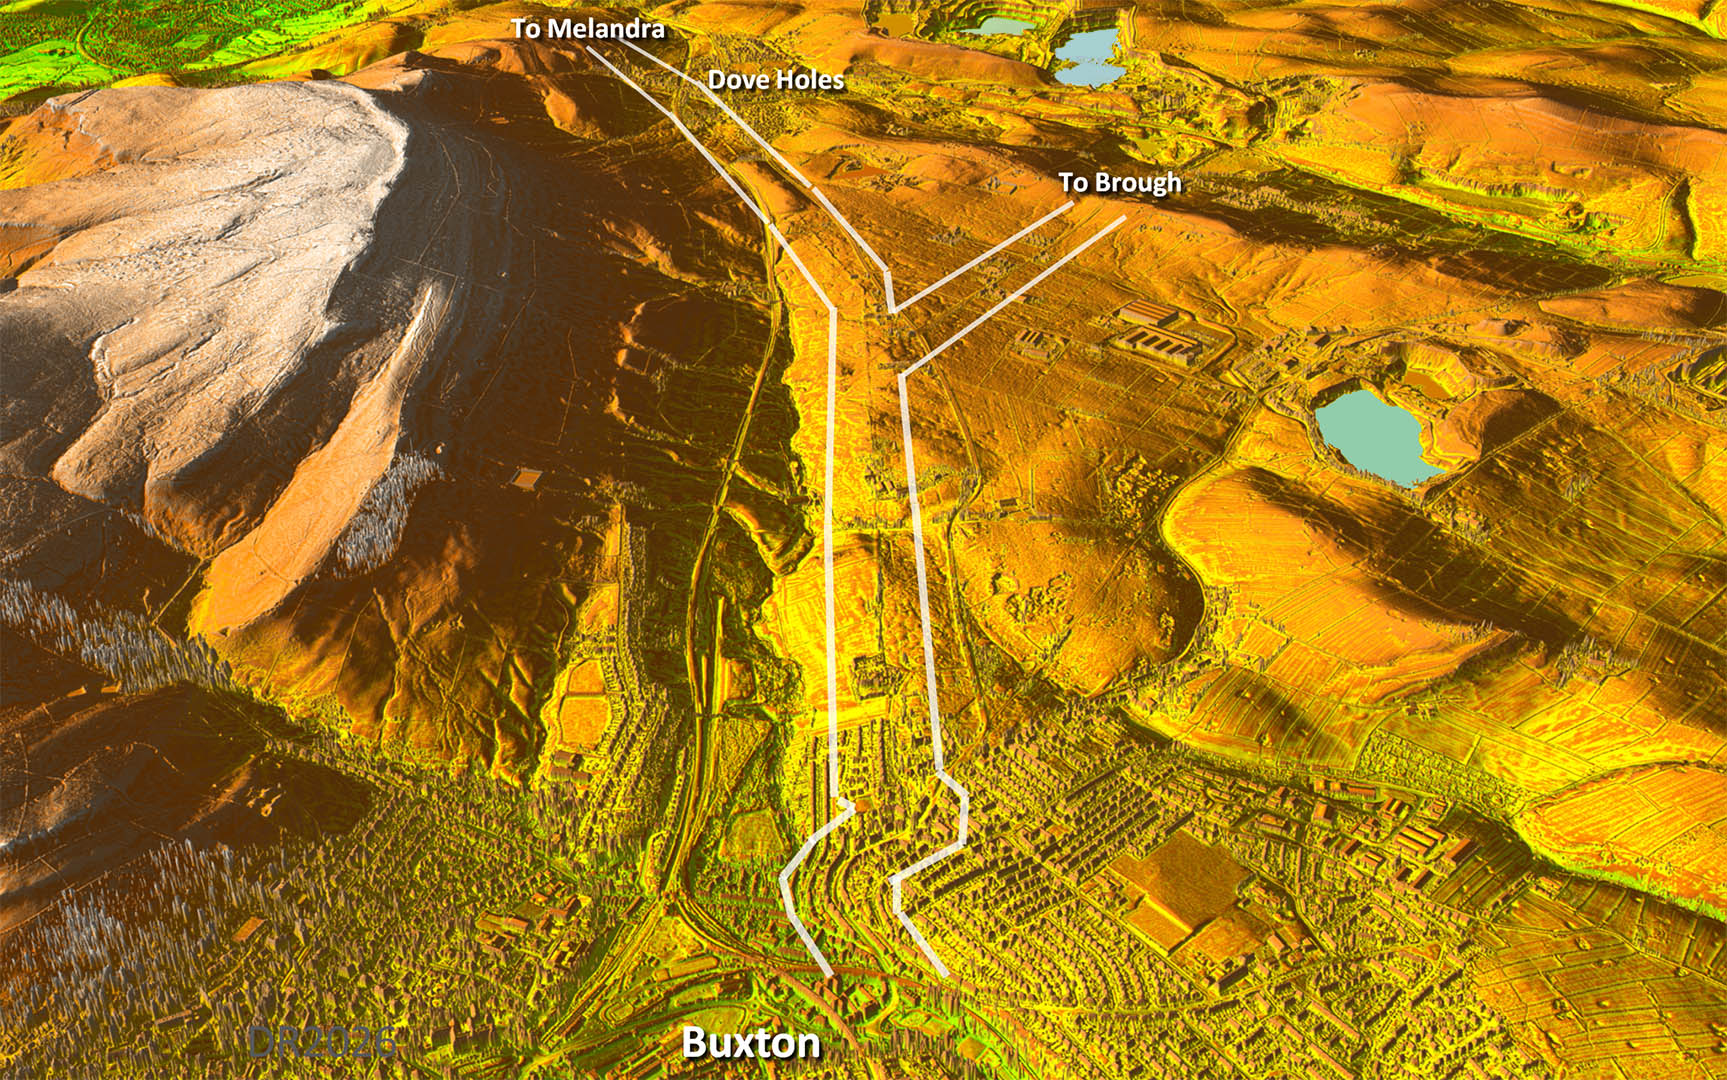 |
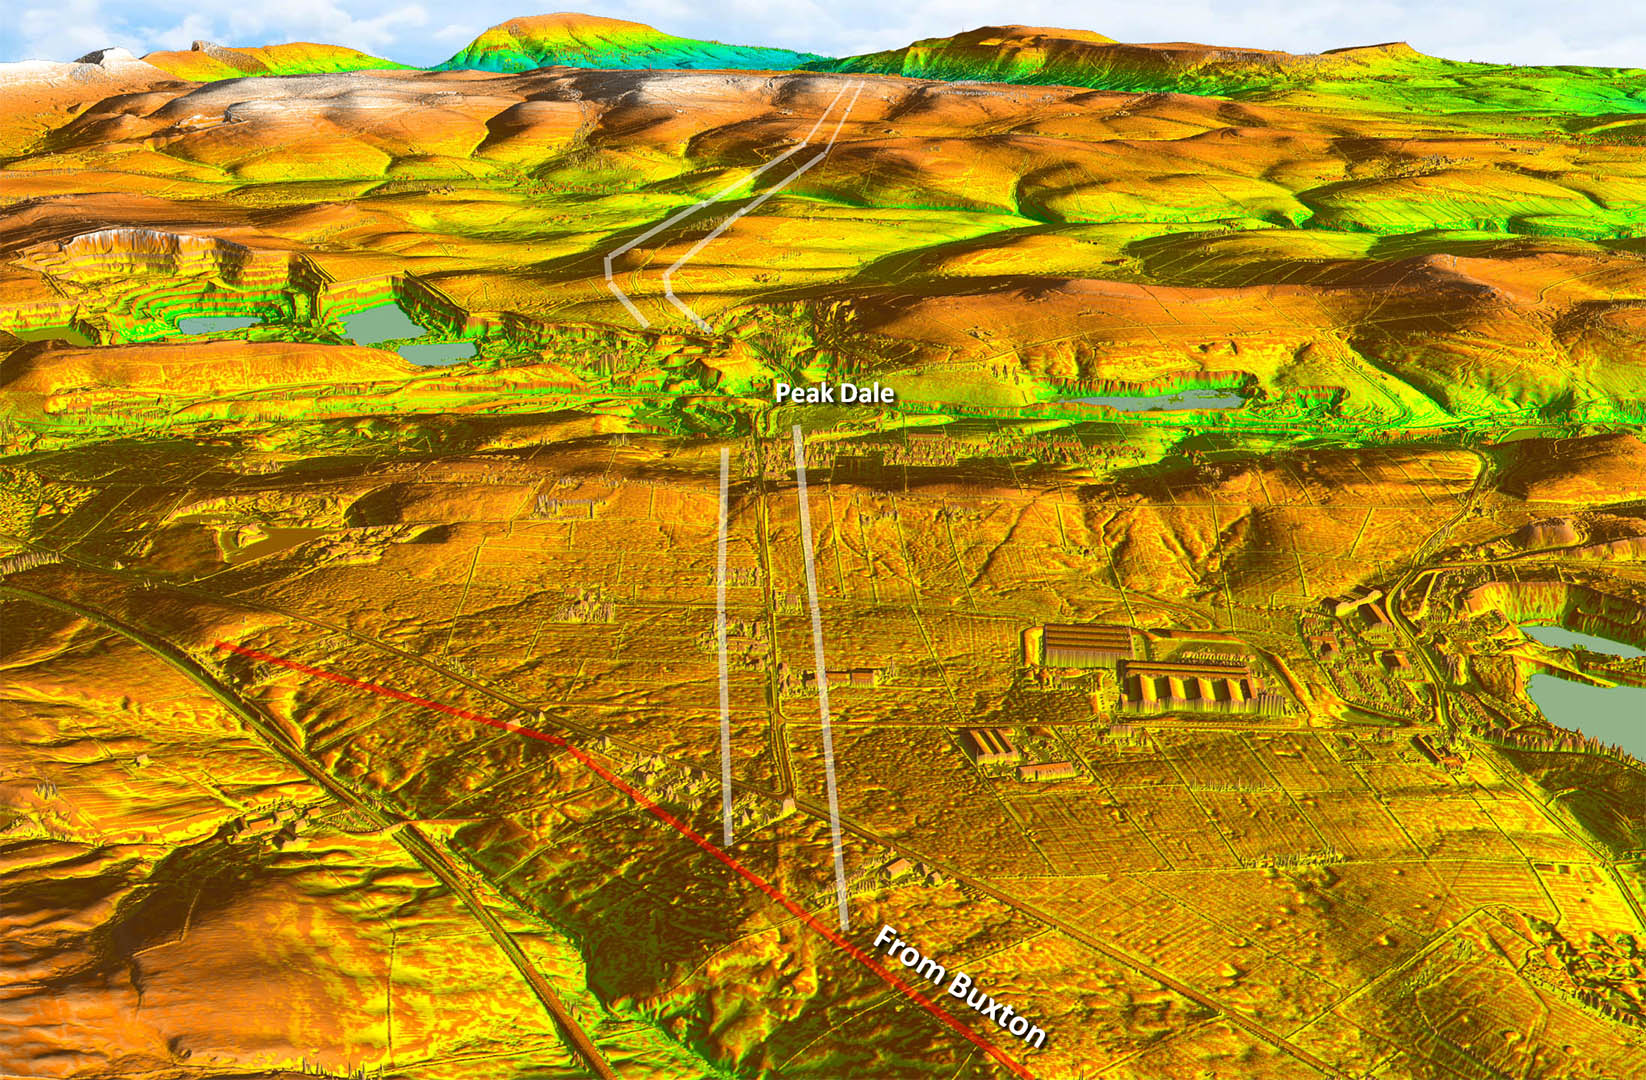
Oblique 3D Lidar Image - Branch towards Peak Dale First alignment. Quarrying at Peak Dale was wiped out a section but beyond there then the road has generally survived well.
|
Click for larger view |
 |
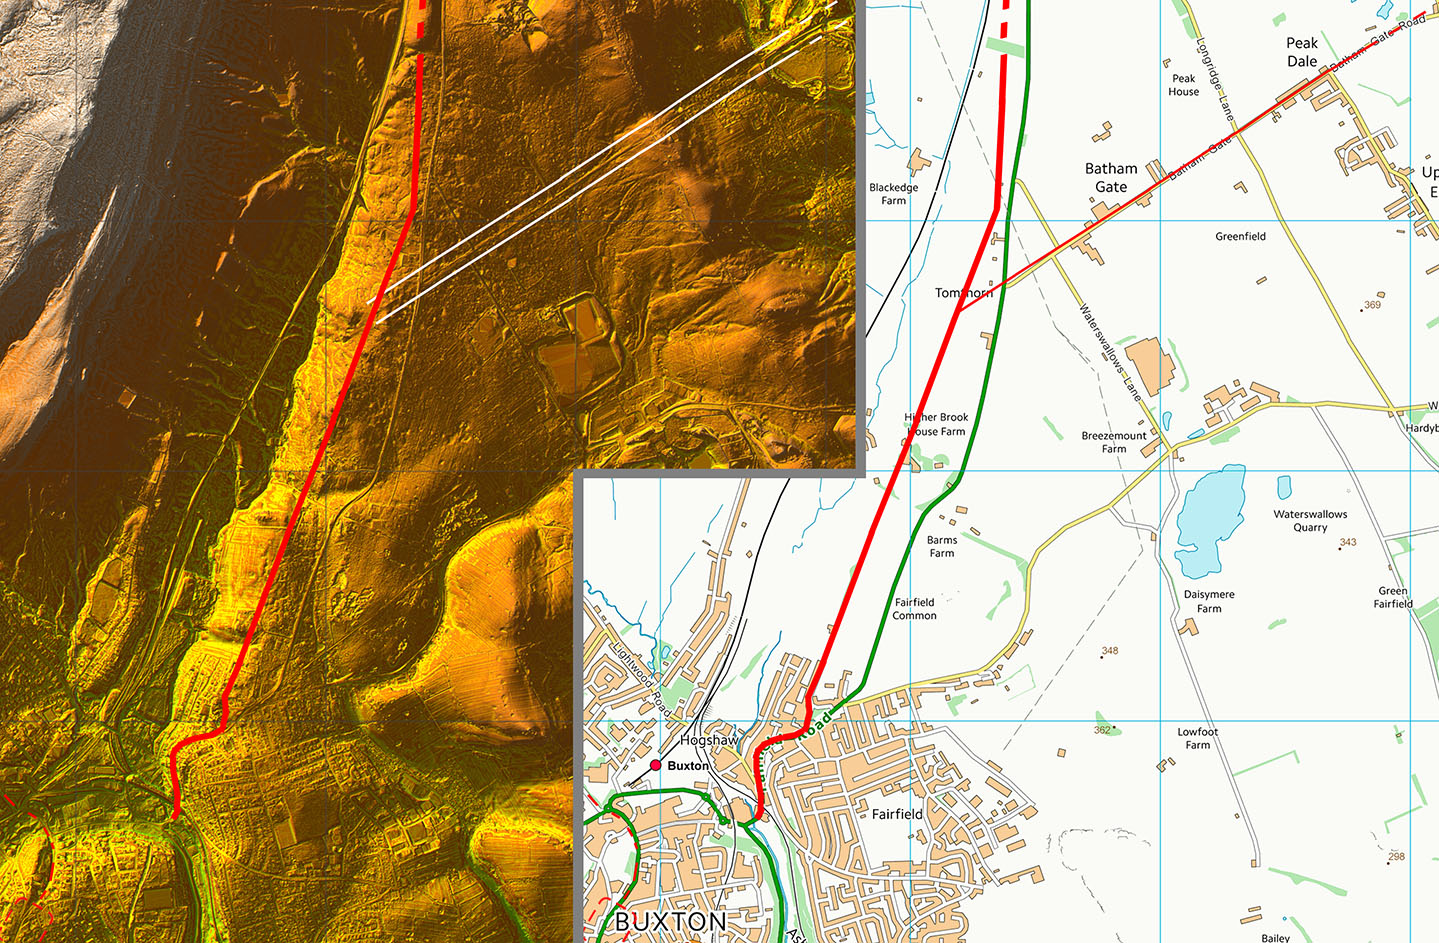
Route Map 1 Buxton to Peak Dale
|
Click for larger view |
 |
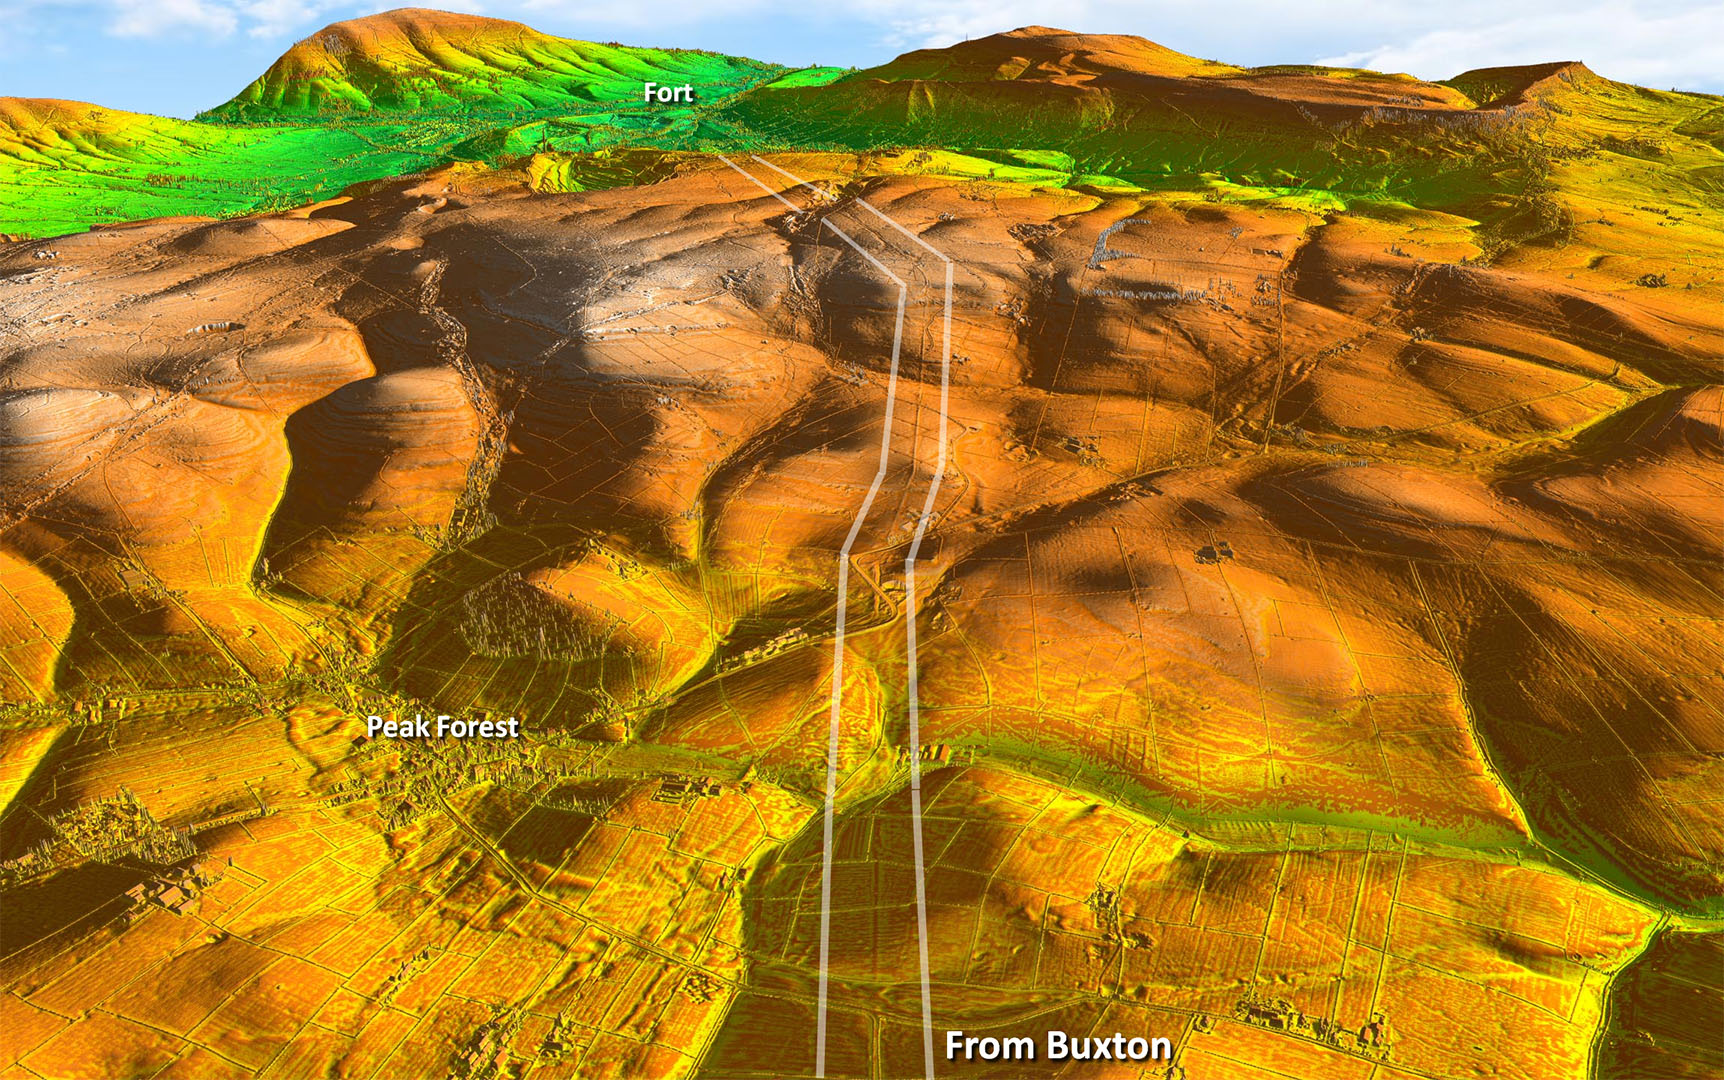
Oblique 3D Lidar Image - passing Peak Forest Some climbing to well over 1000 feet but not overly steep. The road's summit at around 445 metres.
|
Click for larger view |
 |
Route Map 2 Peak Dale to Bradwell Moor
|
Click for larger view |
 |
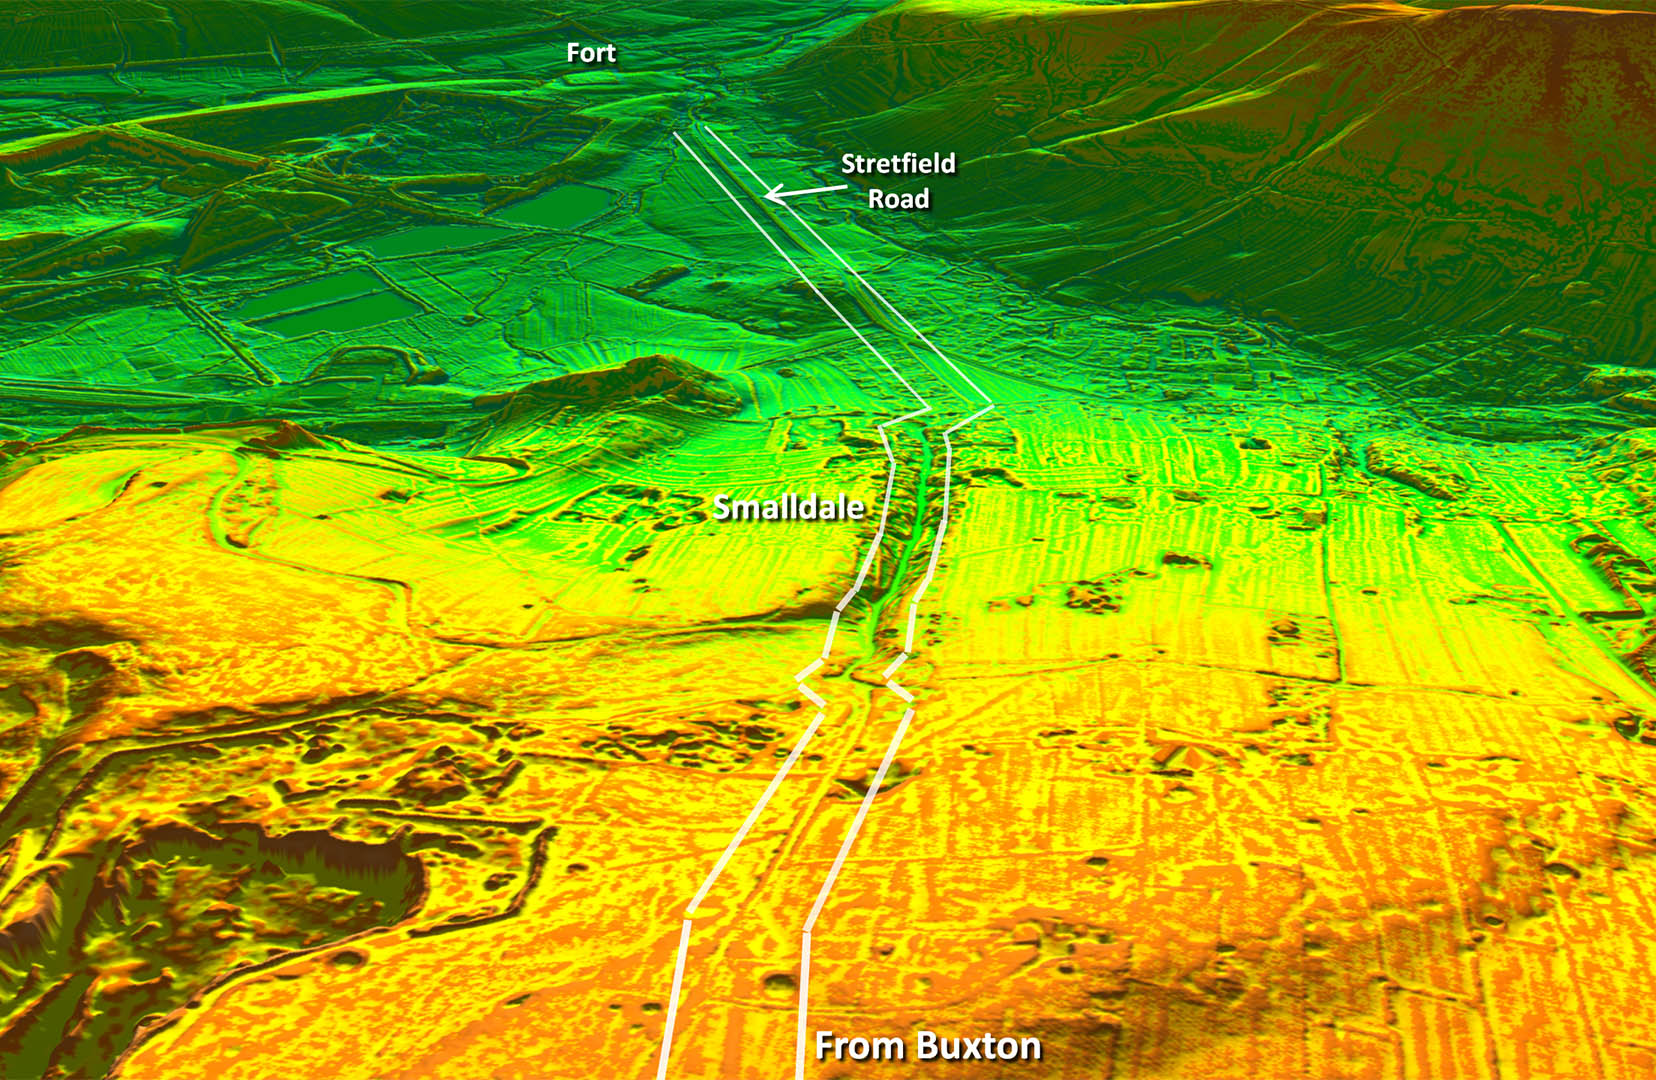
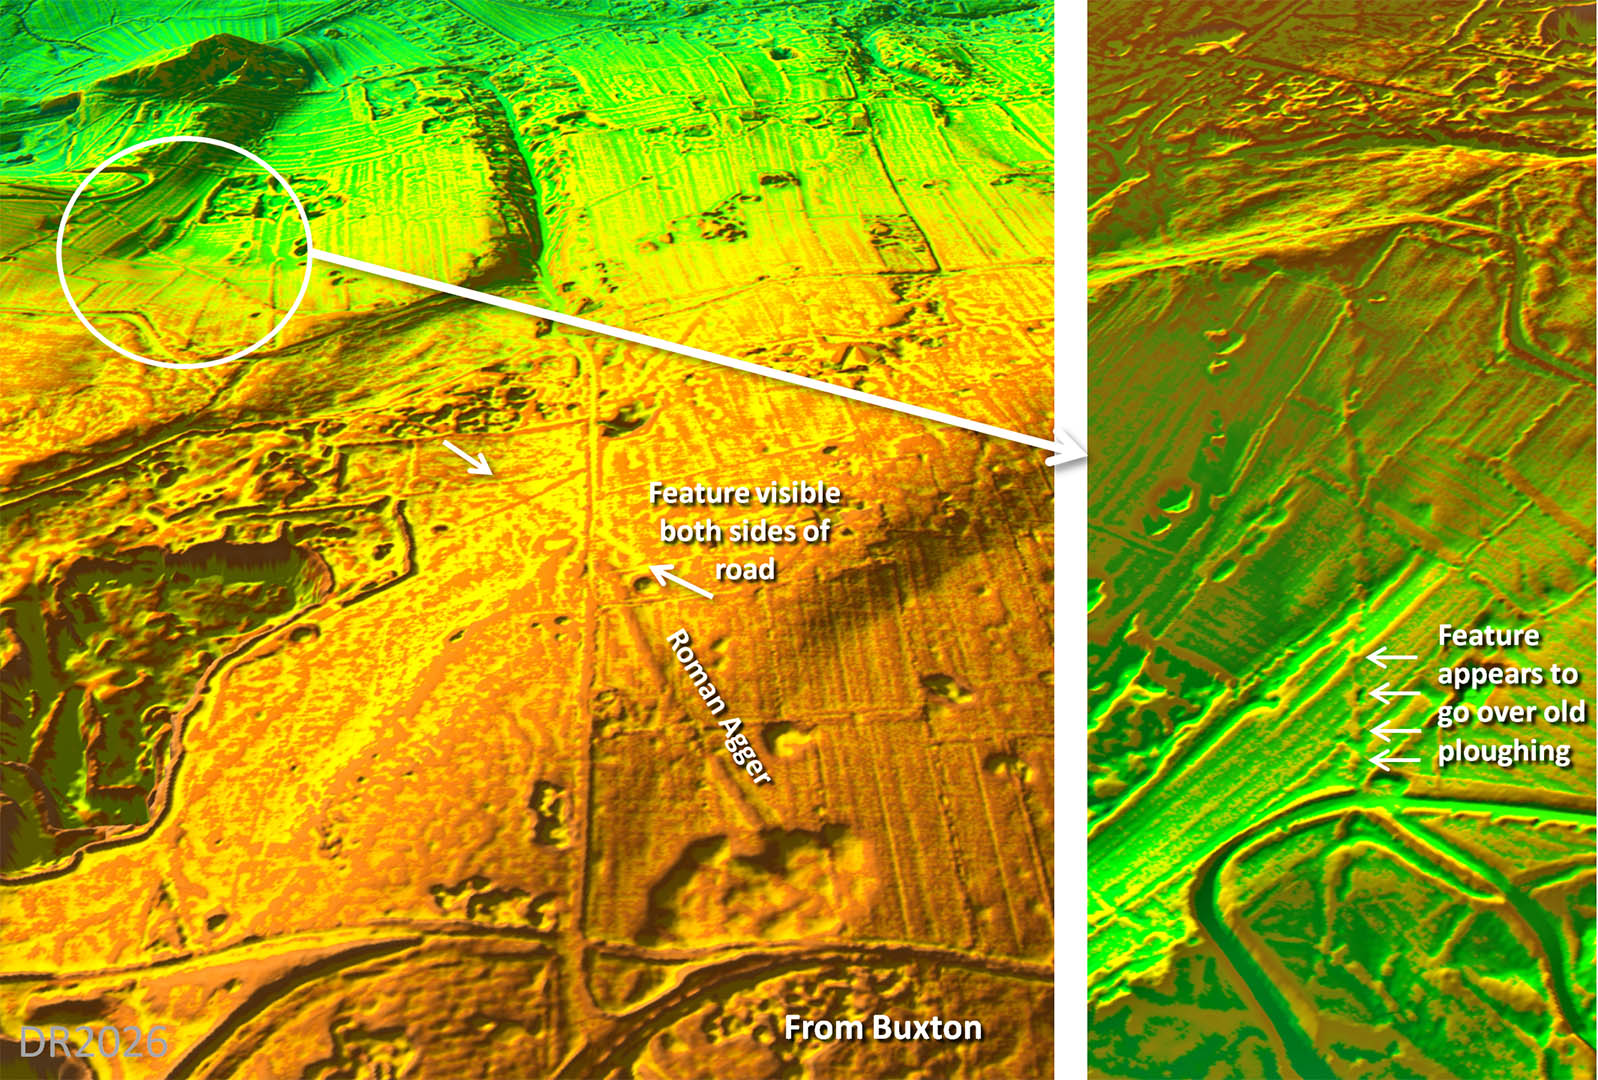
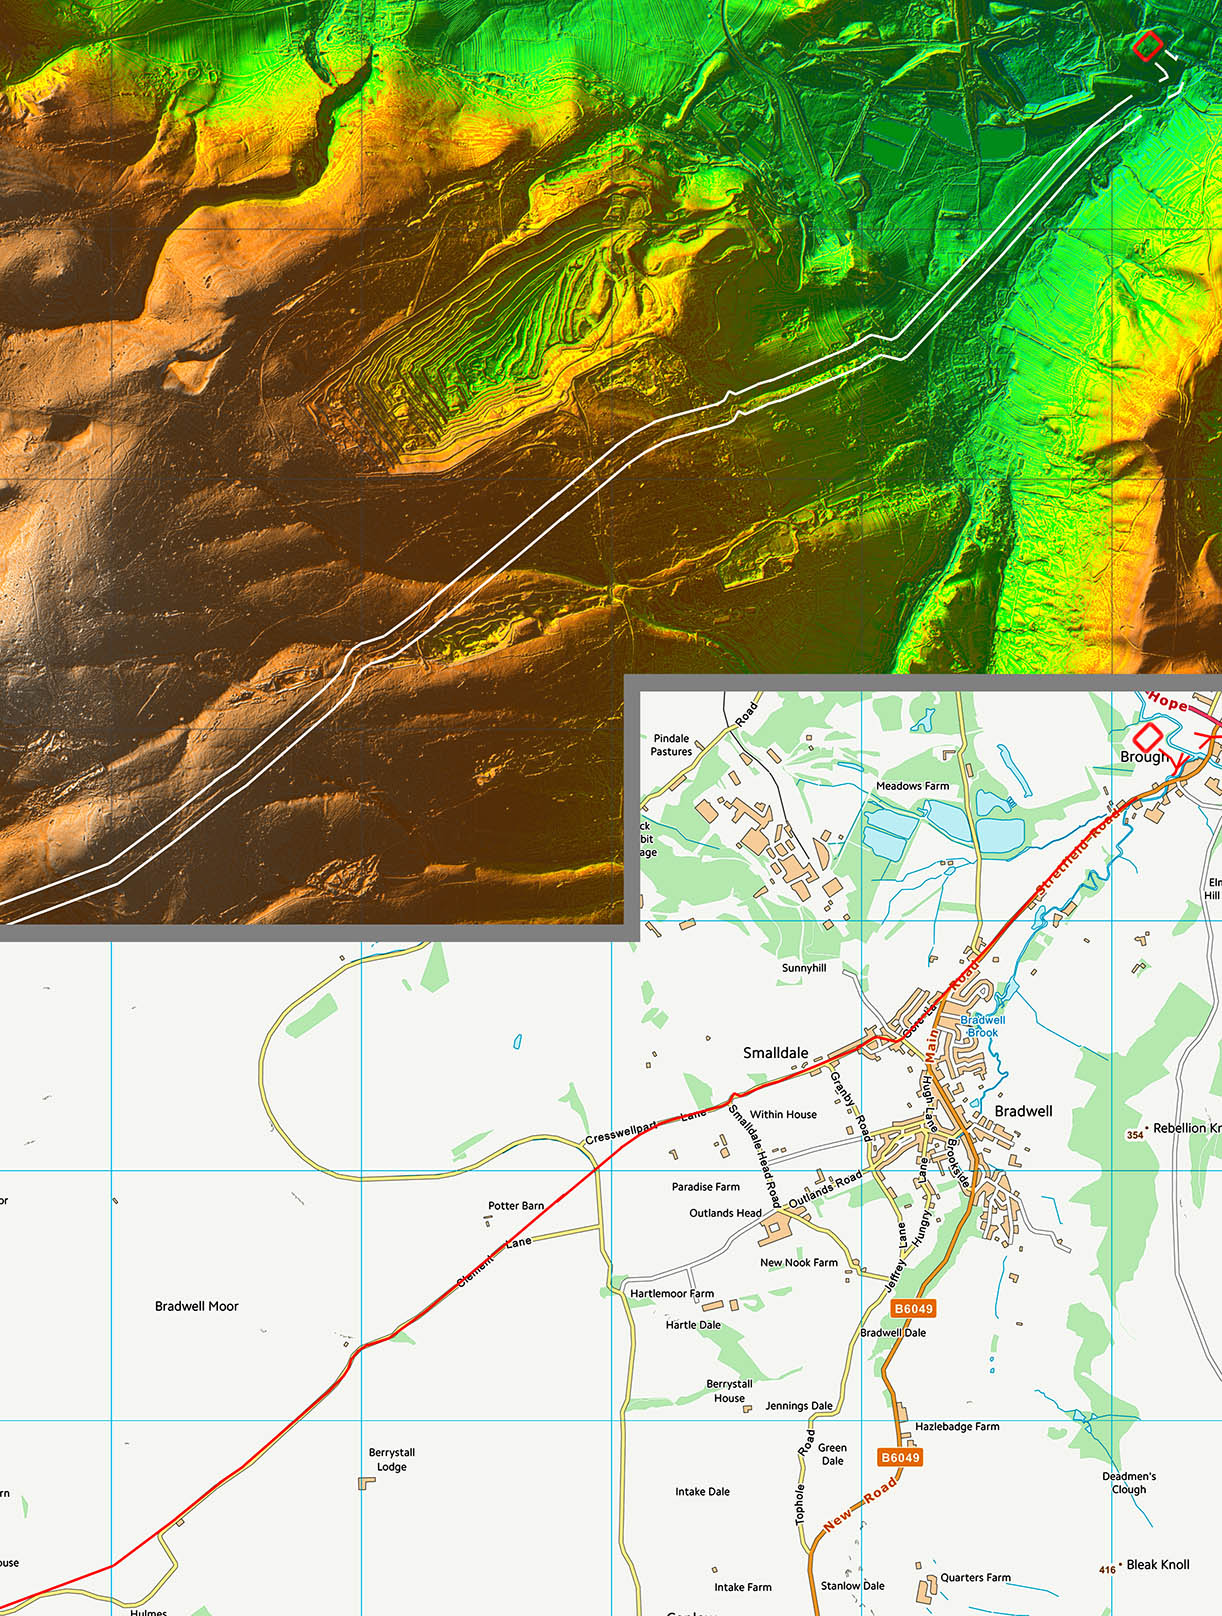
Oblique 3D Lidar Image - Smalldale to the Fort The Roman road merges into the modern road before the natural valley of Smalldale. The HER route oddly keeps out of the dale on its left side (Peter Wroe's suggestion) but I can see nothing that would support that or any reason to do that with no benefit to it. The easy route was down the natural valley/dale. Beyond Smalldale then the modern Stretfield Road rides on a huge agger and must be the correct line.
|
Click for larger view |
 |
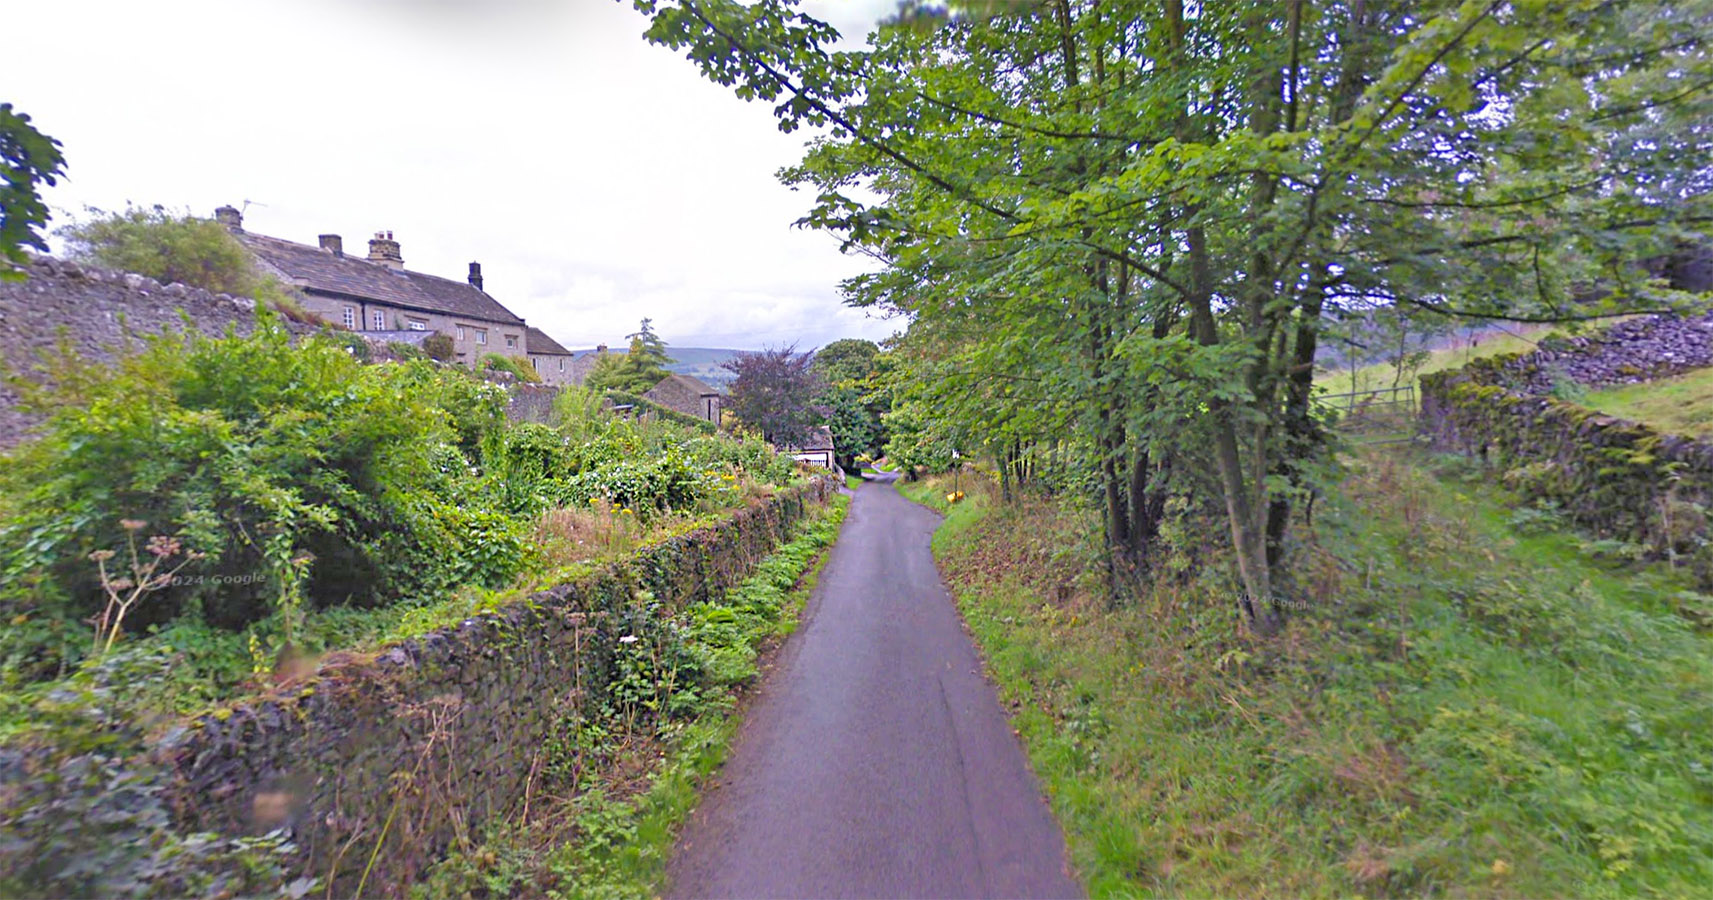
Smalldale - Cresswellpart Lane Smalldale is a natural valley linking the high ground with the valley floor. Very much the logical route down and a free bonus for the Roman road builders. A few minor zig-zags at the beginning (top) and at the bottom where the road becomes Gore Lane/Stretfield Road. Note: it has been suggested that the Romans preferred not to use valleys. However, Smalldale is a Derbyshire dry valley - perfect for a road! Image: Google |
Click for larger view |
 |
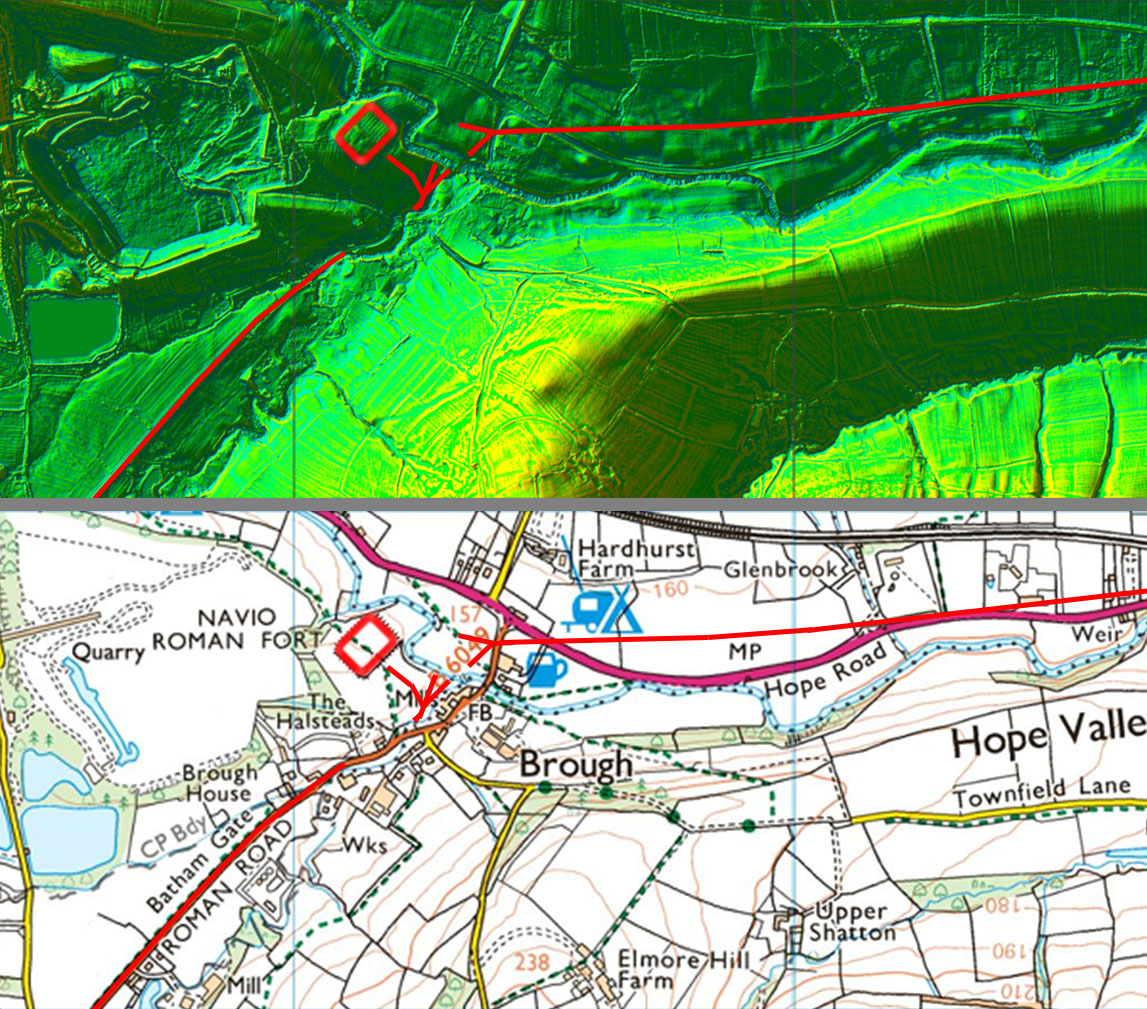
Alternative Route to Brough Fort by Bradwell History Society Bradwell History Society have suggested an alternative route to Brough Fort. However, whilst there are certainly features on their suggested line neither, to me, indicate a Roman road. The first feature can be seen crossing Cresswellpart Lane and the Roman line so cannot be part of the Roman road. The second appears to be newer than the ridge and furrow ploughing so not an old feature. There is no reason to doubt the traditional line via Smalldale and Stretfield Road. The latter is straight, sits on a built up agger and has that suggestive name too.
|
Click for larger view |
 |
Oblique 3D Lidar Iamge - Brough (Navio) Fort The Raman line would surely have continued along Stretfield Road to a bridge crossing over to a road junction outside the fort. There are four arms to that junction: the one from Stretfield Road, one to the fort, one straight one and one forking off right (east). Sandy Ford has been suggested as an alternative route but to me it offers no advantage over carrying on along Stretfield Road to a bridge and that road junction outside the fort. My guess is Sandy Ford came into being when the Roman bridge eventually collapsed.
|
Click for larger view |
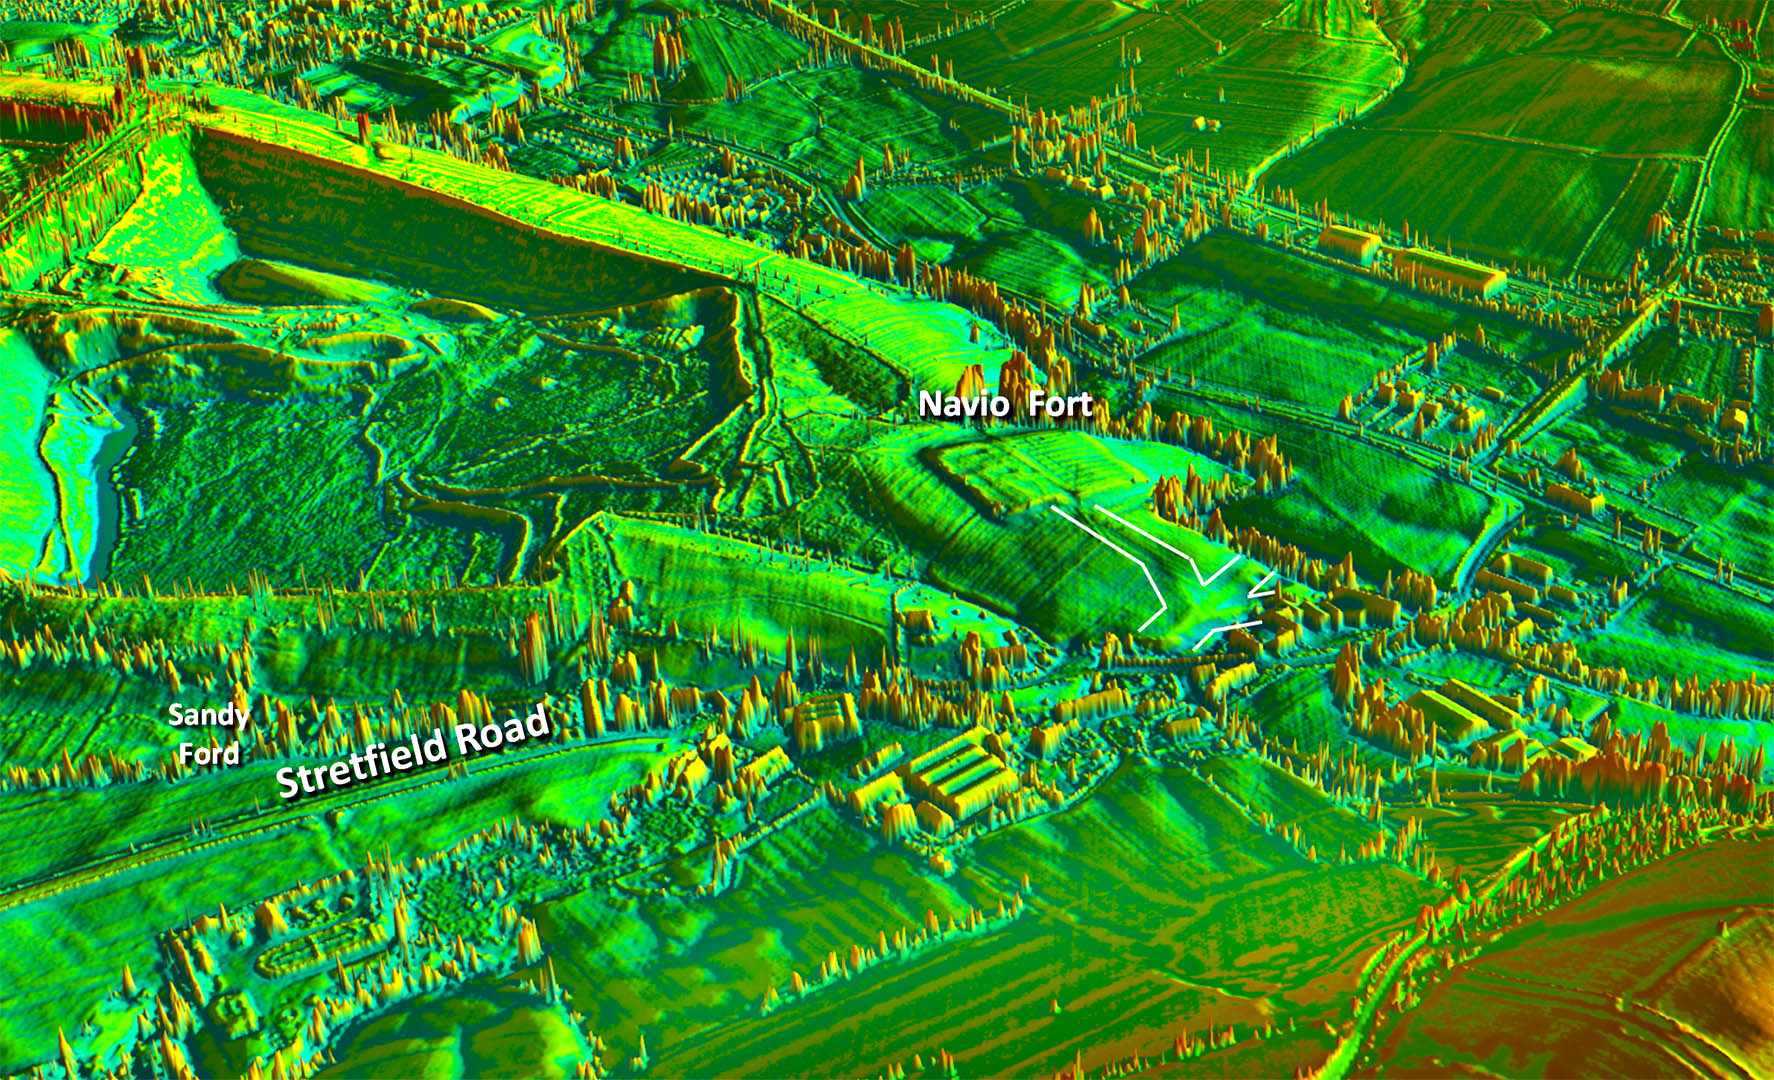 |
Brough Road Network Outside the fort is a road junction. Our road continues on via the diagonal branch and heads down the Hope Valley. The straight-on branch was possibly the start of the route to Melandra.
|
Click for larger view |
 |
Route Map 3 Bradwell Moor to Brough Fort
|
Click for larger view |
 |
|
Last update: March 2026 |
© David Ratledge |