
|
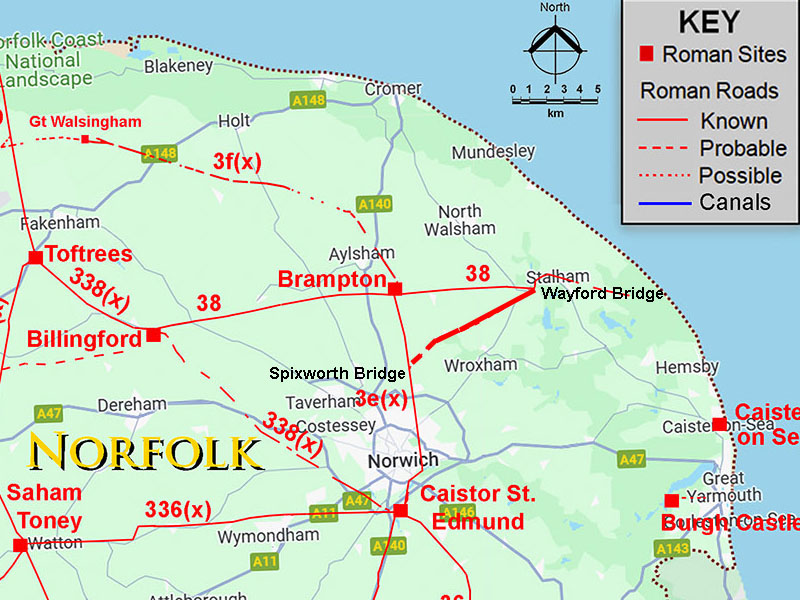
The Roman Road from Wayford Bridge to Spixworth Bridge (Probable)Margary Number: noneDistance: 8.5 milesAn obvious short-cut for traffic coming from Caistor St Edmund. It also would explain the route of Anchor Street approaching Wayford Bridge and why it did a big turn there. It was joining a road from Spixworth Bridge. The route passes the Roman camp at Horstead but south-west of there then the clues are very limited. Coltishall to Wayford Bridge then the evidence is much stronger.
|
Historic Counties: Norfolk Current Counties: Norfolk HER: Norfolk
|
|
|
|
|
|
Lidar Flyover Video - Caistor St Edmund to Hickling Harbour
|
||
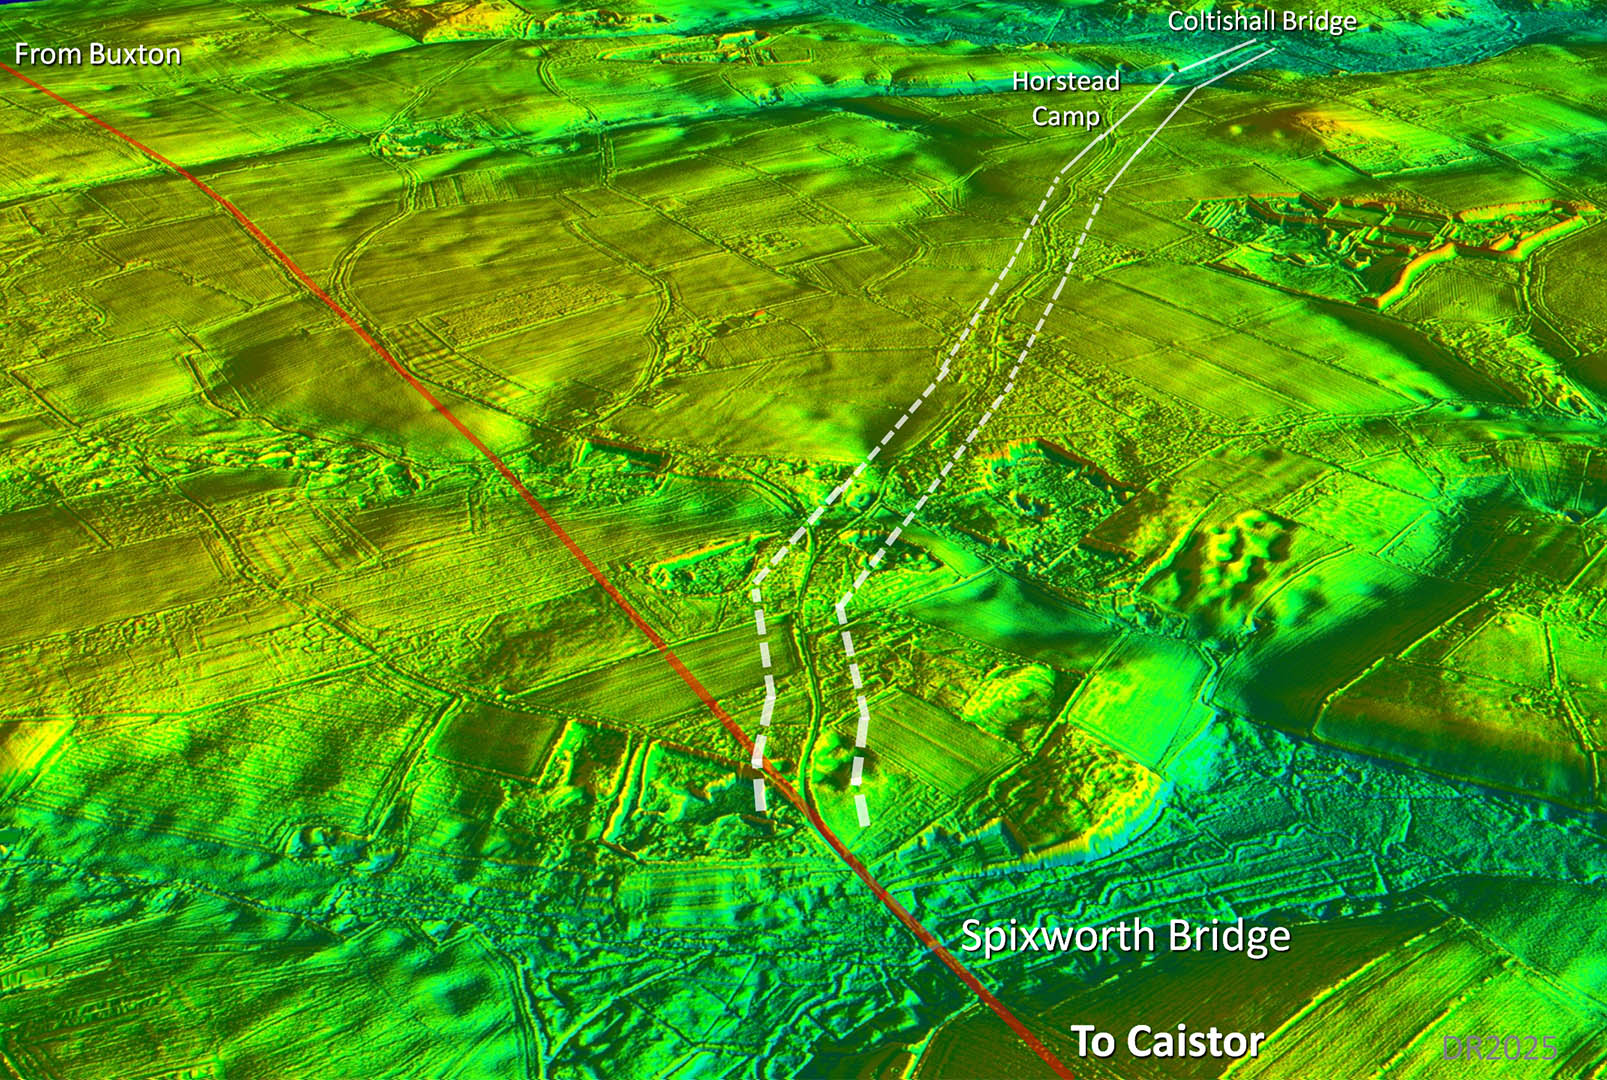
Oblique 3D Lidar Image - Caistor St Edmund to Hickling Harbour This view shows how the section from Spixworth to Wayford Bridge fits into what would be a very practical route from Caistor St Eddmund to Hickling Harbour.
|
Click for larger view |
 |
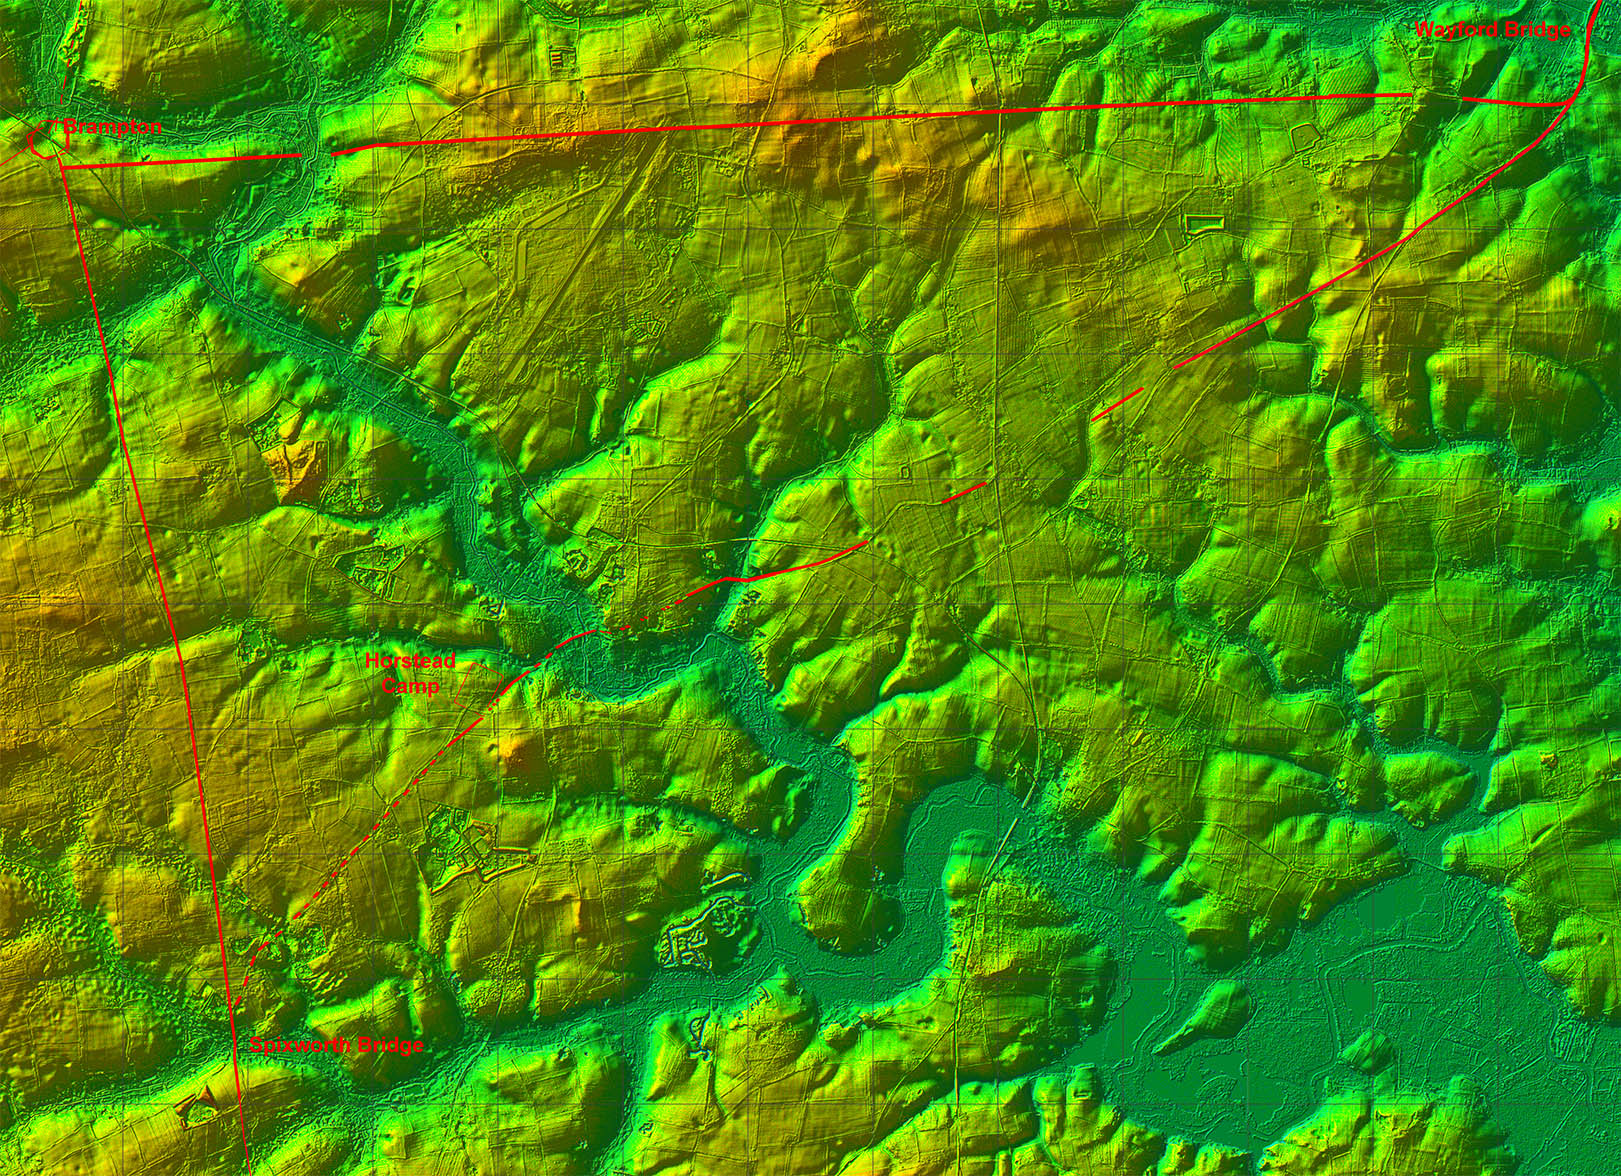
Lidar Image - Route from Spixworth to Wayford Bridge Coltishall Bridge was obviously a critical crossing point of the River Bure and the route certainly targets it. The existence of the Roman camp at Horstead, presumably watching that crossing place, reinforces this must have been a strategic location.
|
Click for larger view |
 |
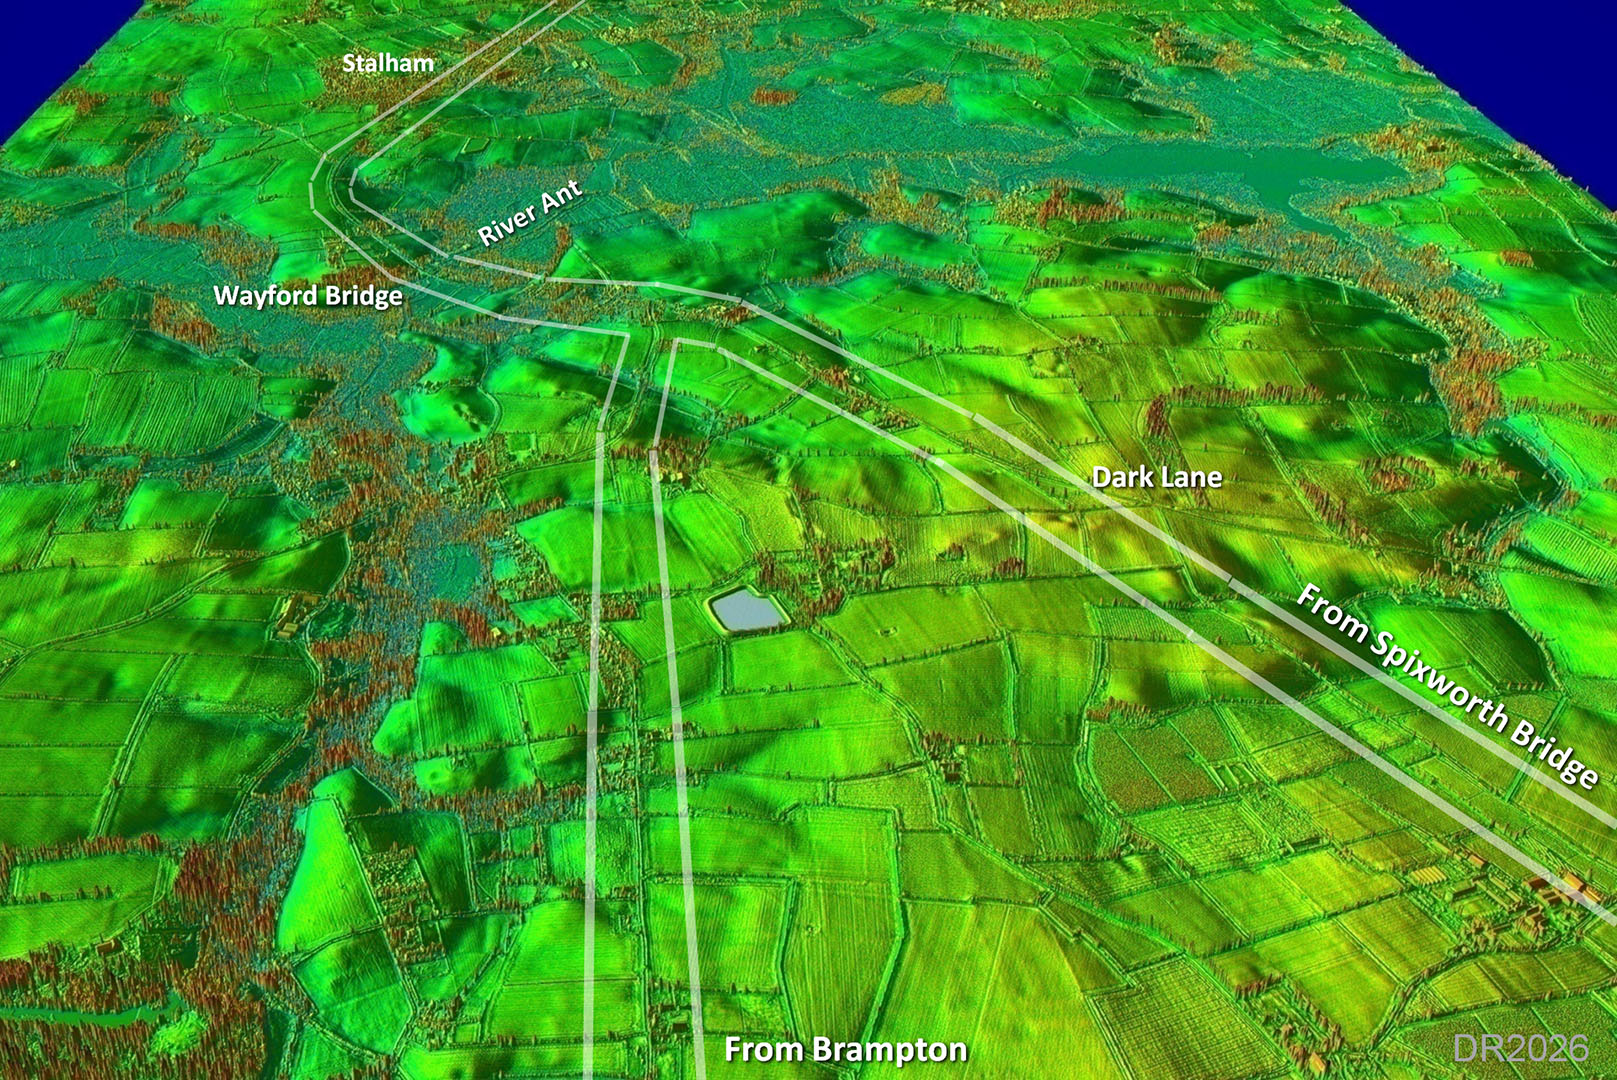
Oblique 3D Lidar Image - Junction at Wayford Bridge This was the view that convinced me there was a Roman road from Spixworth Bridge. It explains the route of the road from Brampton - that big turn it makes before Wayford Bridge is because it was joining a road from Spixworth.
|
Click for larger view |
 |
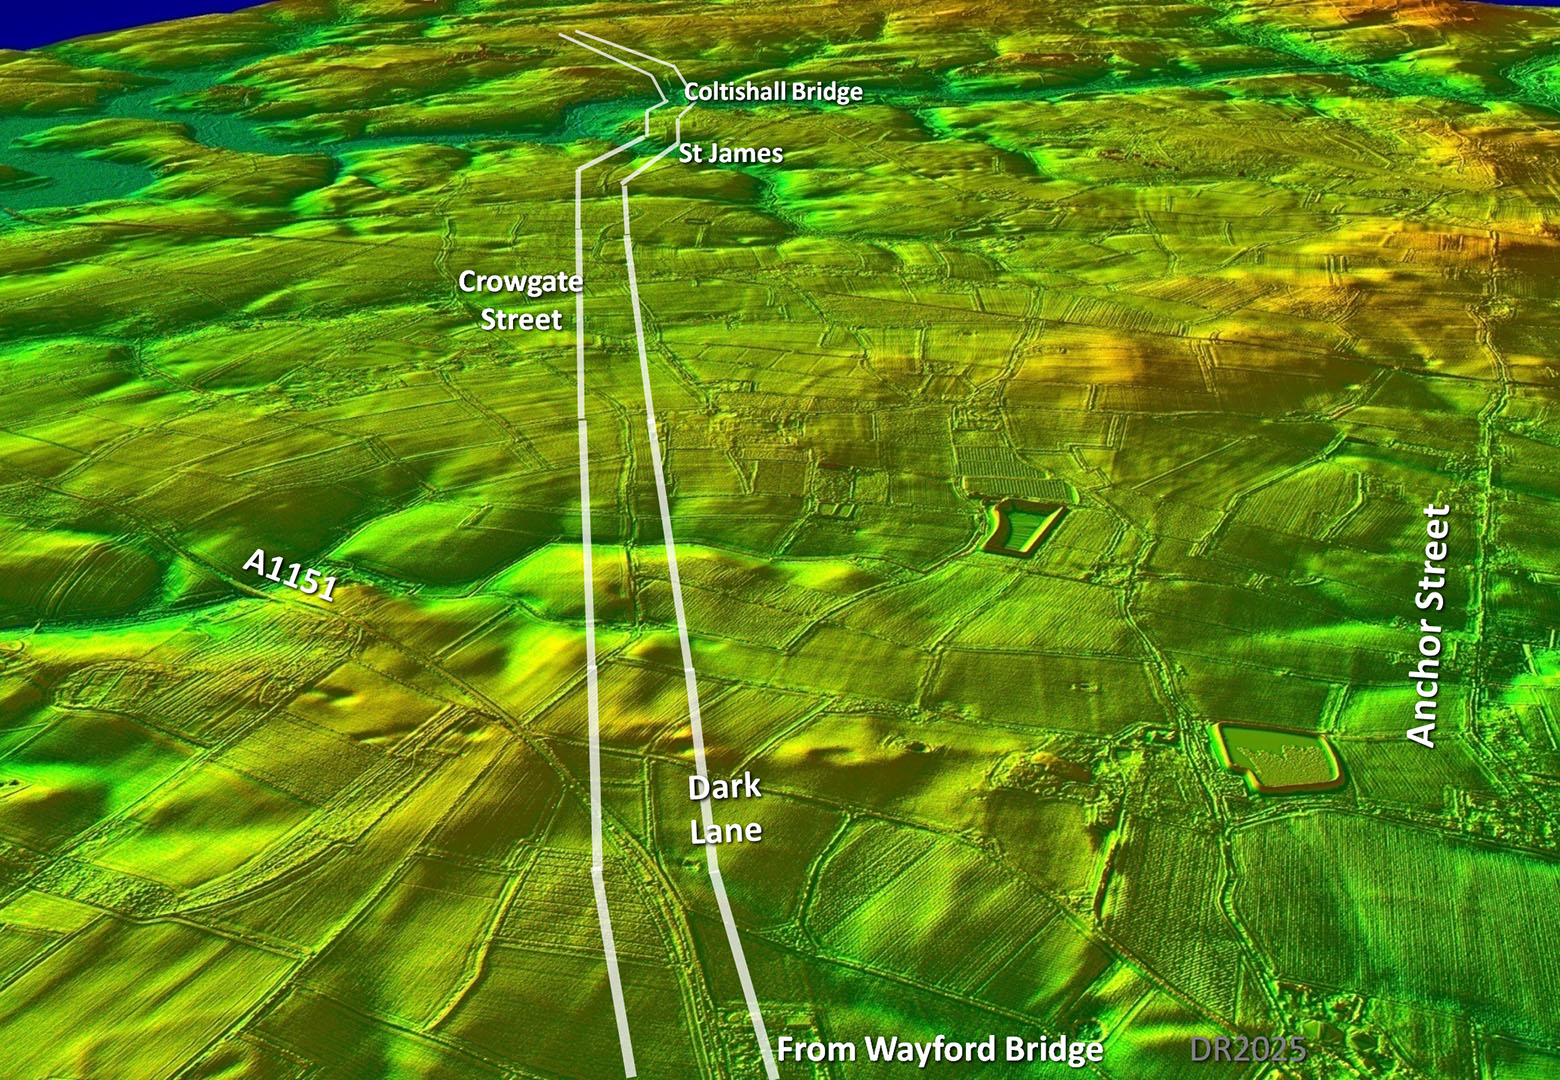
Oblique 3D Lidar Image - Looking along the line of the road Quite secure this stretch with several clues all the way to St James.
|
Click for larger view |
 |
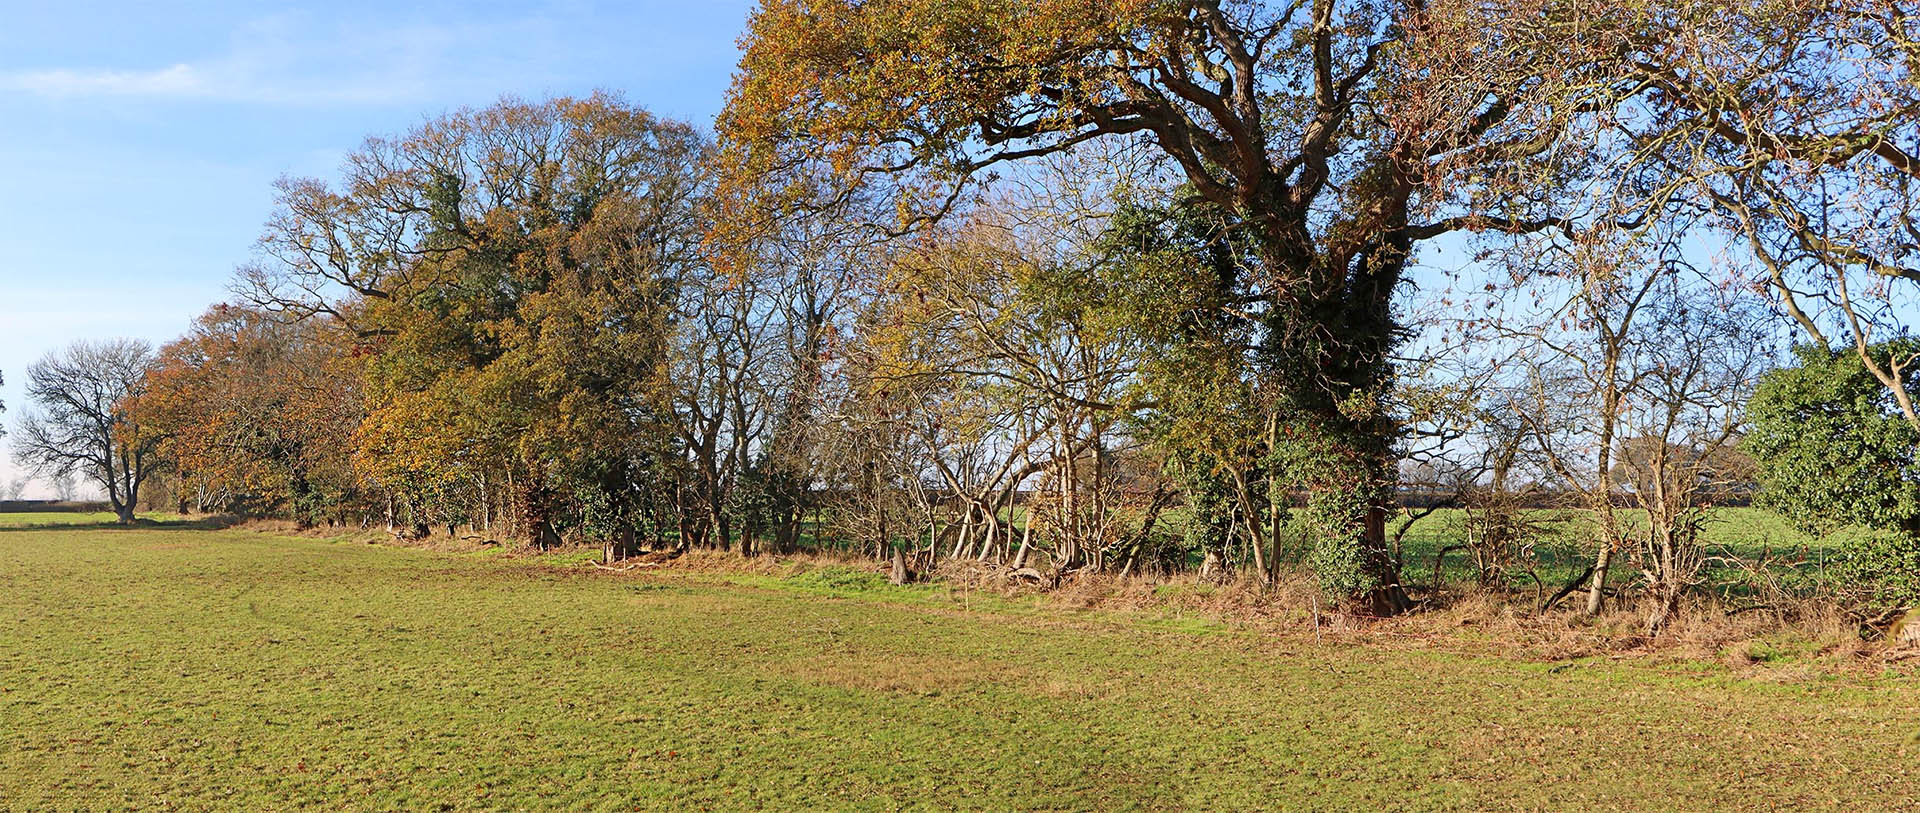
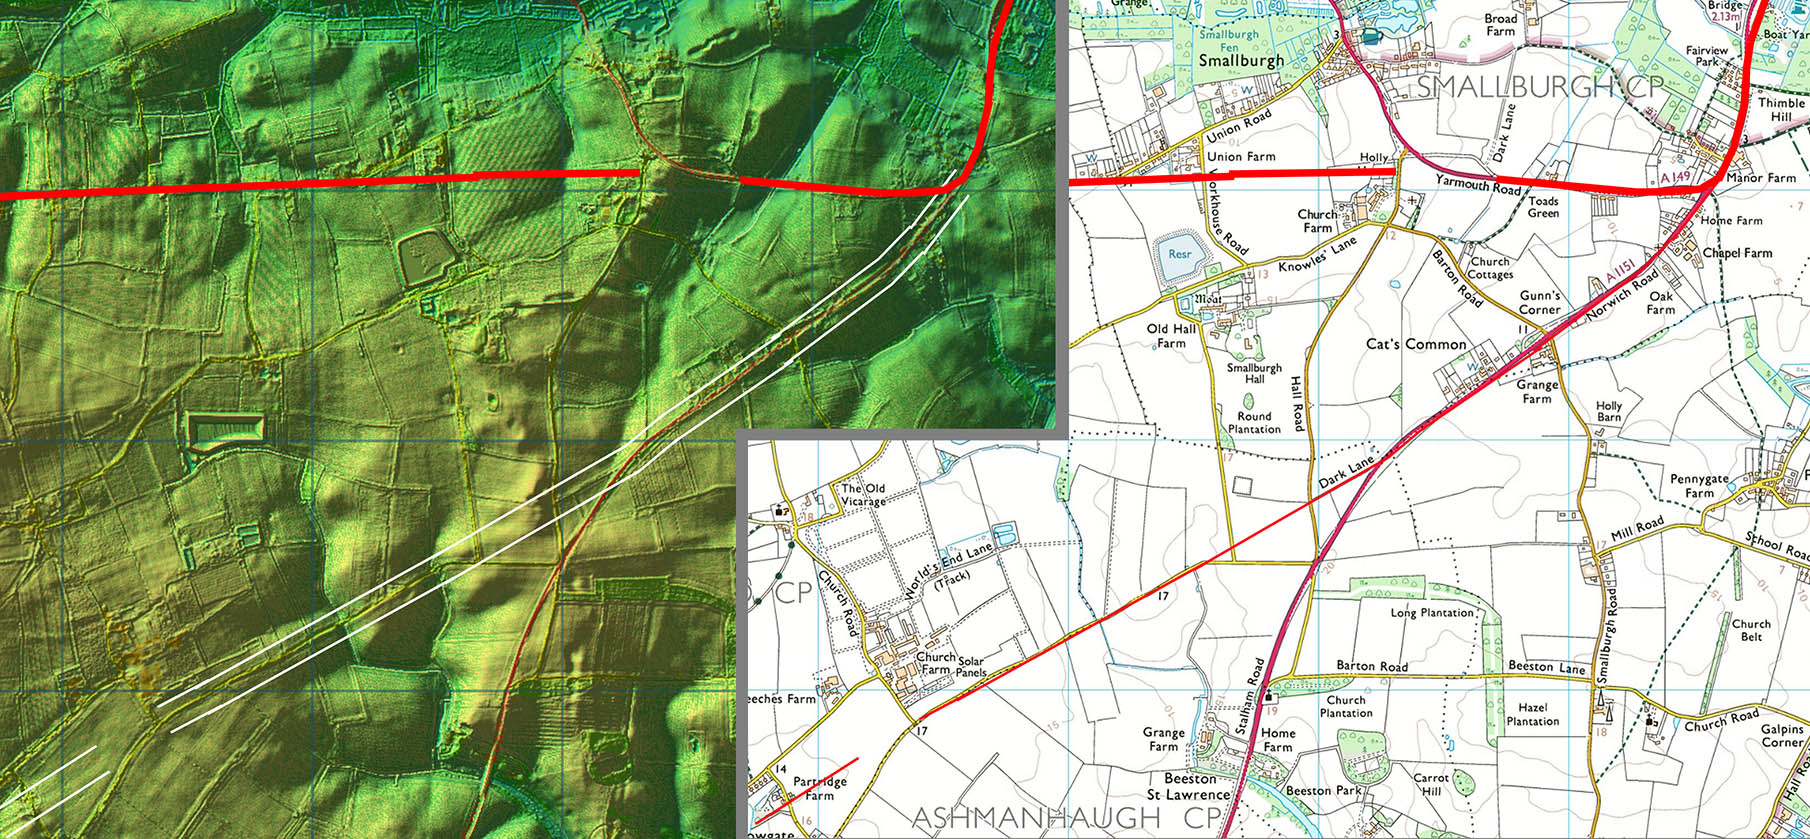
Dark Lane 1 Definitely an old road and one almost certainly 2000 years old! The road itself is now worn down to almost a hollow-way but the outsides are still built up - see below. Image: DR |
Click for larger view
|
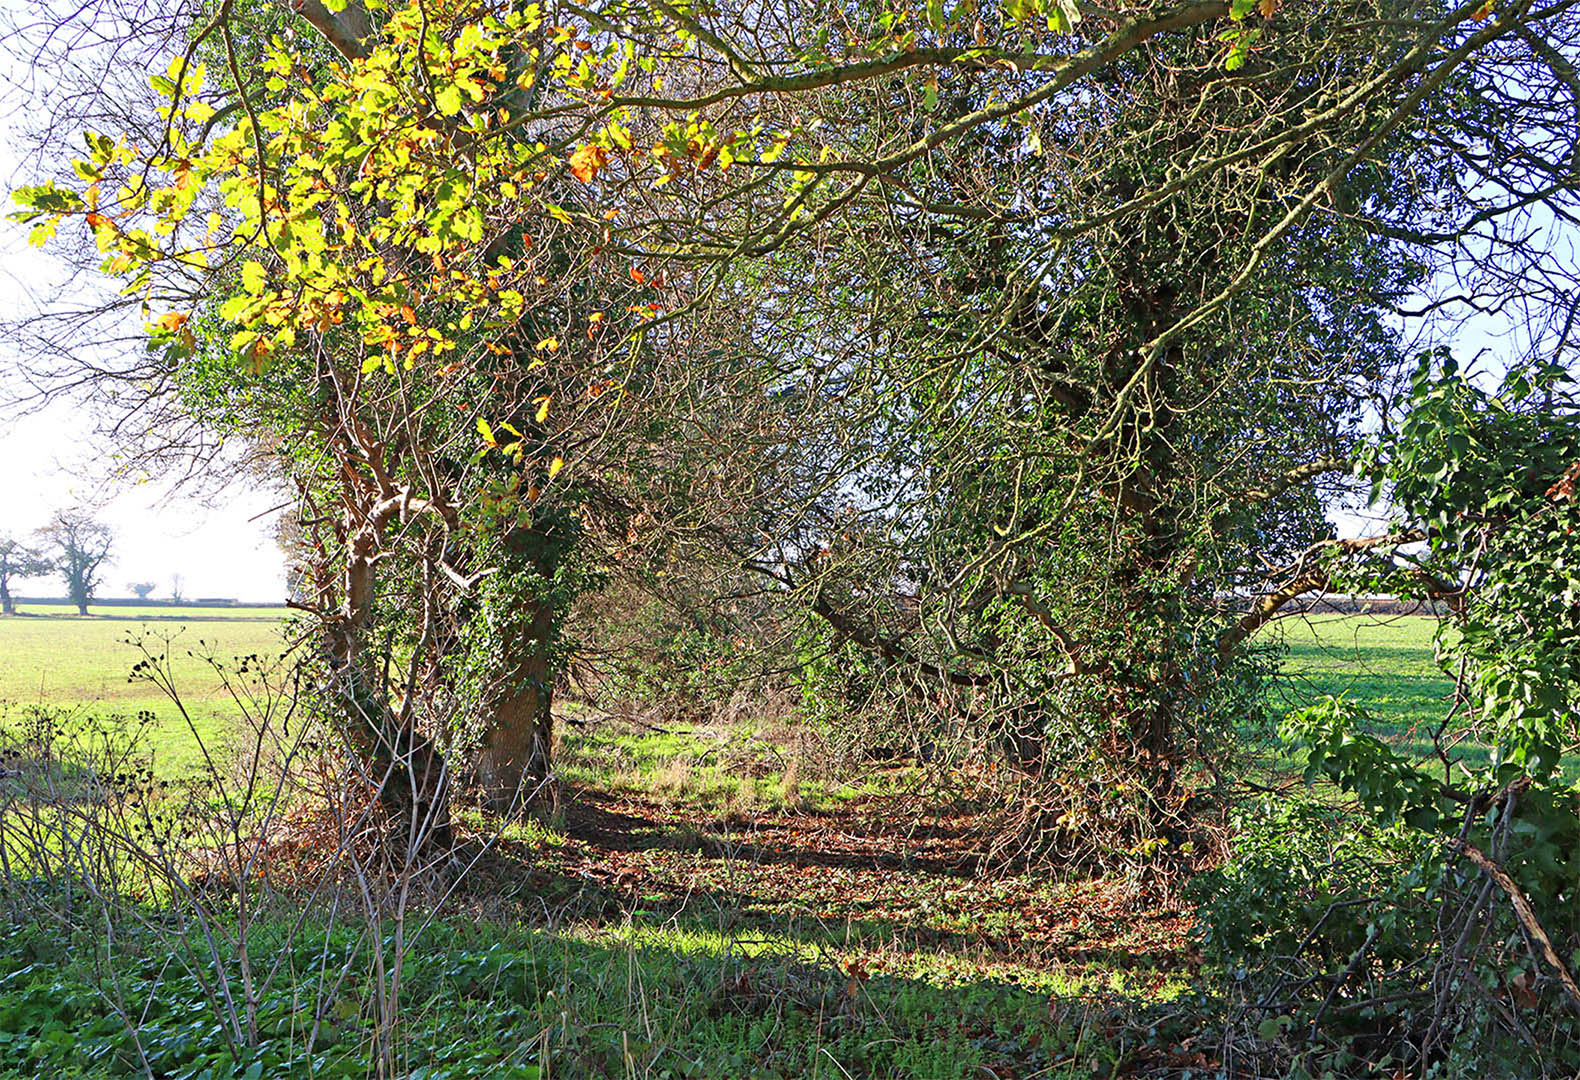 |
Dark Lane 2 I had driven past this feature many times and wondered - it looks like a Roman road. It all makes perfect sense now we now the Roman had a road to a harbour at Hickling. This is the agger of Dark Lane from the south side. Image: DR |
Click for larger view
|
 |
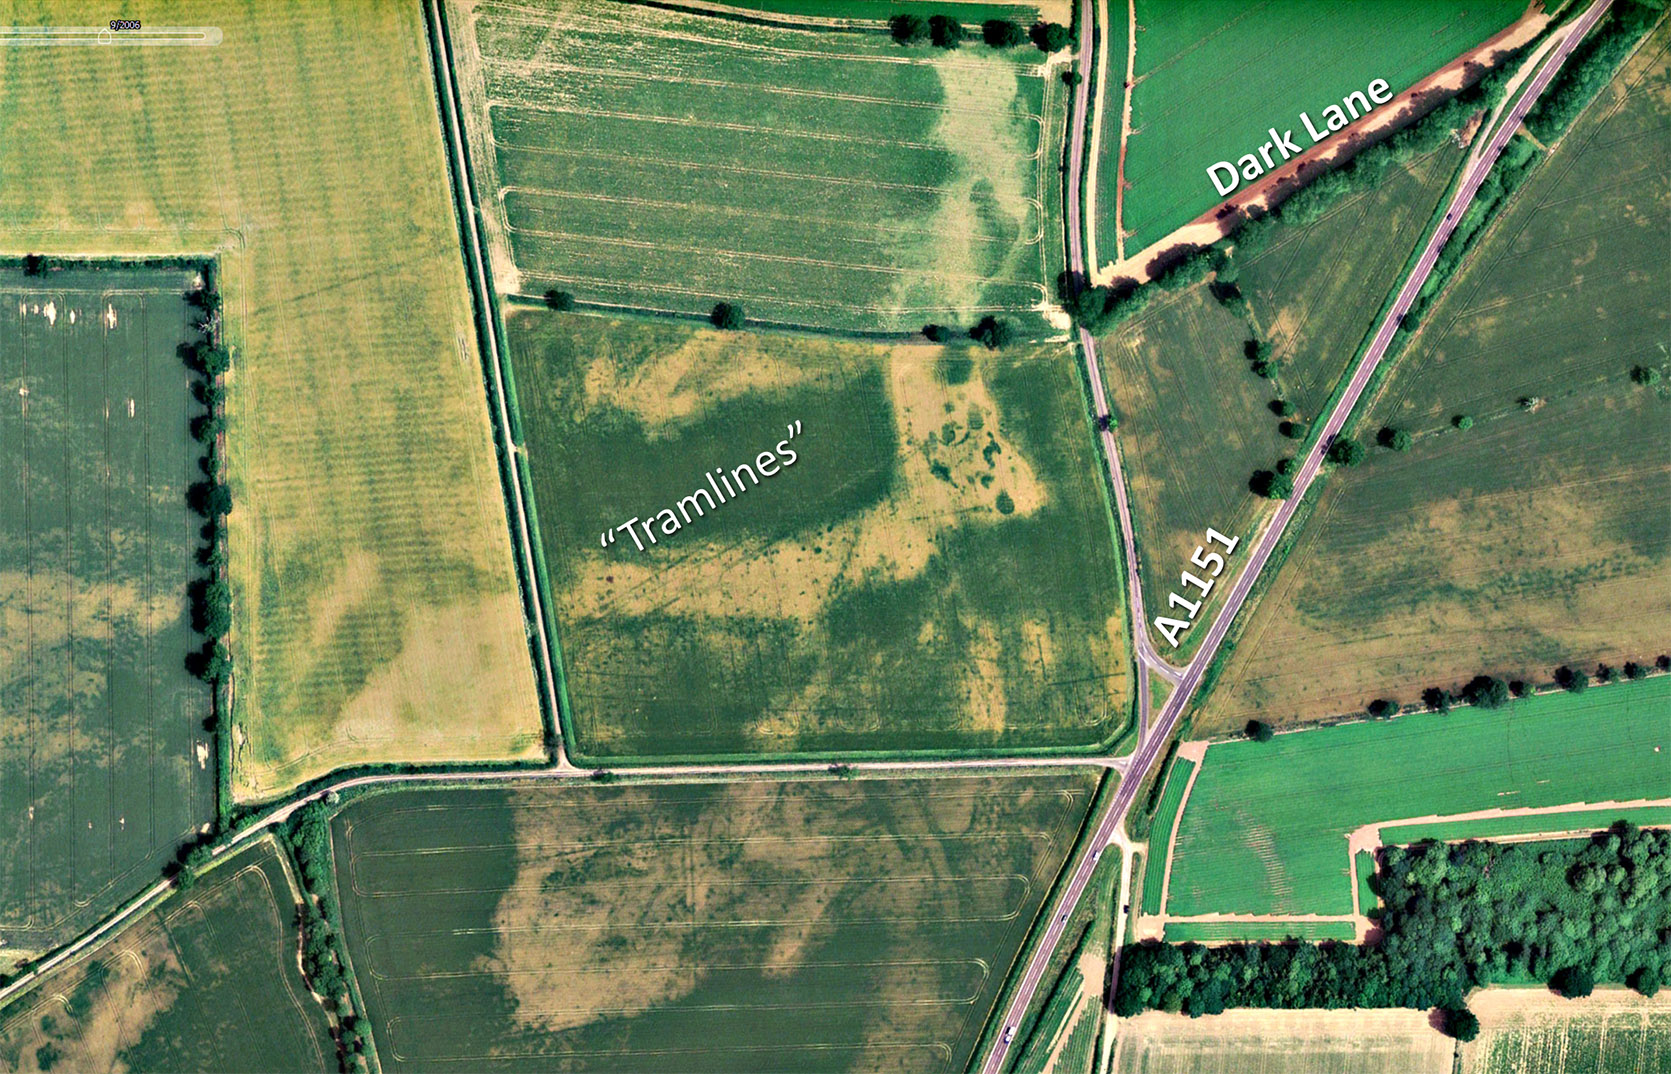
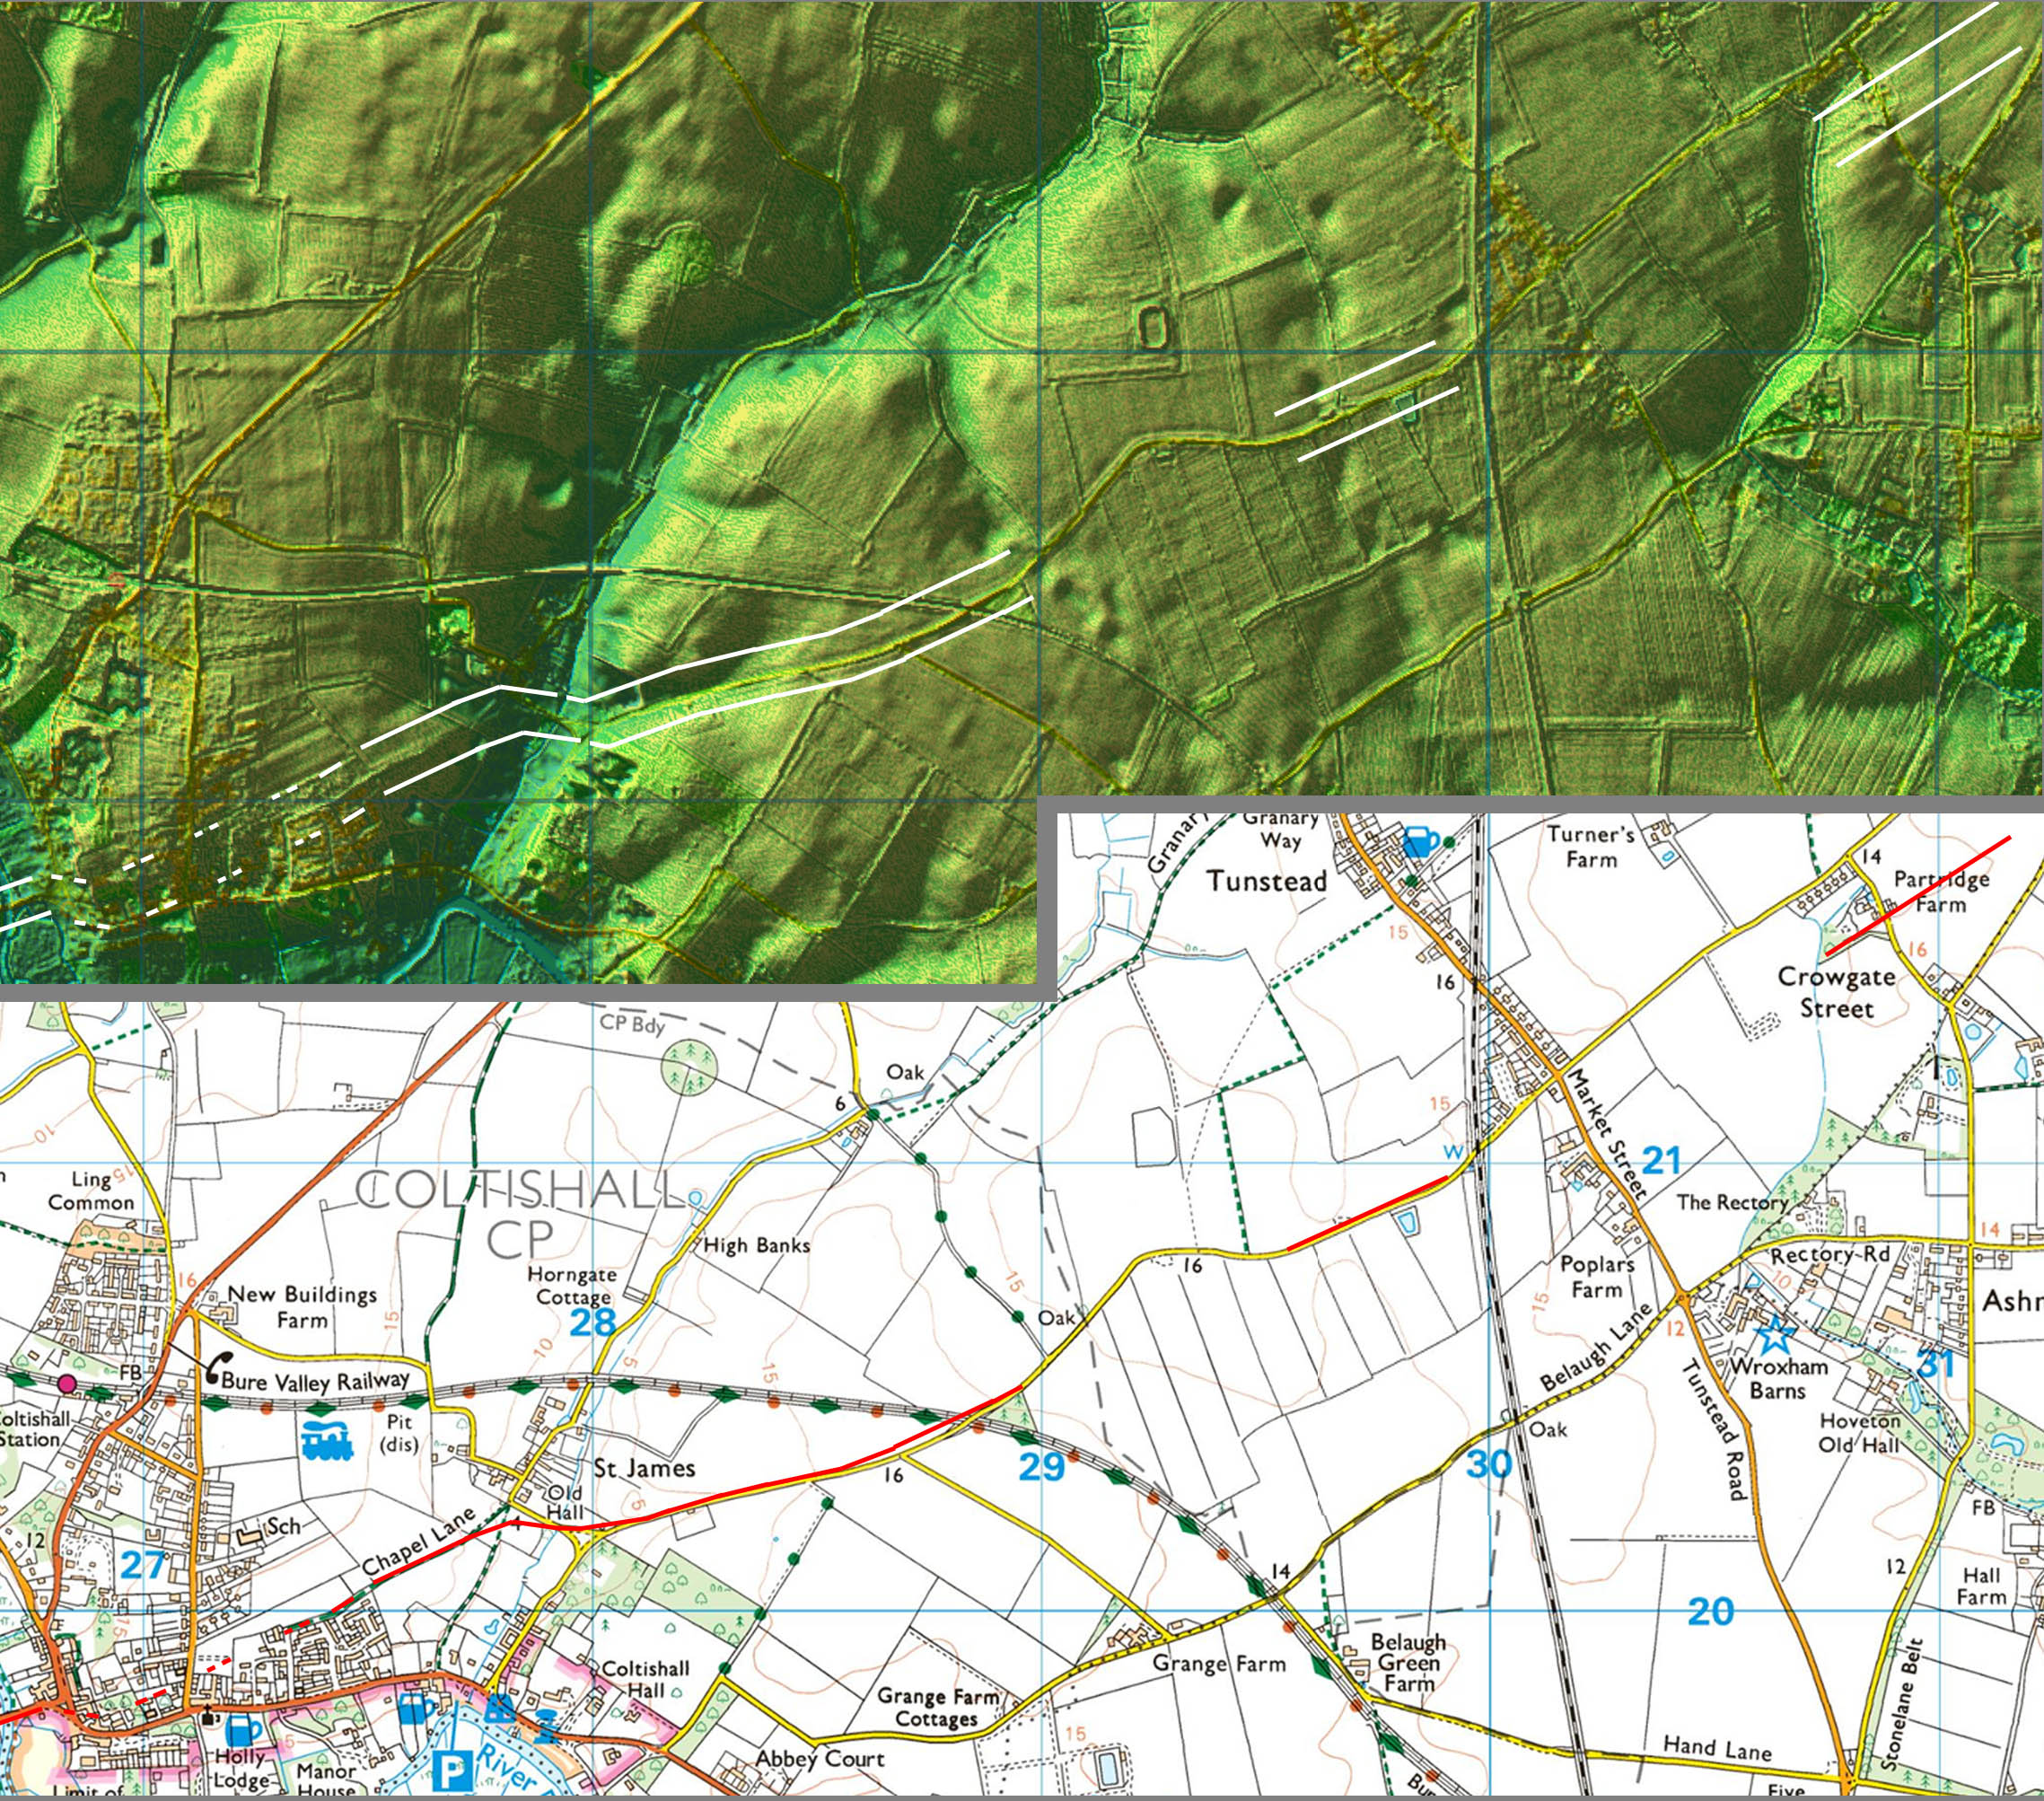
Aerial Photo - South-west of Dark Lane Tramlines, ie the Roman road ditches, are often a great clue to Roman roads when the agger has been ploughed away. Only the ditches survive. They continue the alignment of Dark Lane and onto the modern lane to Crowgate Street. Quite a significant name that with two road references within it - gate and street. Image: GoogleEarth |
Click for larger view
|
 |
Oblique 3D Lidar Image - Coltishall St James The target was obviously the crossing of the River Bure at Coltishall. The undulations here resulted in some adaptation to the line.
|
Click for larger view |
 |
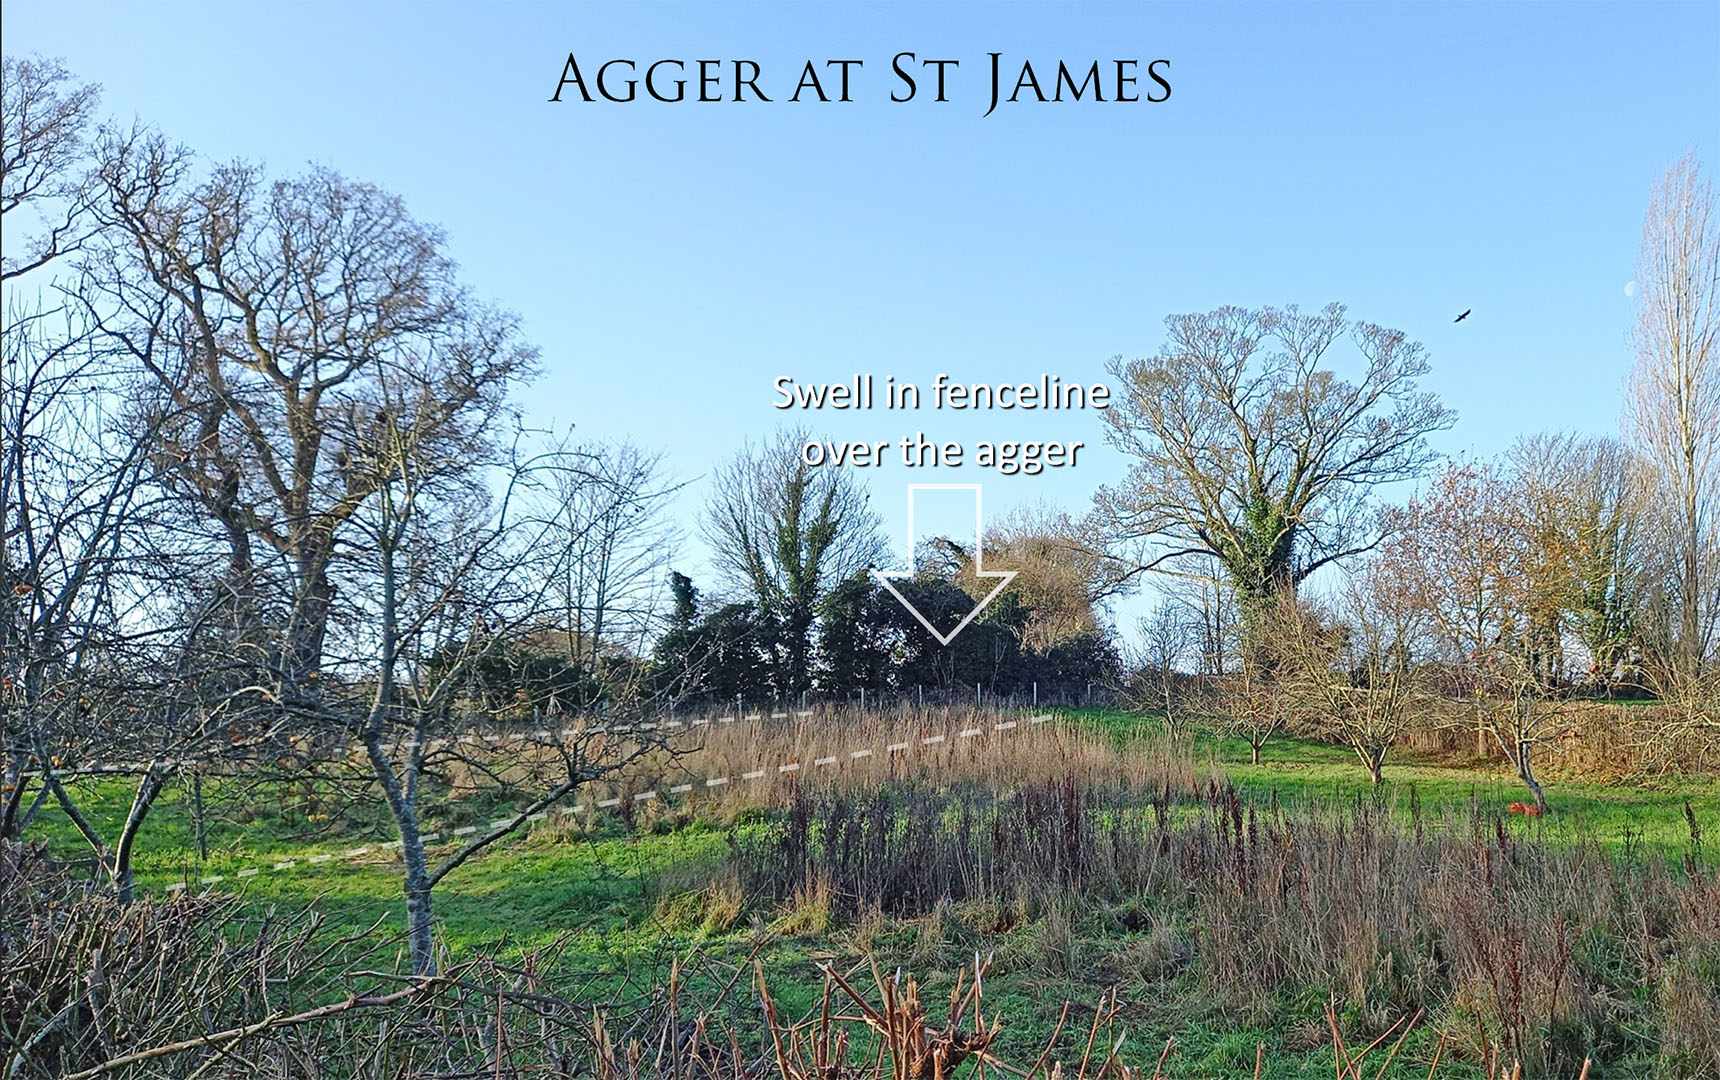
Agger - St James After crossing a stream in St James the road agger shows in two fields in the Lidar image - see above. The first field is tree covered but the second is more open and the agger can be made out in this view. Note also the swell where the far fence passes over the agger. A very common feature of Roman roads. Image: DR |
Click for larger view |
 |
Contour Map - Coltishall - Horstead Coltishall has long been an important bridging point for the Bure and the nearby Roman camp shows it was a crucial crossing point for the Romans too. On the Horstead side of the bridge then the road runs on a built up causeway to the Recruiting Sergeant public house. This would be expected as this is low lying marshland.
|
Click for larger view |
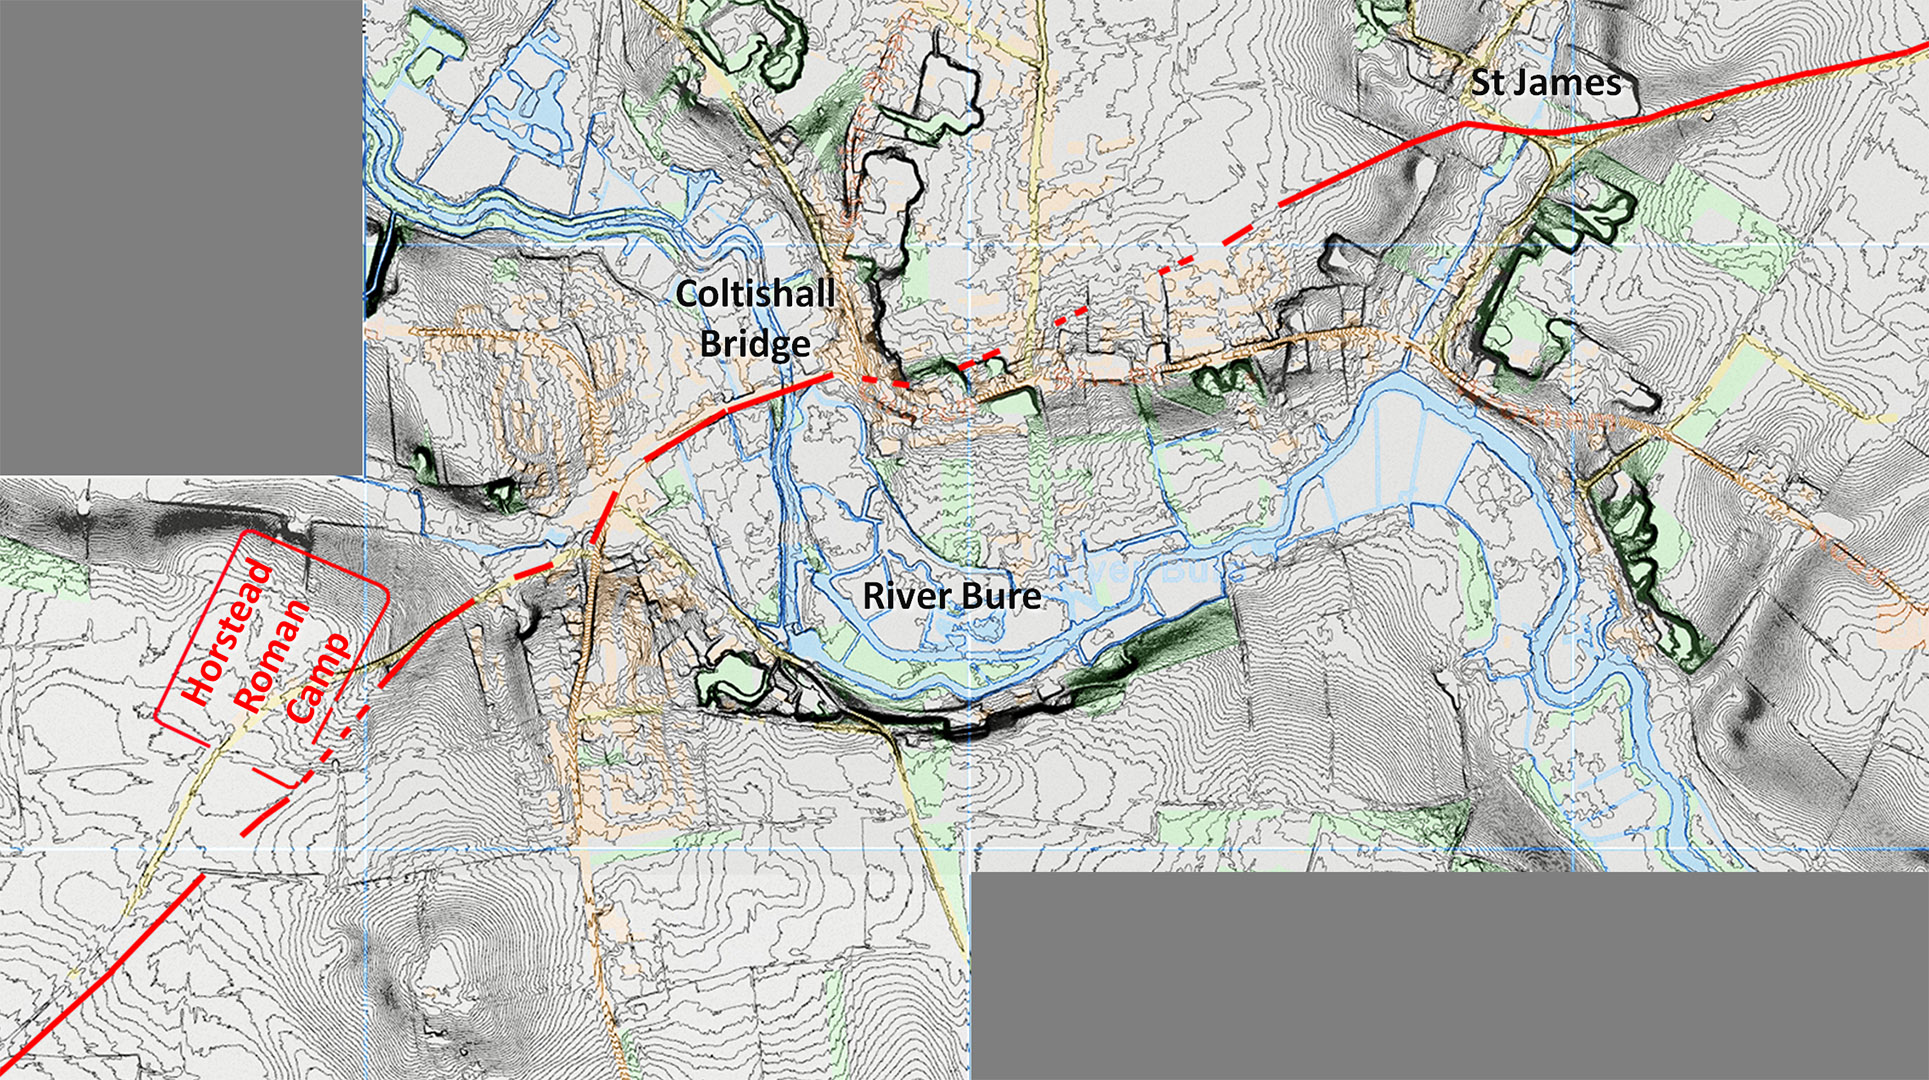 |
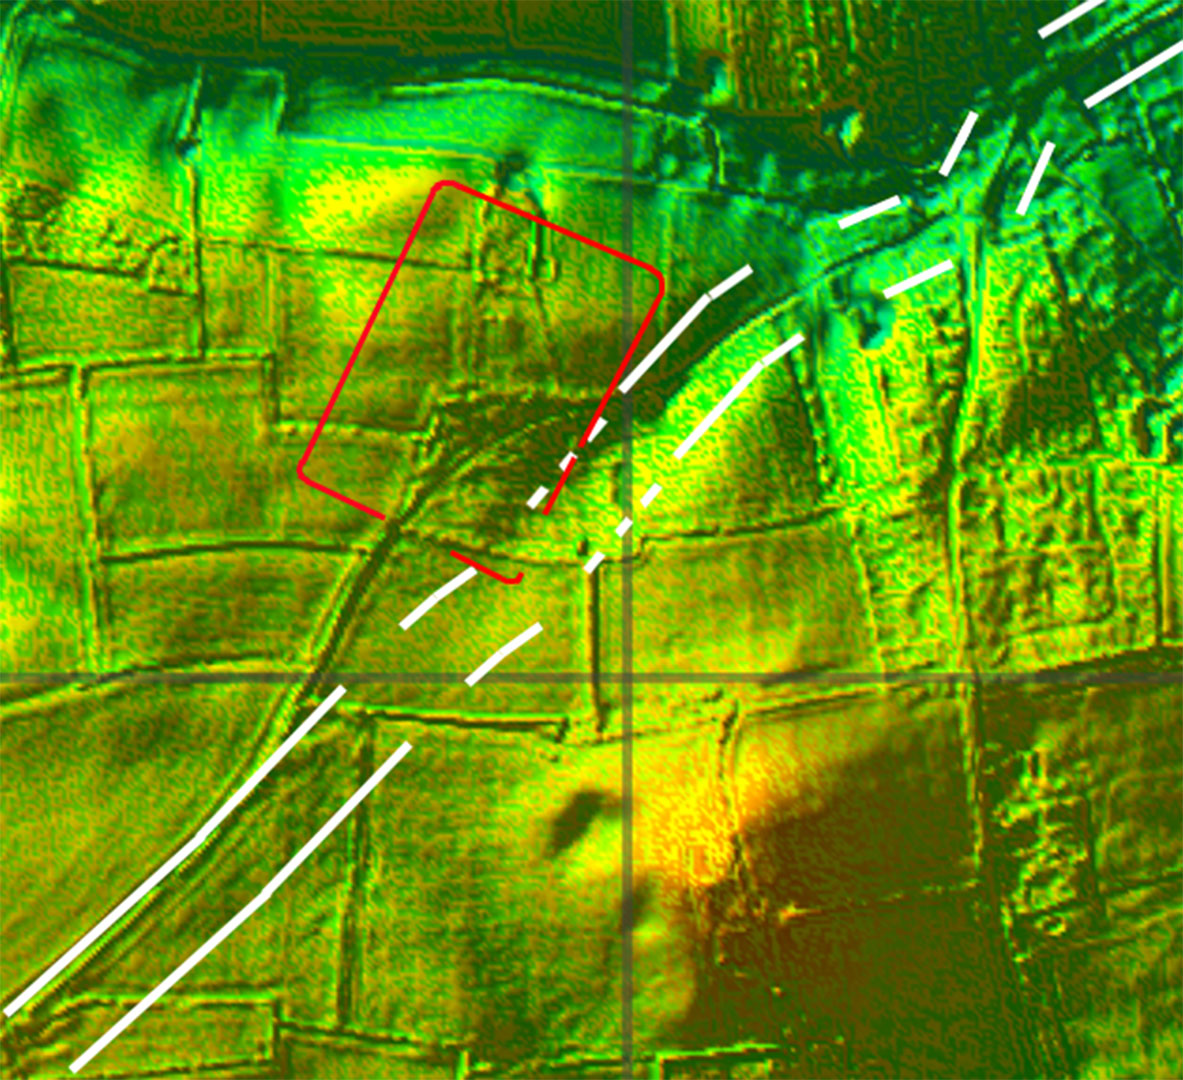
Lidar Image - Horstead Roman Camp The camp really only shows up on aerial photographs - just sections of the ditch around survive. There are some indications the road would have passed the camp's south-east corner. The modern road goes through the middle of the camp. This is currently the only known Roman camp in East Anglia. Clearly an important place.
|
Click for larger view |
 |
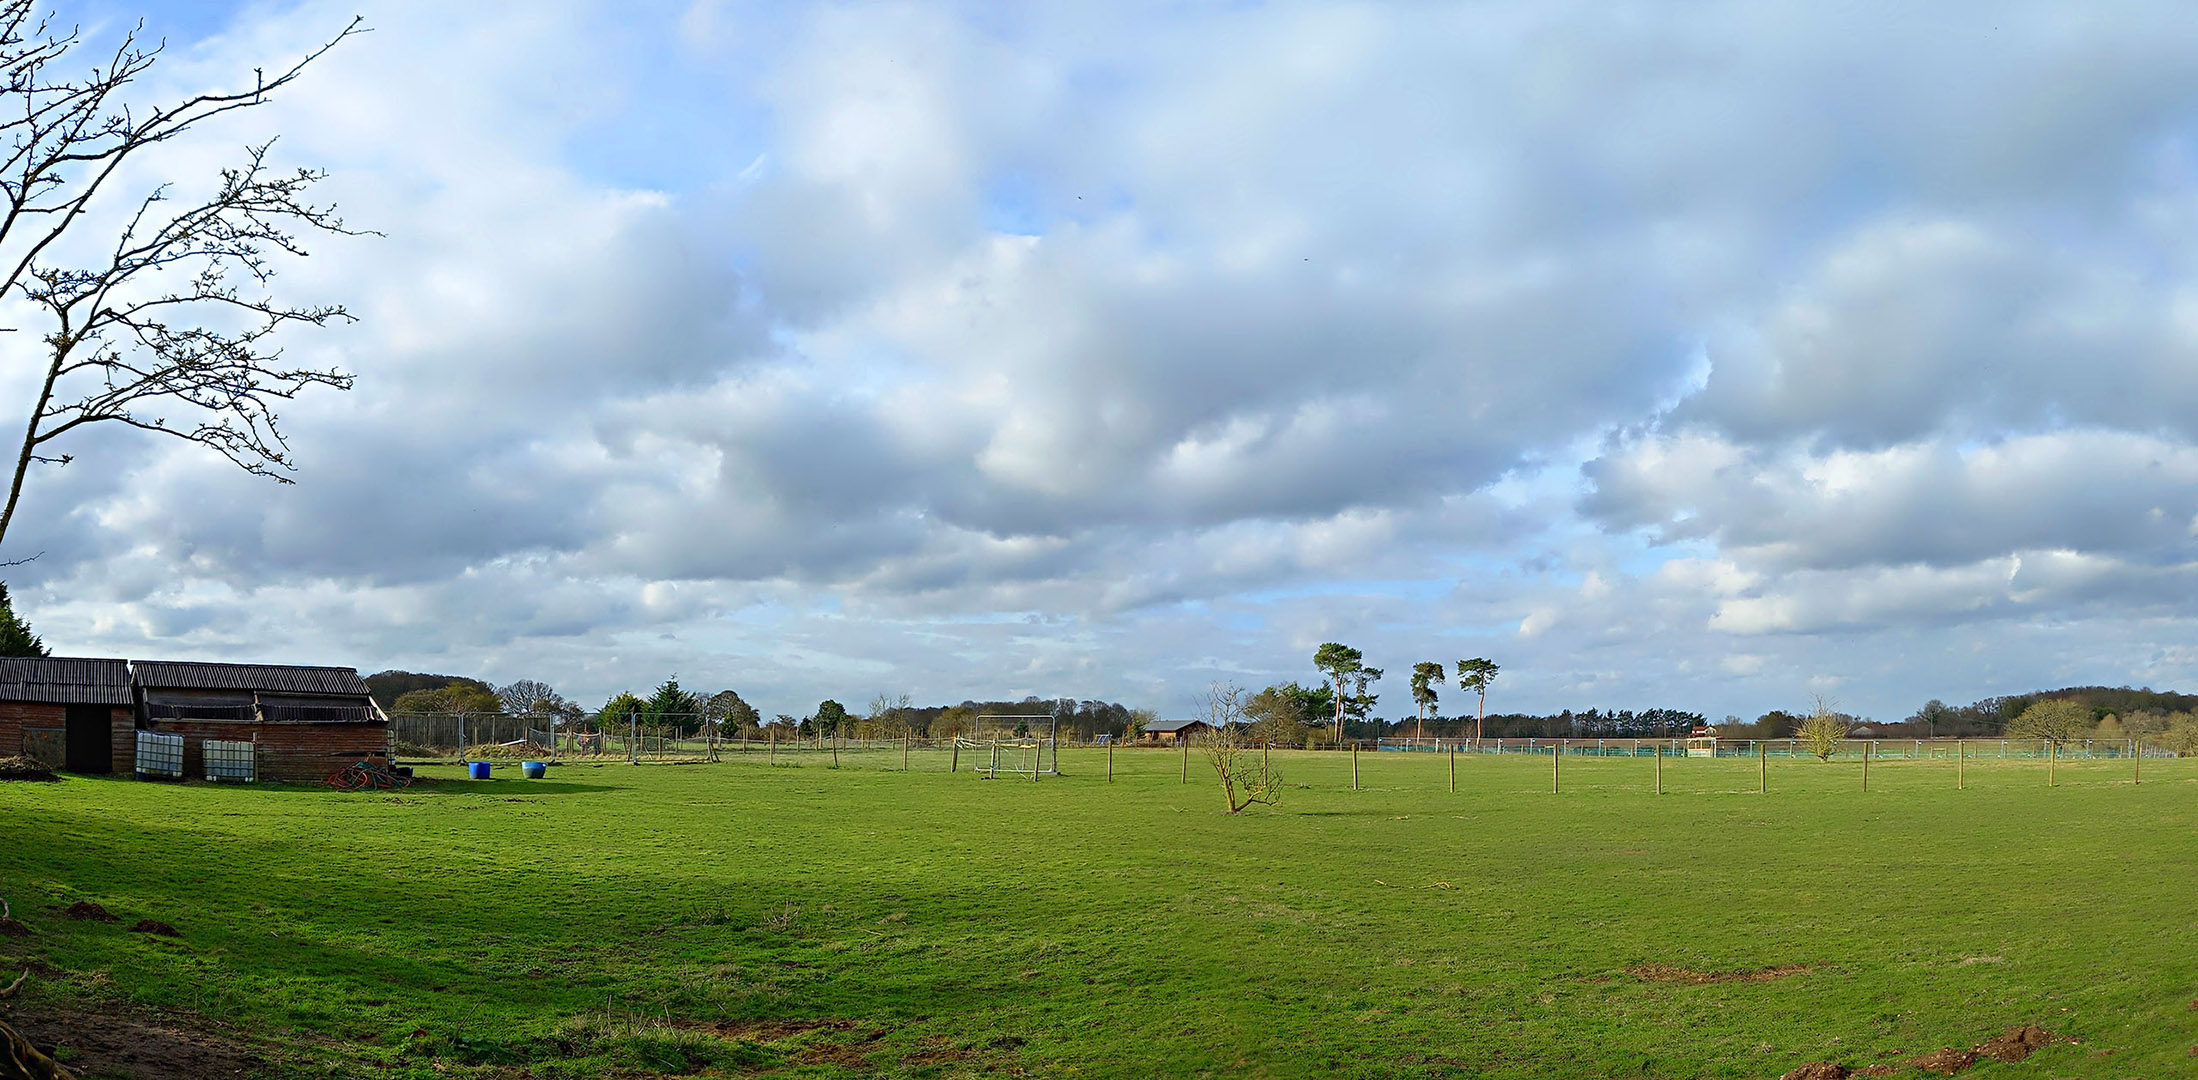
Inside the Roman Camp We are inside the Roman camp's northern half. Clearly evident is what an excellent site this was with clear views towards the River Bure to the north. Image: DR
|
Click for larger view |
 |
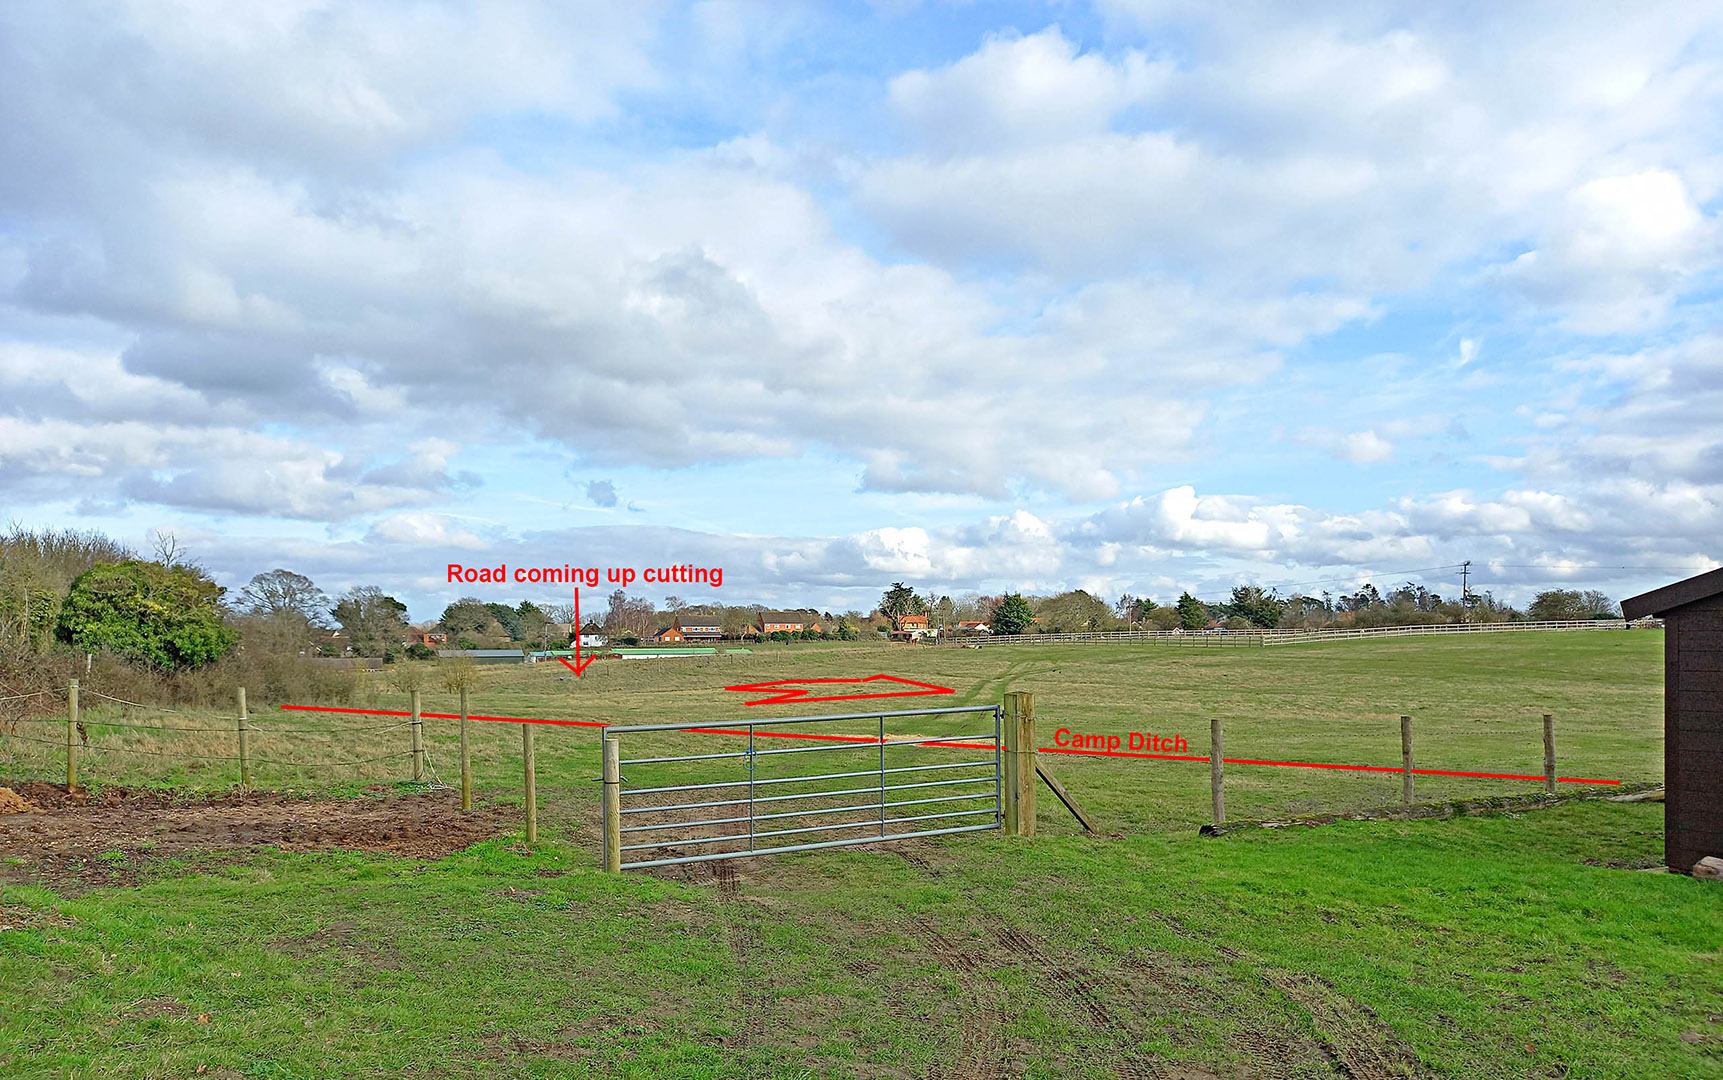
Roman Camp and probable course of the Roman Road Still inside the camp - just - on its eastern side. The road likely came up a valley or cutting and then passed outside the camp. Image: DR
|
Click for larger view |
 |
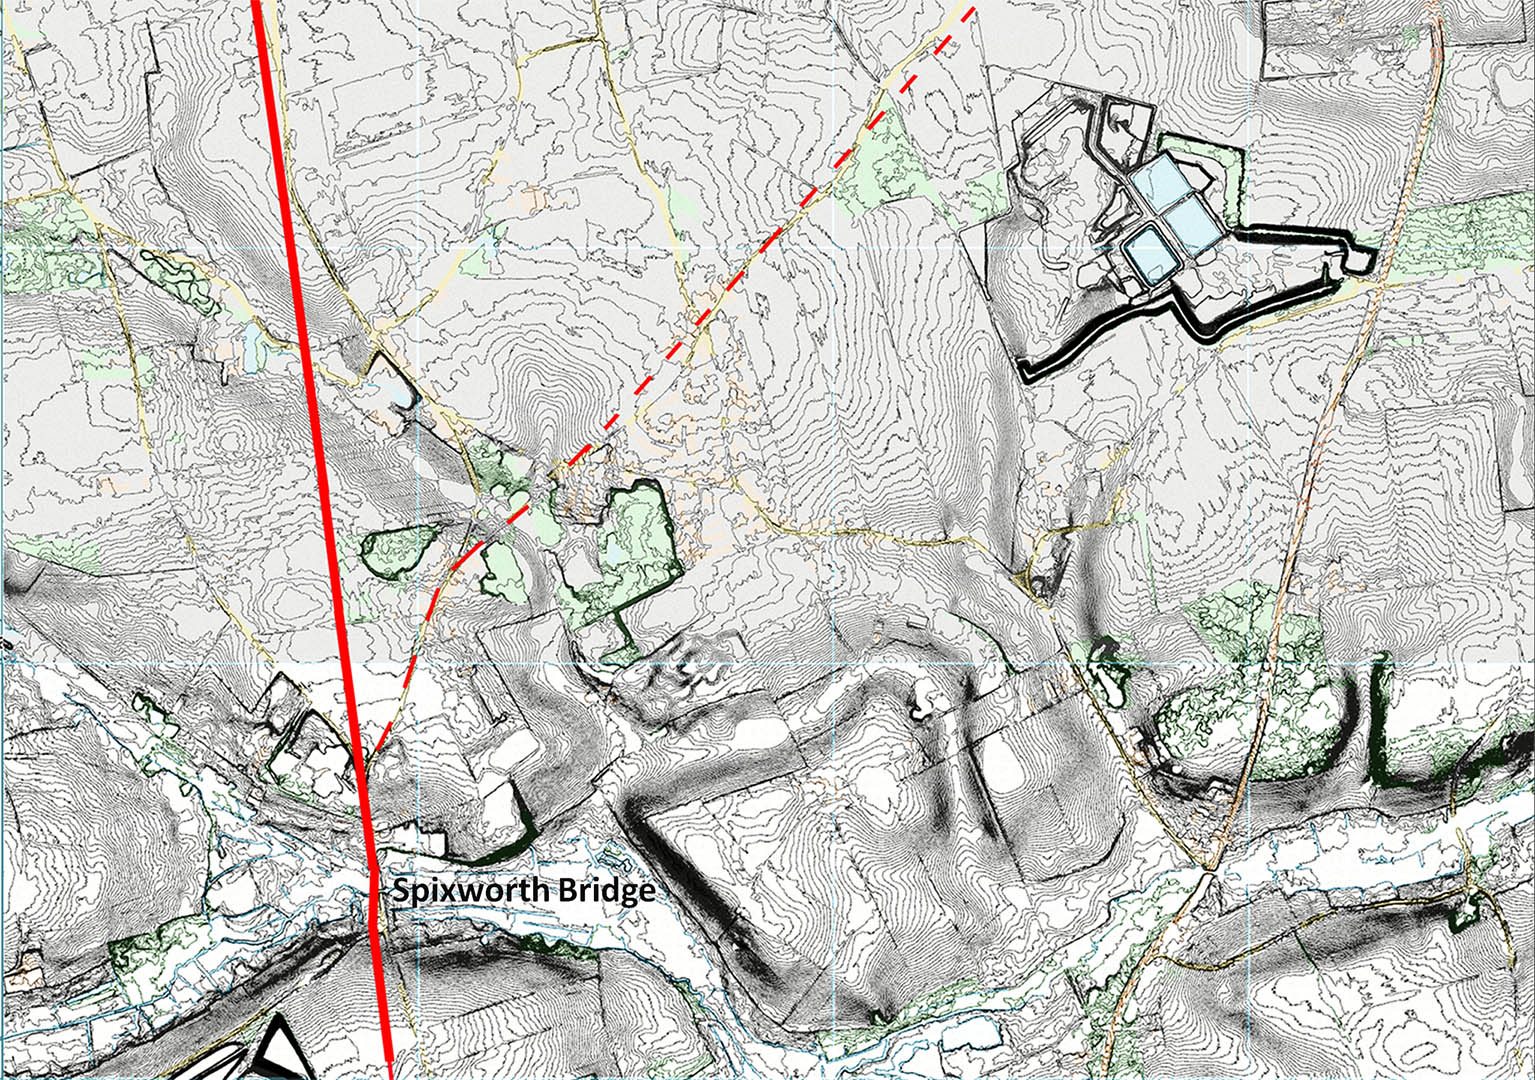
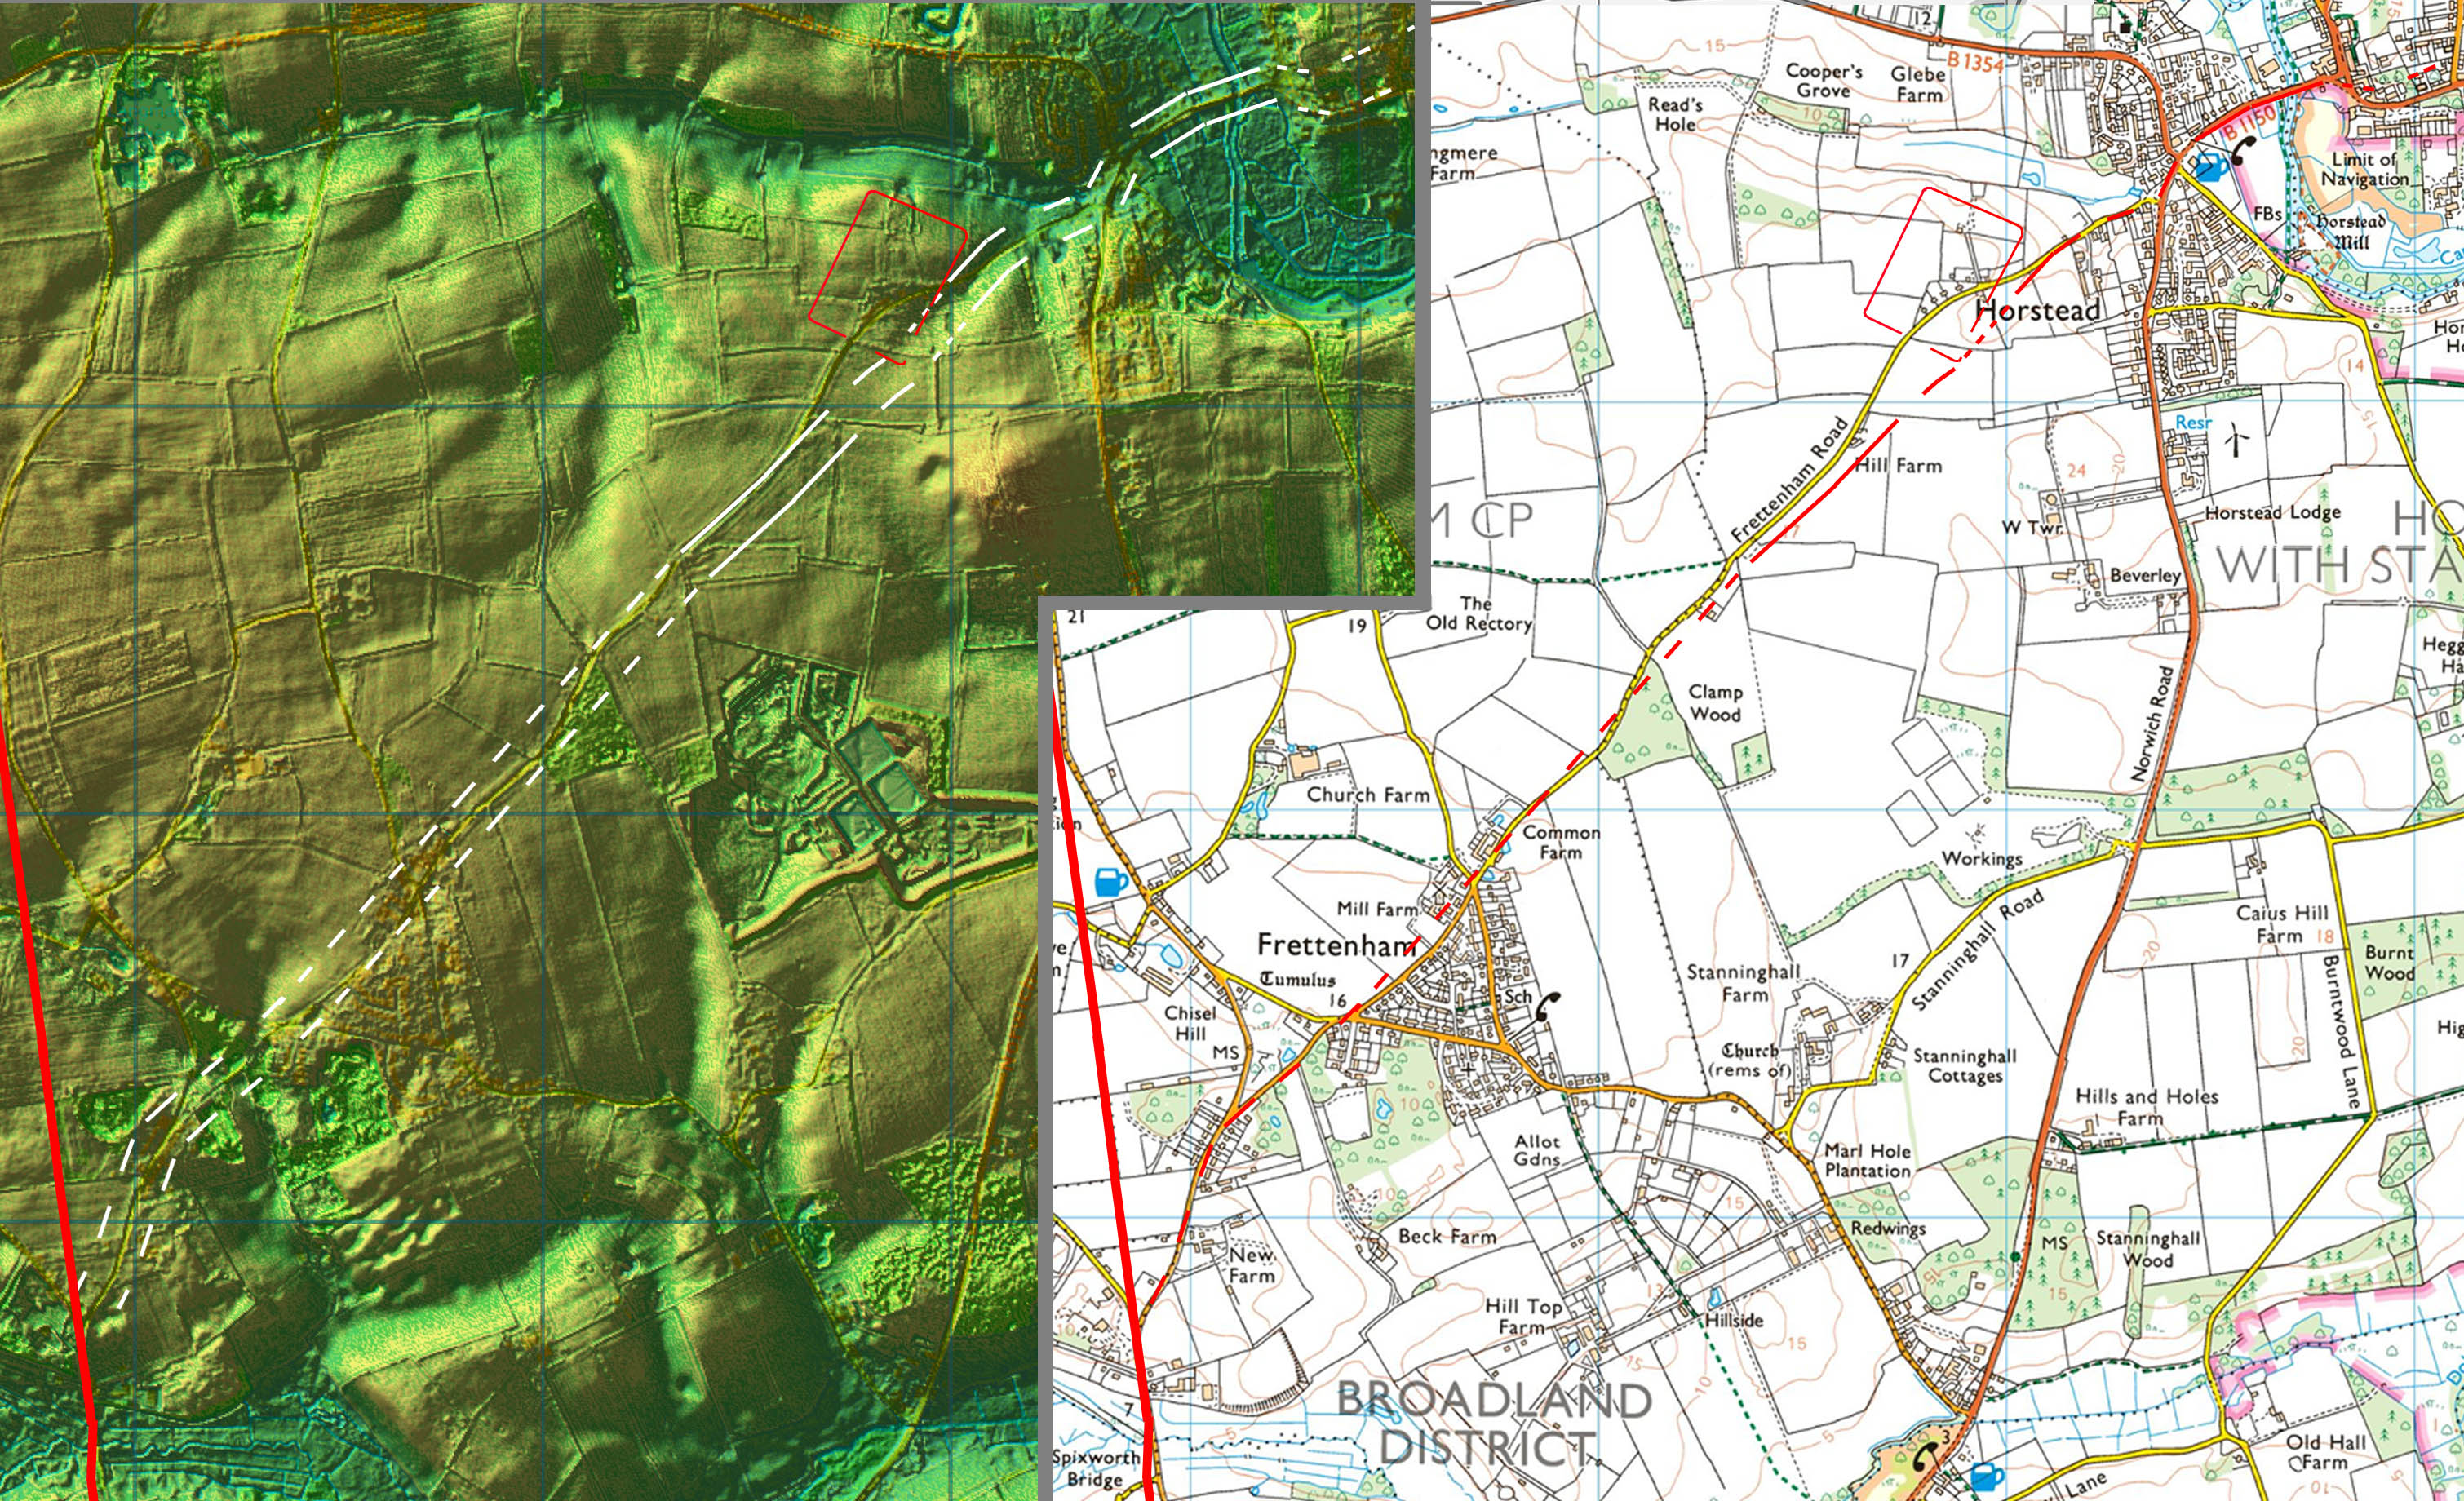
Contour Map - Horstead to Spixworth Bridge So far the clues to the road have been sufficient to work out the route but from here onwards then the evidence becomes very sketchy. The modern road appears to overlay the Roman route in several places. The route shown is therefore the likeliest course and fits well with the contours. Roman Road 3e, Brampton to Caistor, would have been joined just to the north of Spixworth Bridge. A sensible place for this junction as the routes would then share a single bridge. No need to build two.
|
Click for larger view |
 |
Oblique 3D Lidar Image - Coltishall St James Lidar view of the route described above.
|
Click for larger view |
 |
Route Map 1 Wayford to Crowgate Street |
Click for larger view |
 |
Route Map 2 Crowgate Street to Coltishall |
Click for larger view |
 |
Route Map 3 Coltishall to Spixworth |
Click for larger view |
 |
|
|
|
Last update: May2026 |
© David Ratledge |