
|
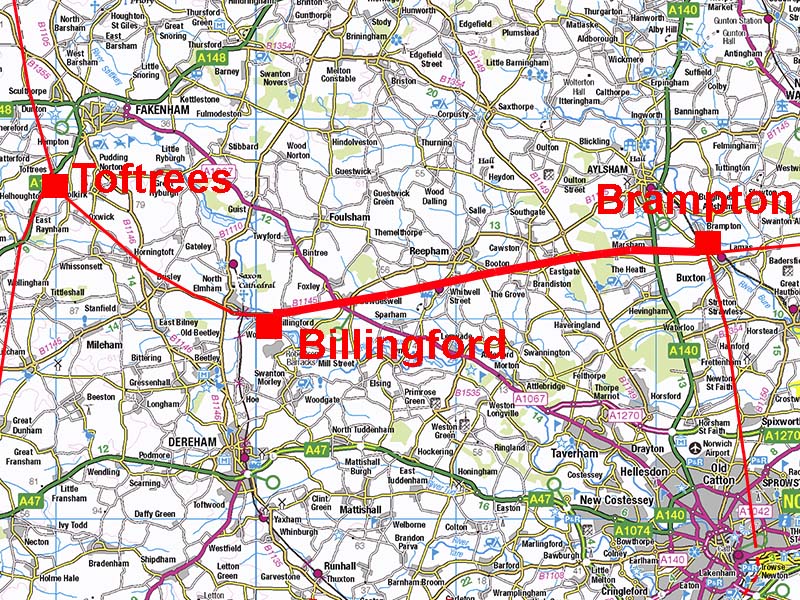
The Roman Road from Brampton to BillingfordMargary Number: 38Distance: 13.75 milesThis road was regarded by Margary and currently also by the Norfolk HER to be part of the Fen Causeway. However, this was dismissed by Albone and certainly on the basis of the Lidar evidence he would appear to be correct - no through connection is visible - well at least to my eyes. In reality this road appears to continue to Toftrees so really should have had the same number but Margary thought otherwise. Only the initial first mile or so of this road was uncertain otherwise most of its course to the Roman settlement at Billingford was reasonably well established - lidar has only offered a few minor corrections. The early Roman fort at Swanton Morley is on the opposite side of the river to Billingford. Norfolk HER: 2796 (regarded as part of the Fen Causeway) |
Historic Counties: Norfolk Current Counties: Norfolk HER: Norfolk
|
|
|
|

|
|
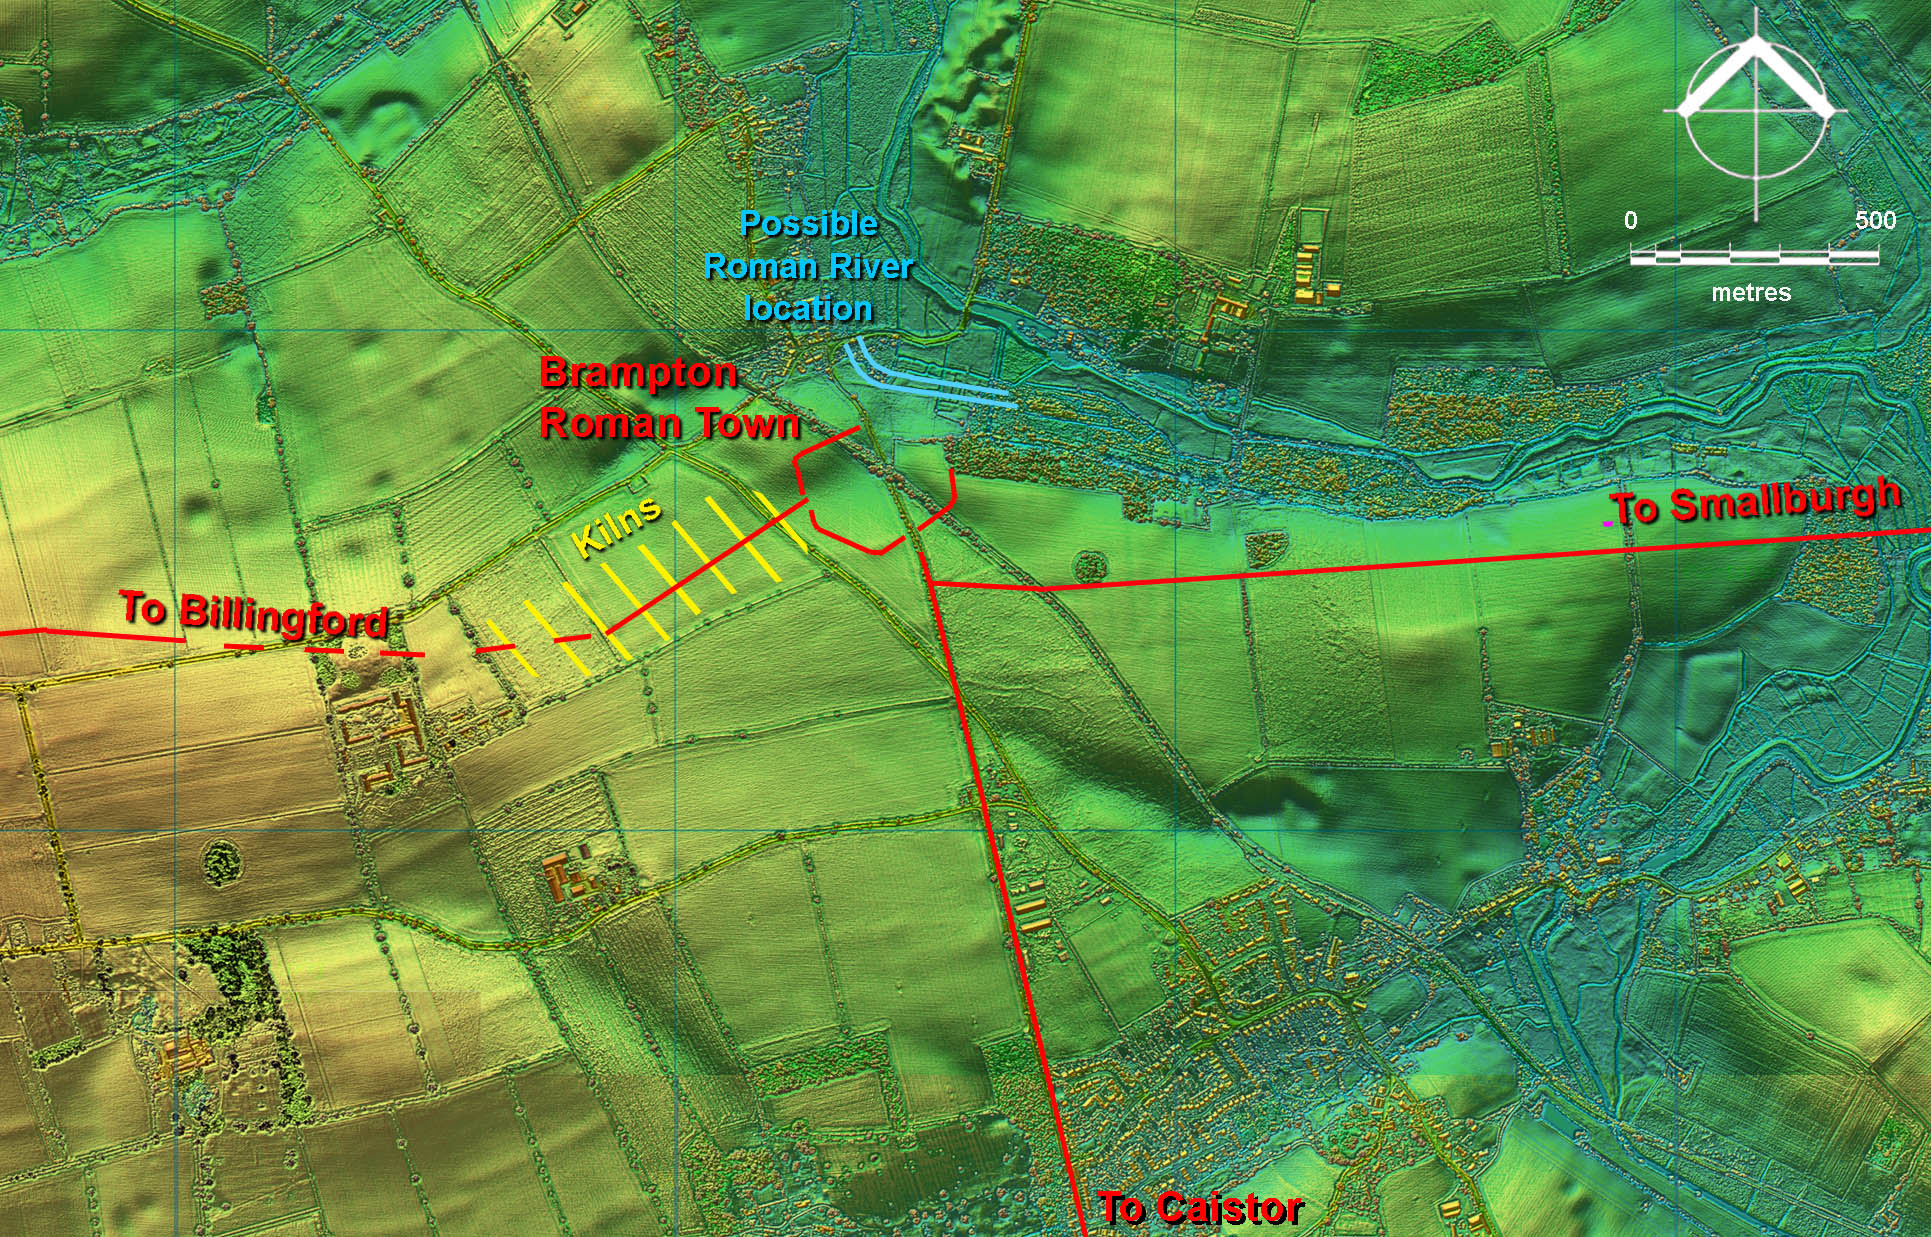
Lidar Image - Roman Roads at Brampton Brampton was the Roman equivalent of the Potteries with over 130 kilns known. As such it became a hub for the Roman road network. West to Billingford, south to Caistor St Edmund and east to a probably port near Smallburgh. There is also perhaps some lidar evidence for local roads. |
Click for larger view |
 |
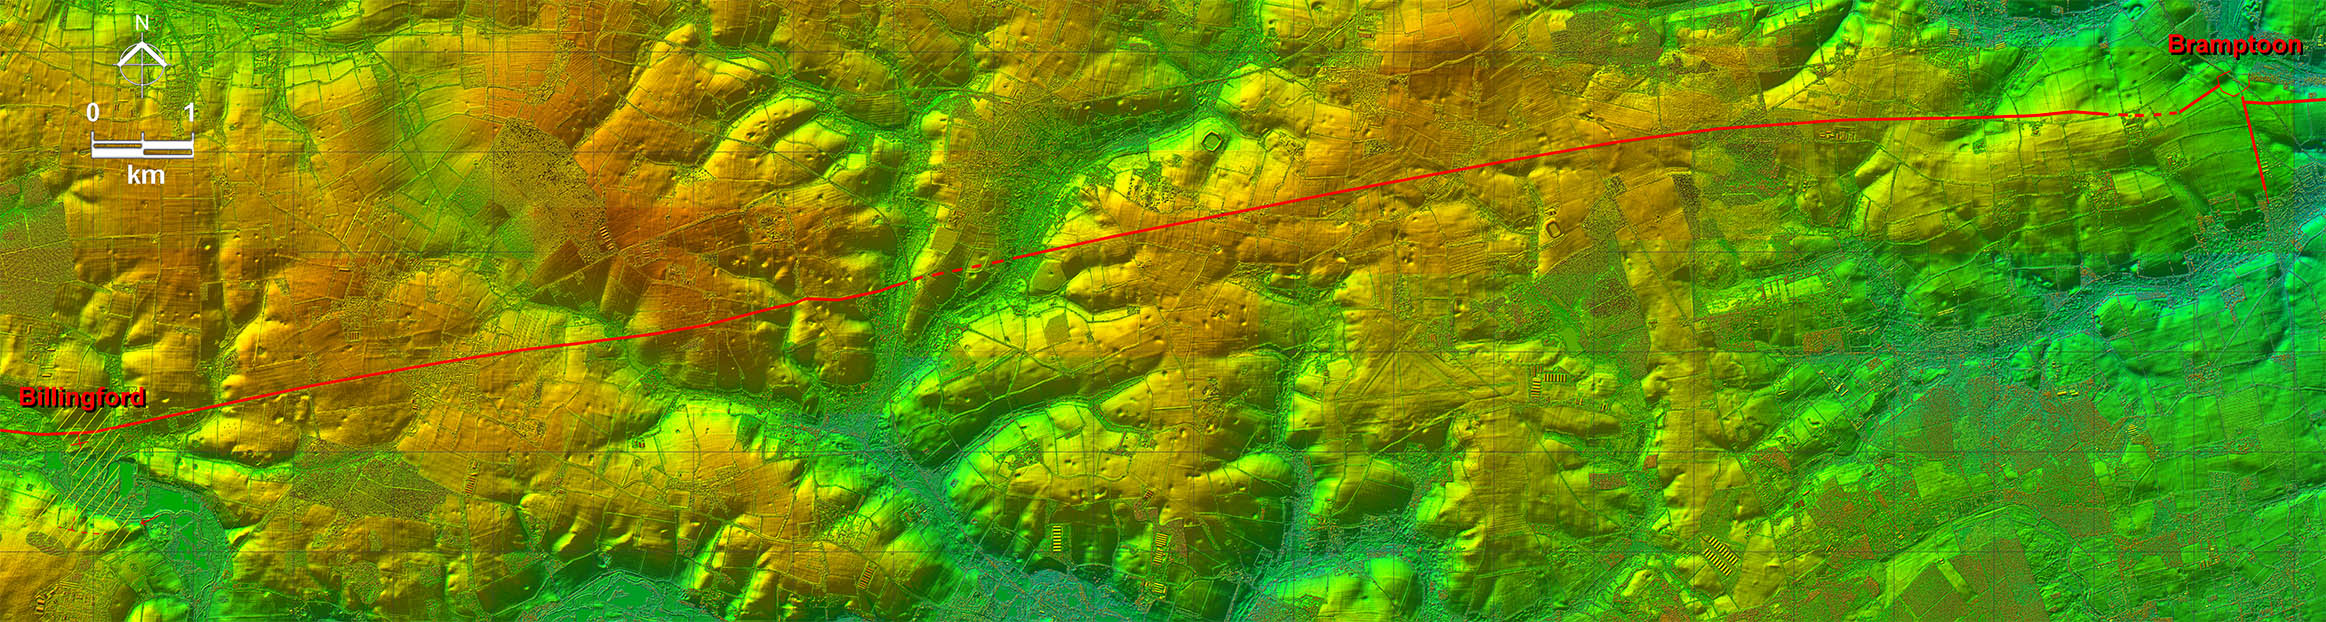
Lidar Image - Full Route Very direct and keeps to high ground very well. |
Click for larger view |
 |
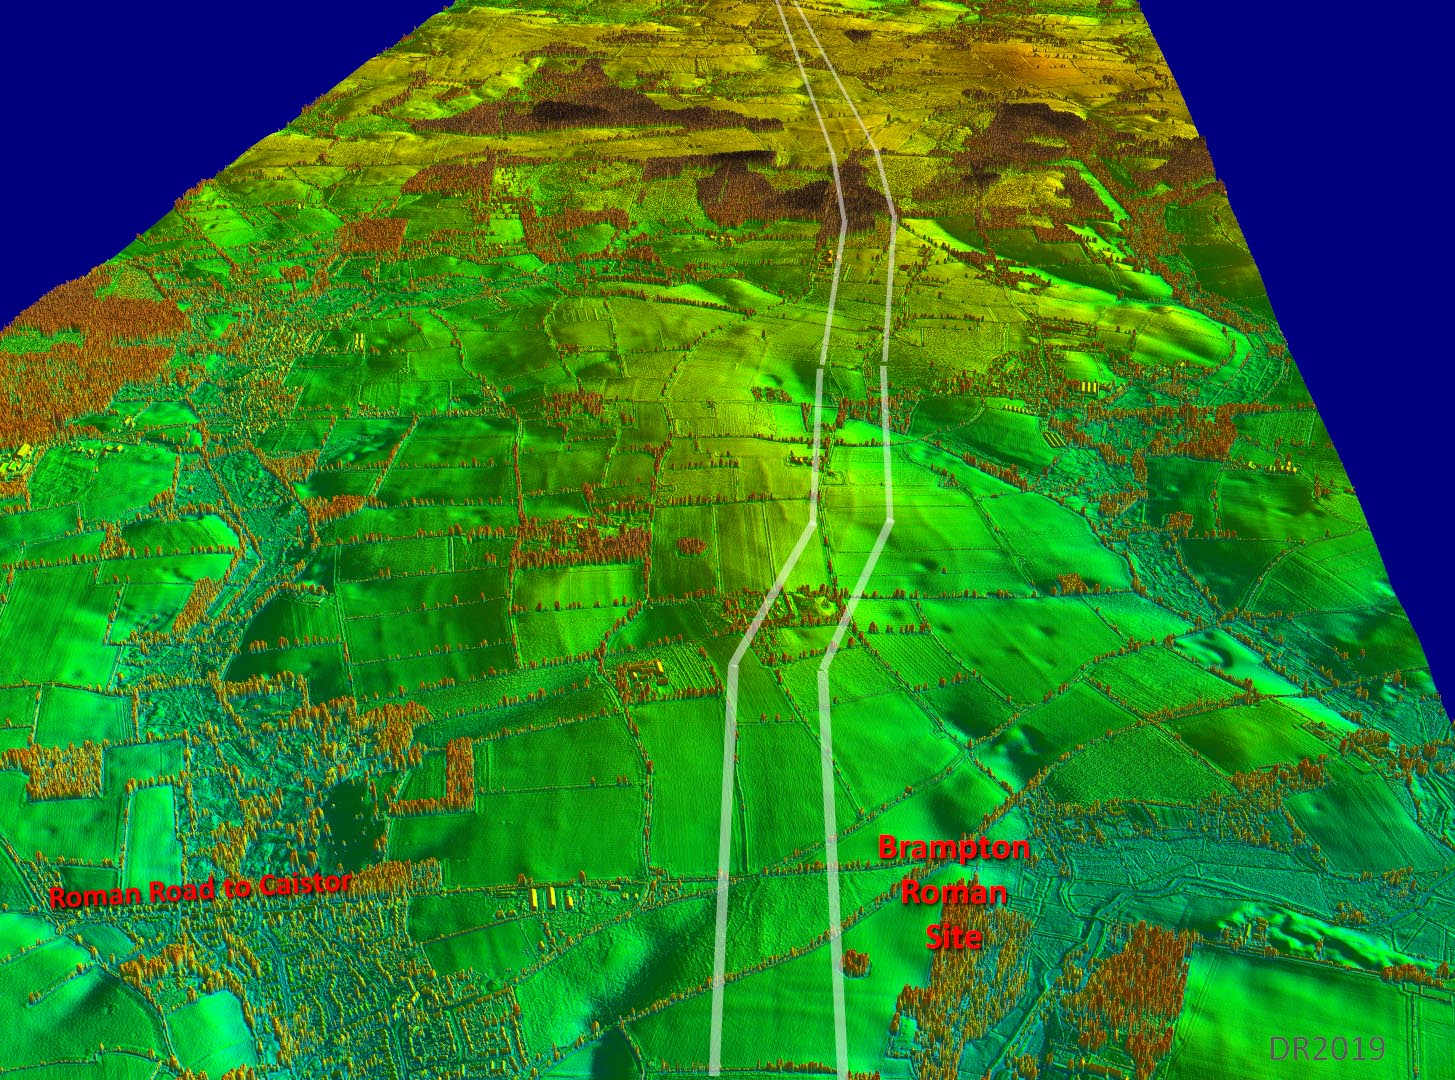
Oblique 3D Lidar image - looking west The Roman east-west route at Brampton bypasses the fort to its south. There would have been a link road(s) from the settlement - see above. |
Click for larger view
|
 |
Lidar Image - Marsham Woods The road has survived here extremely well but despite its course being so obvious both the OS and the HER show it further to the north. |
Click for larger view |
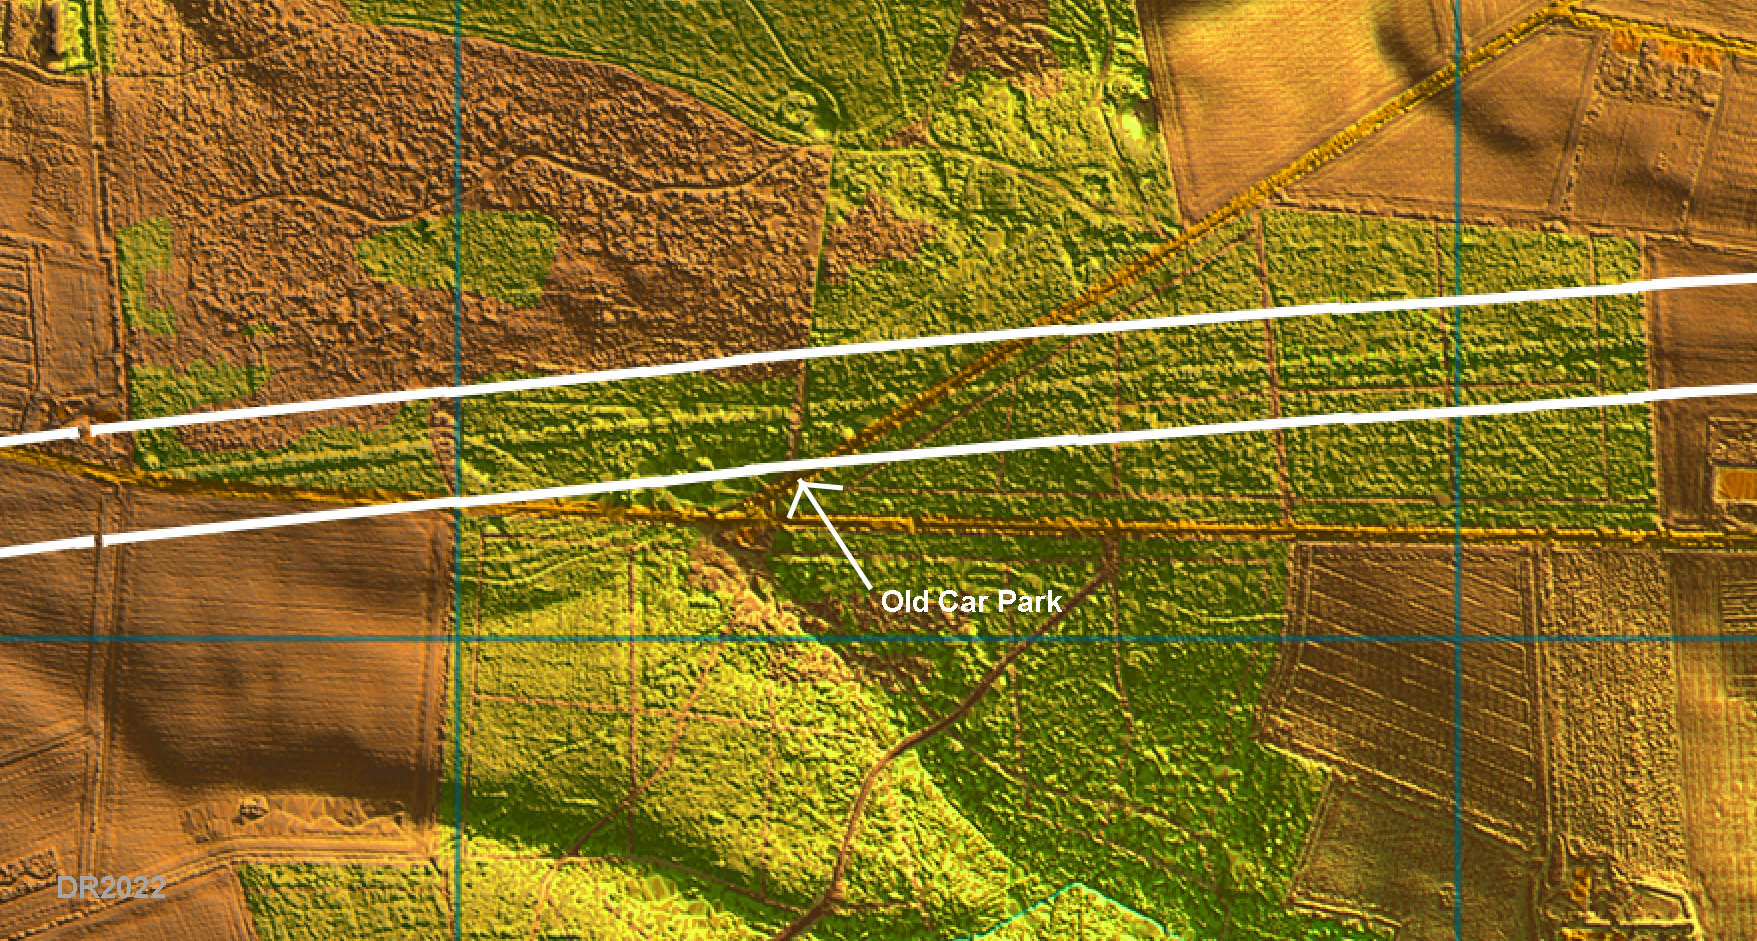 |
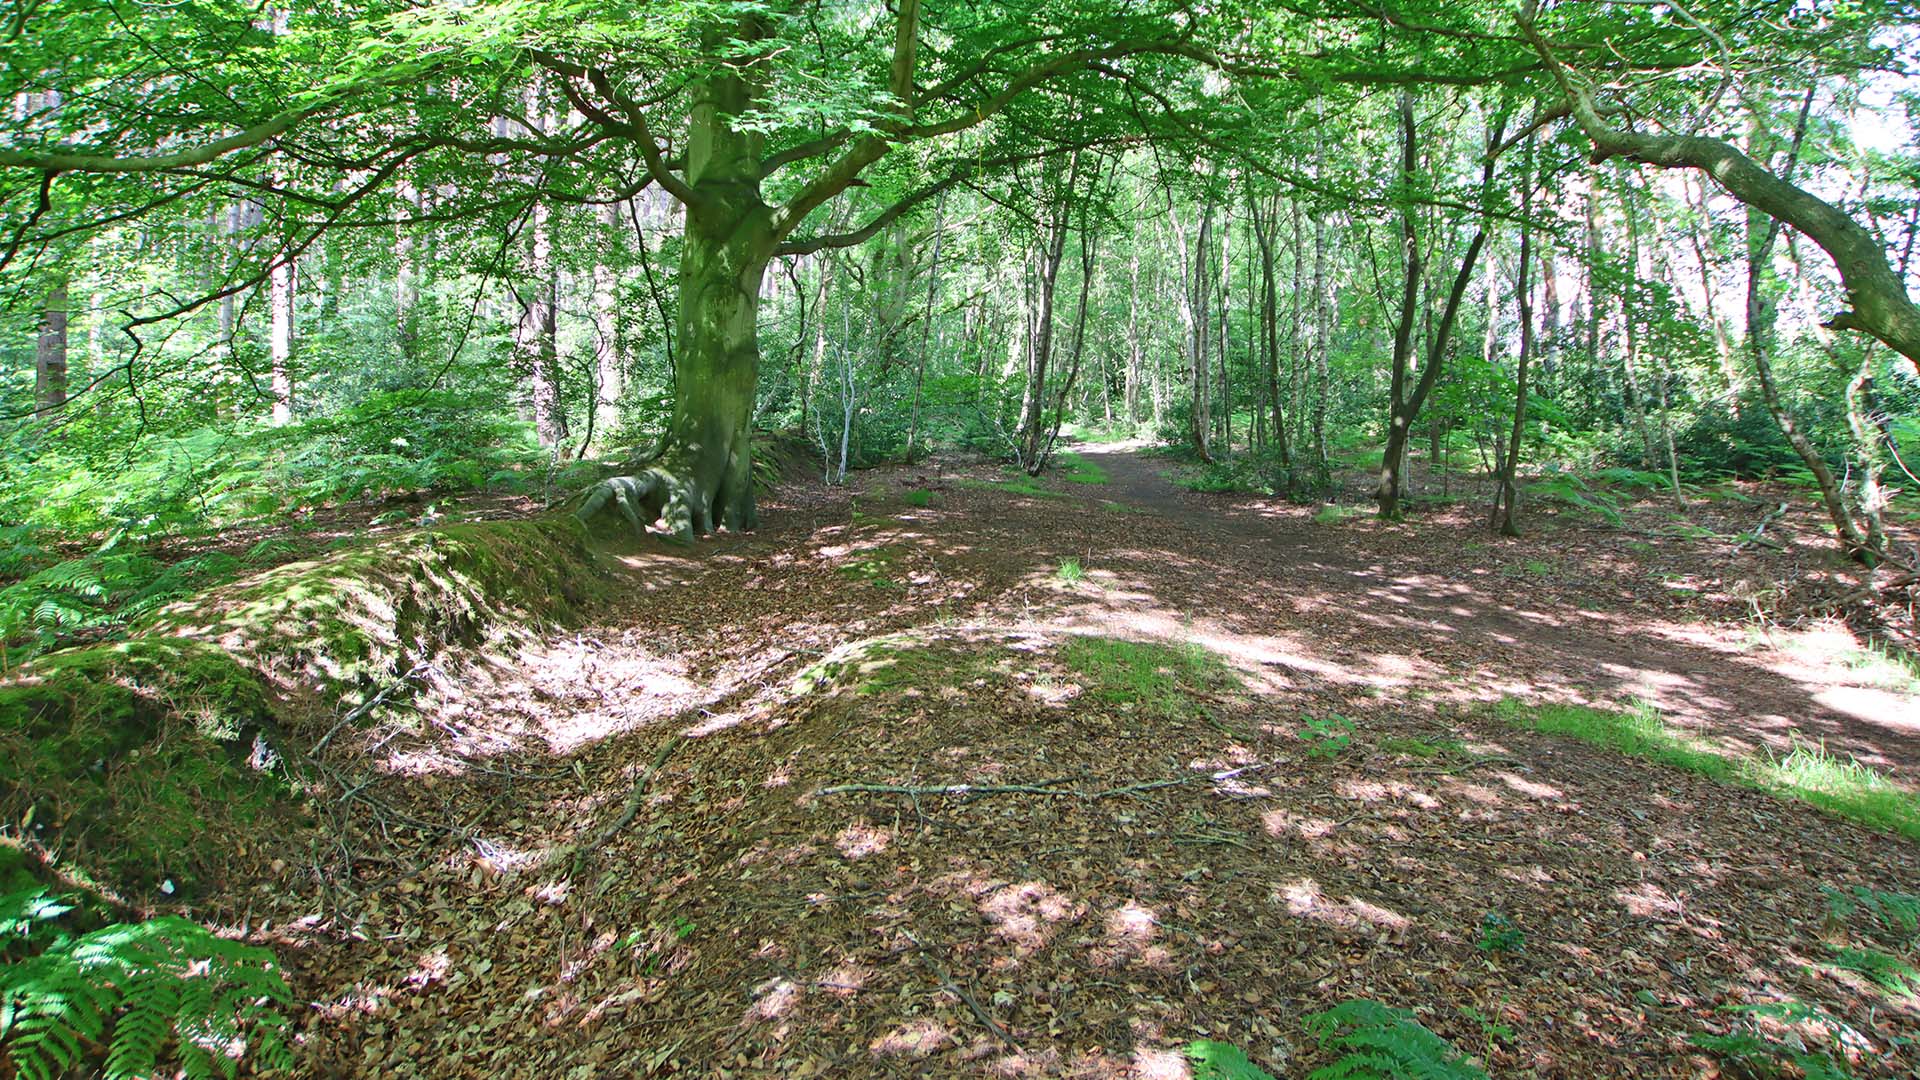
Marsham Woods - looking West This is probably the best spot to view the road - about 50 metres north of an old abandoned car park. Forget the boundary bank at the left - this must be a modern feature that utiliesed the Roman south ditch. We are stood on the centre of the Roman road and the camber of the agger is clear. Image DR |
Click for larger view |
 |
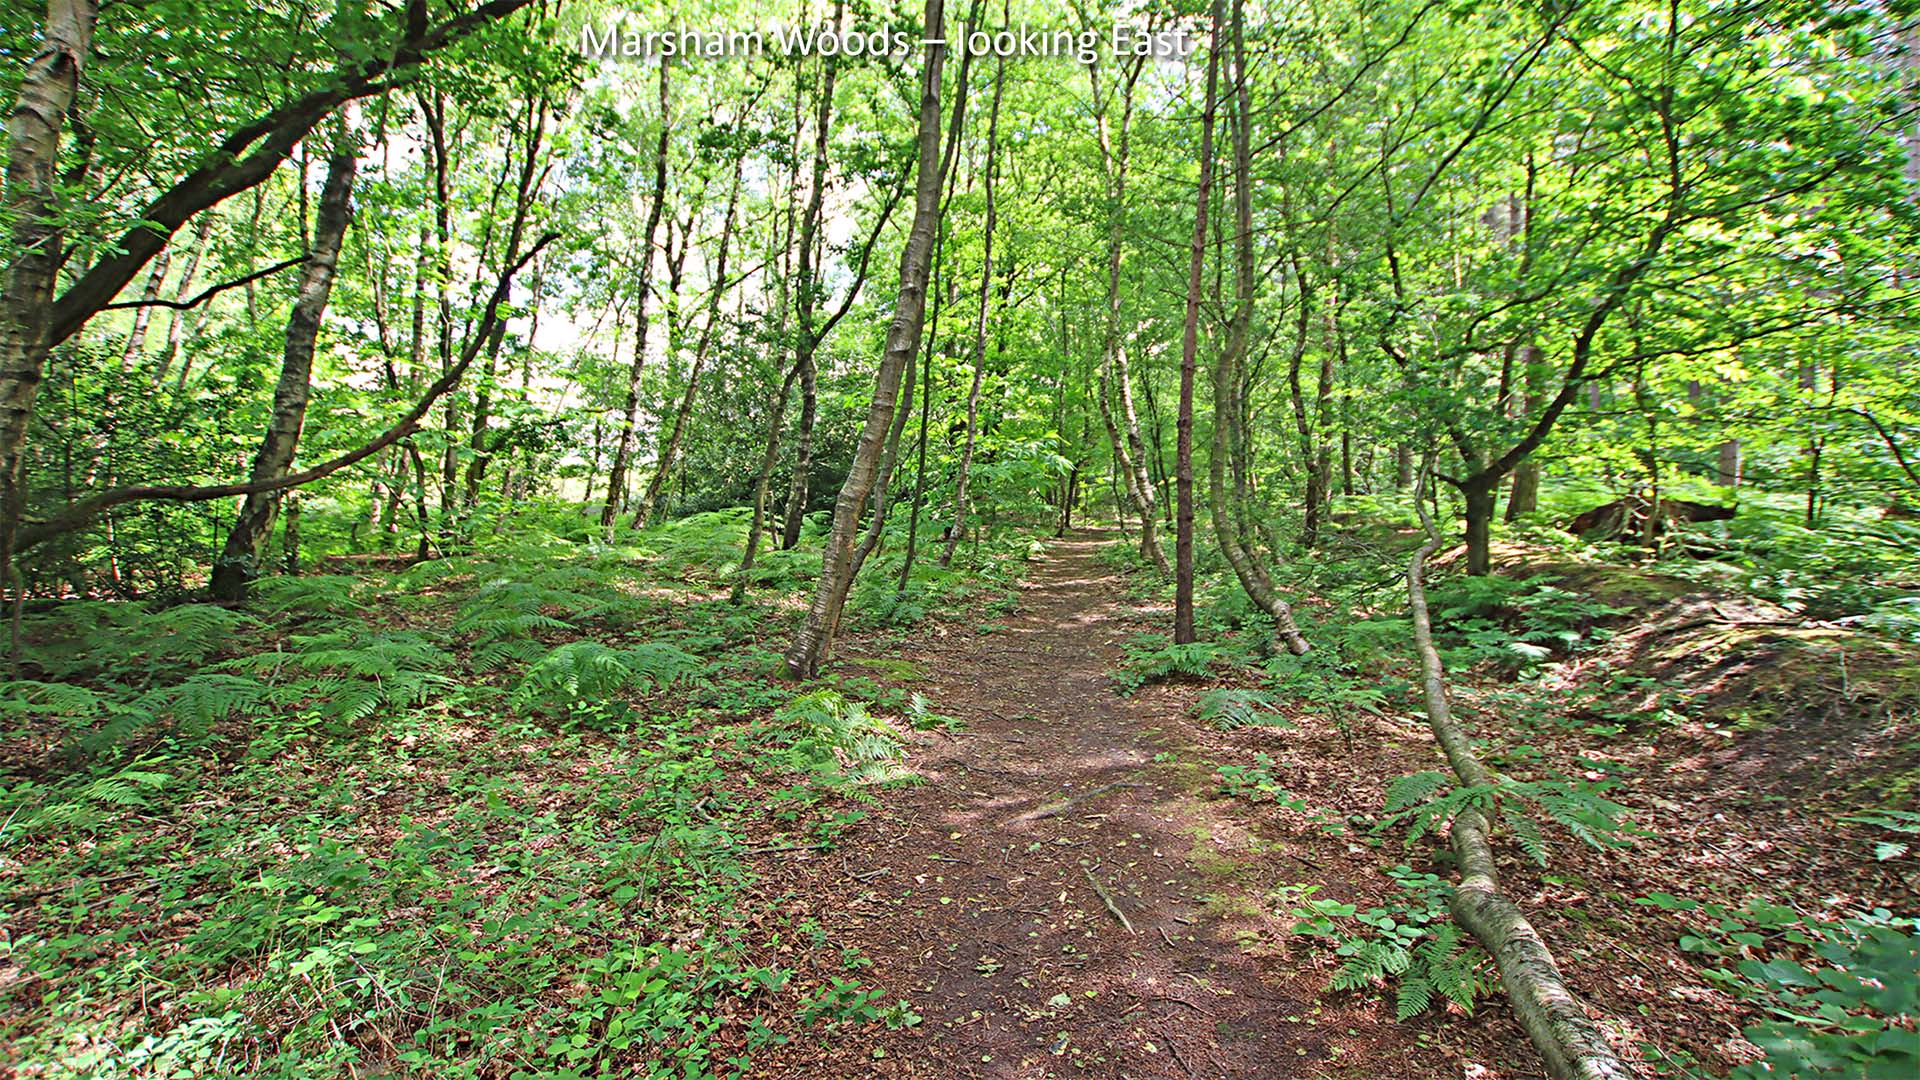
Marsham Woods - looking East This is about 30 metres east of above looking back towards Brampton. The agger is not as obvious here but the line of the road is easy to follow.. Image DR |
Click for larger view |
 |
Lidar Image and Route Map 1 We can be reasonably confident as to the initial course of this road now - there are more than sufficient clues to determine its route. |
Click for larger view |
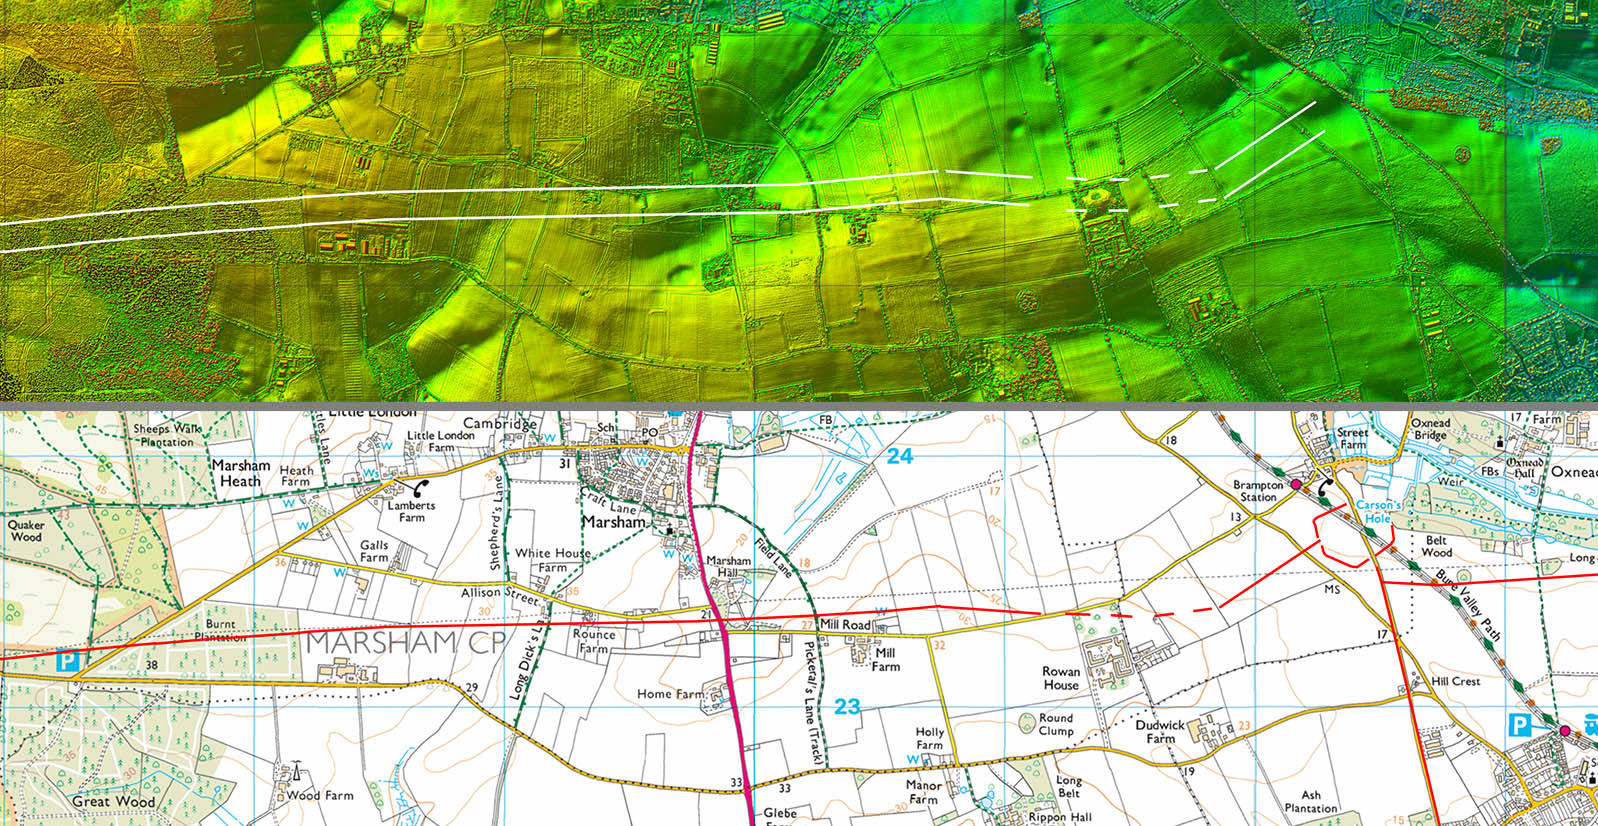 |
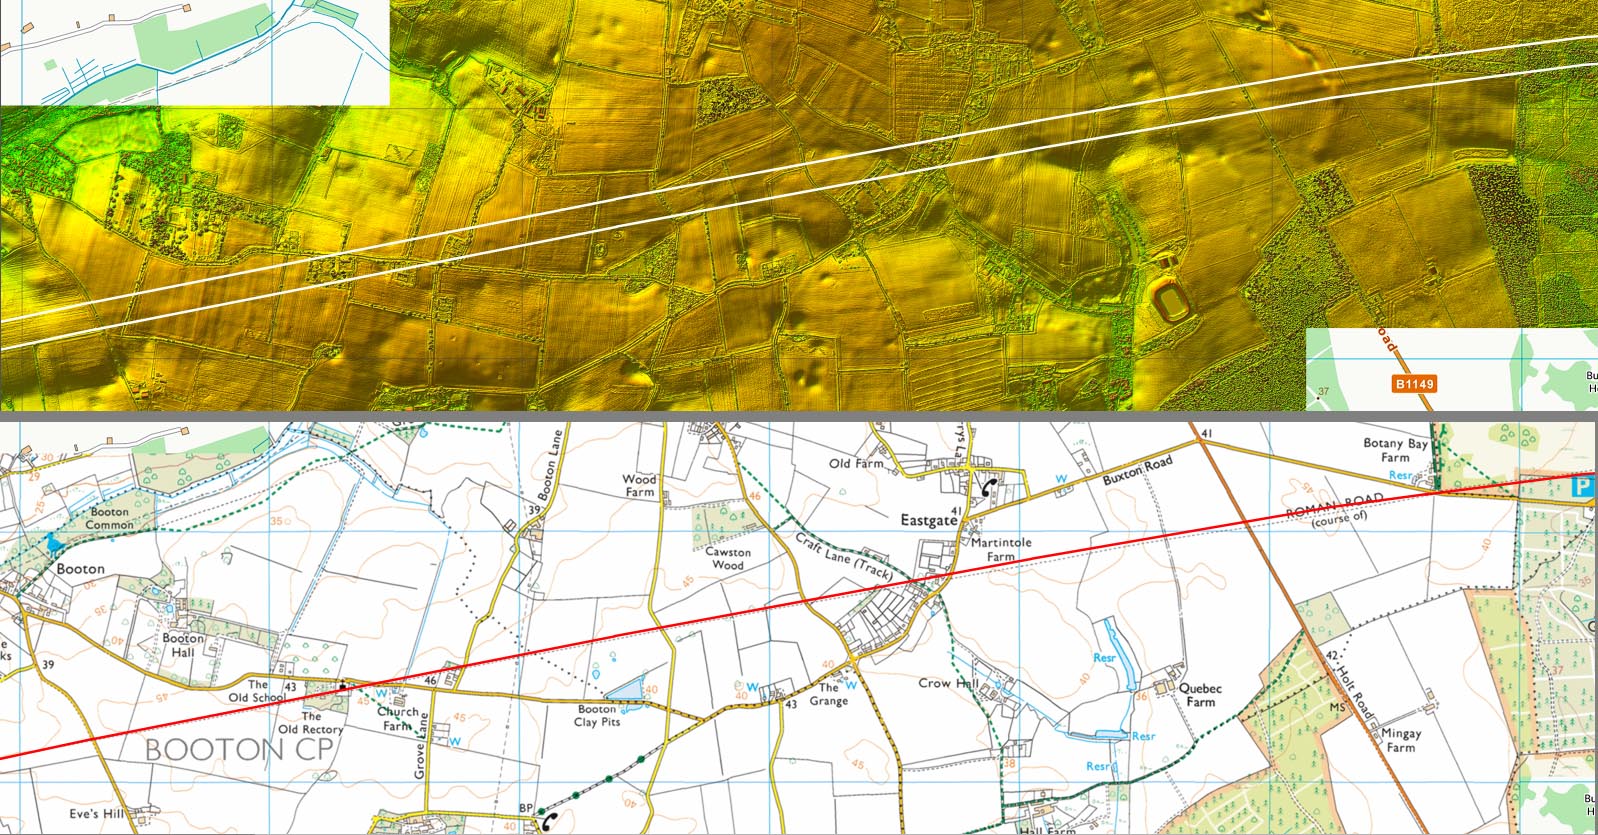
Lidar Image and Route Map 2 Probably the best surviving section of this road with lidar showing its course clearly. |
Click for larger view |
 |
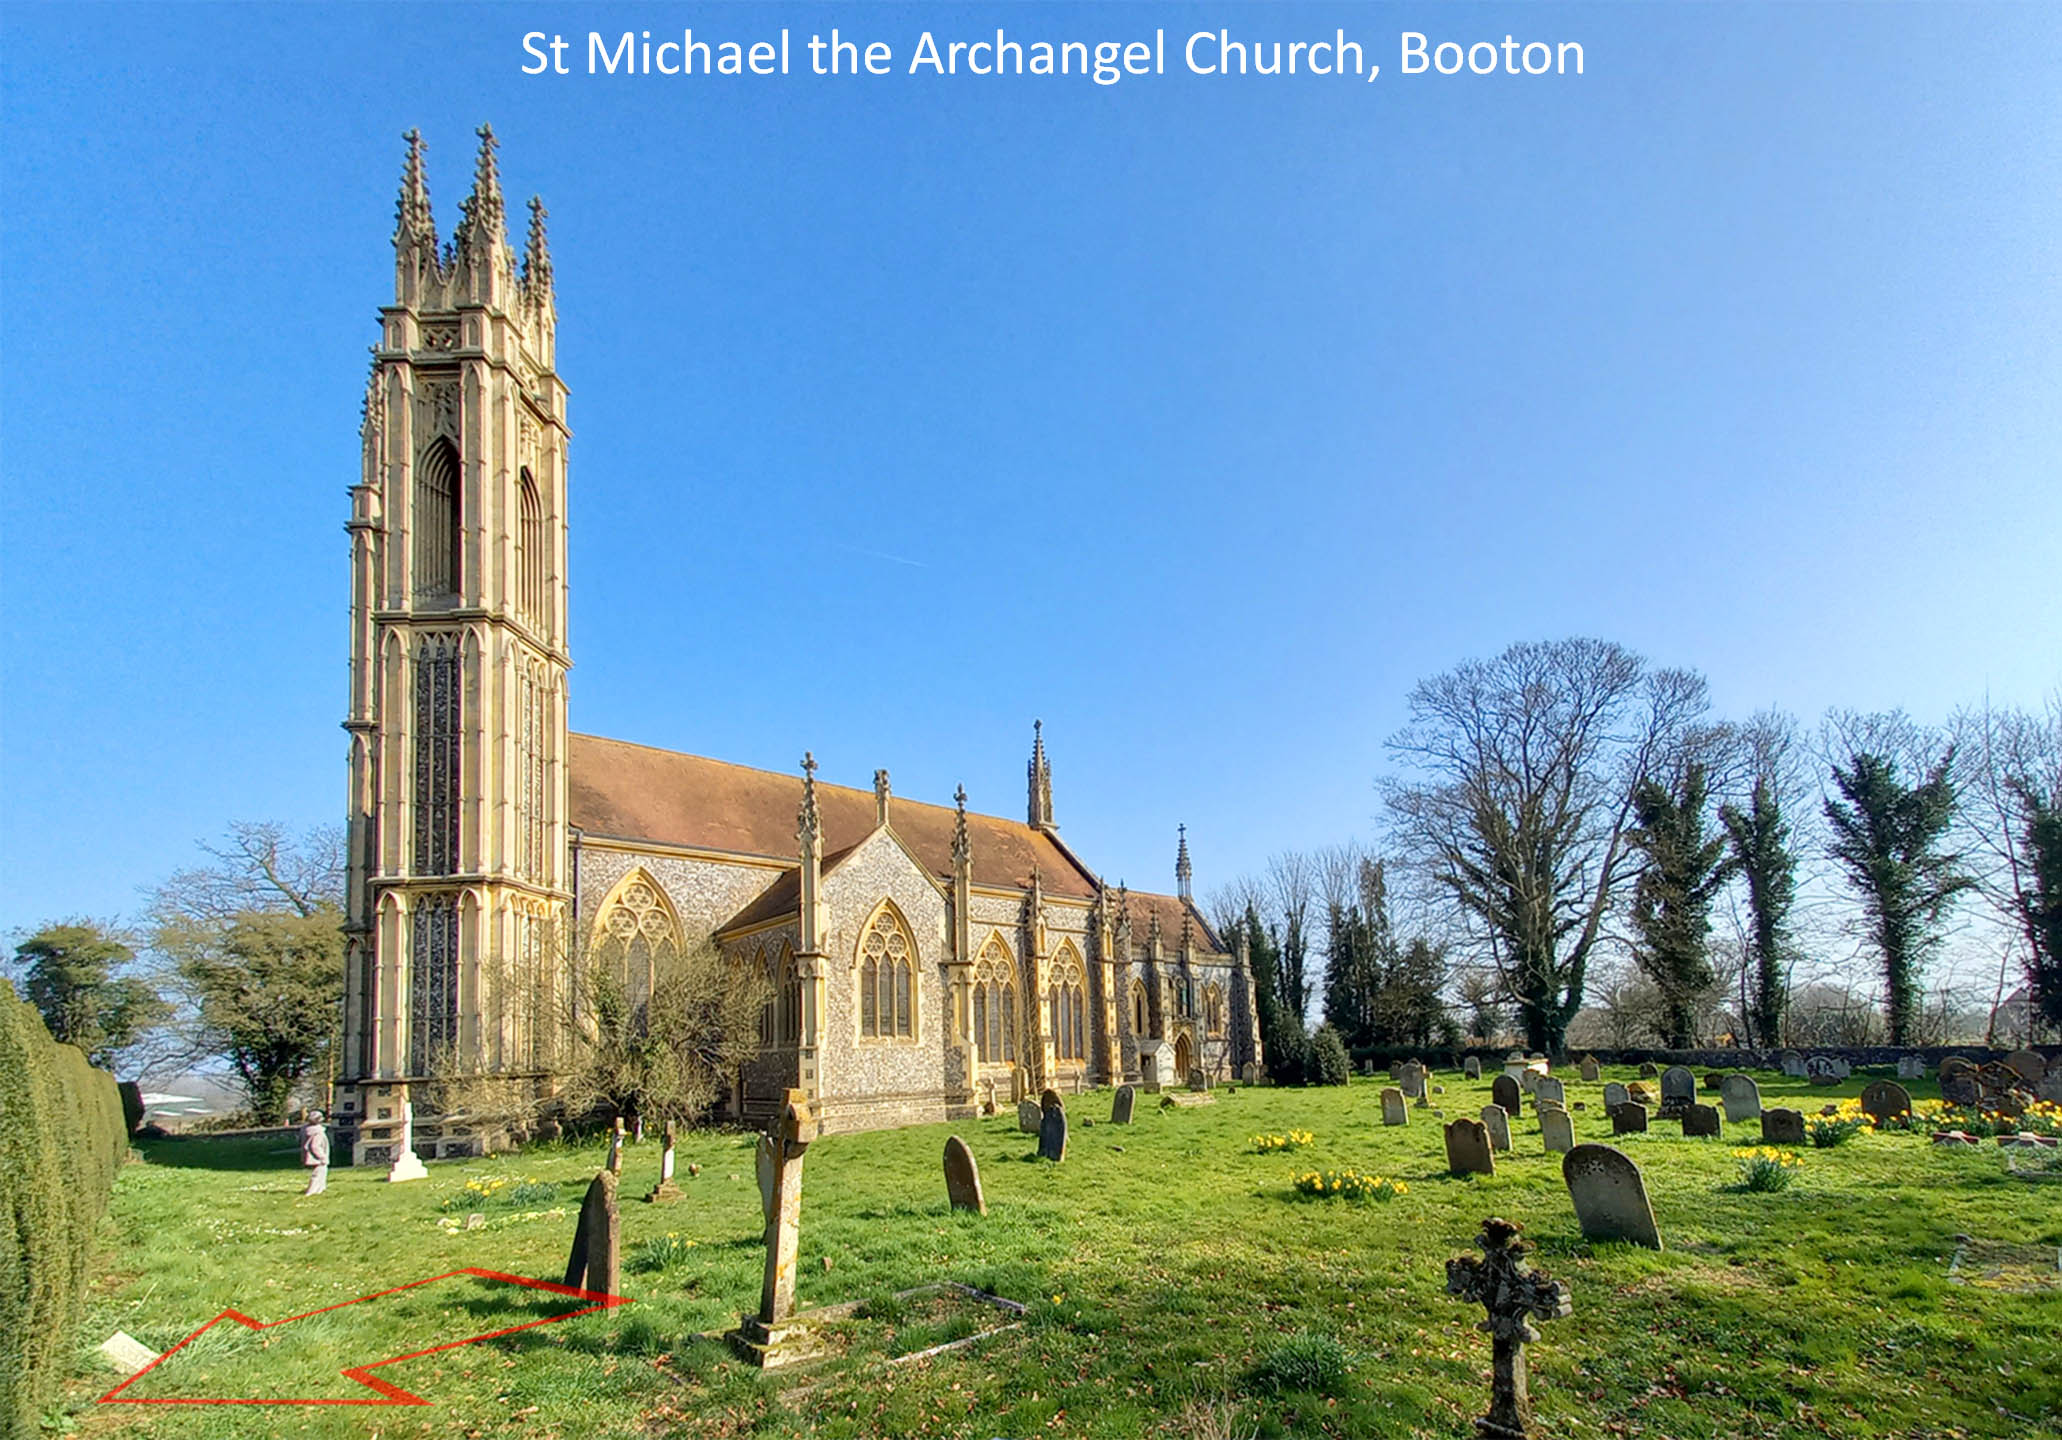
Booton Church on the line of the Roman Road A mini cathedral and one of Norfolk's hidden gems. The approximate line of the road is shown by the aroow but there is little evidence here to confirm this - just interpolation. Image DR |
Click for larger view |
 |
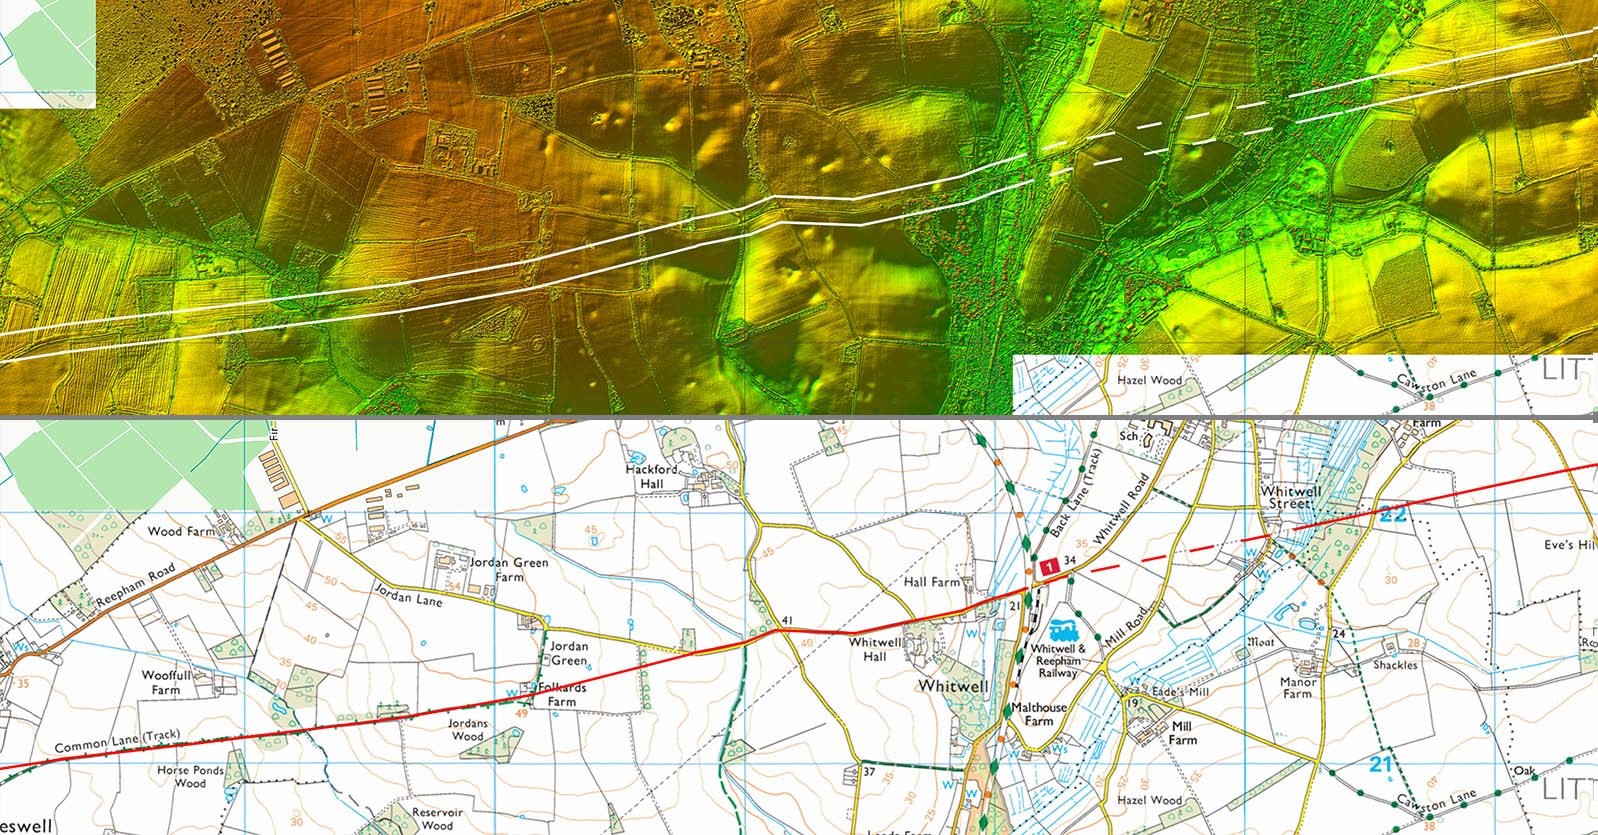
Lidar Image and Route Map 3 The route passes the entrance to Whitwell station yard and then down to cross the river. The Roman line is logical here but a bit lacking in hard evidence. |
Click for larger view |
 |
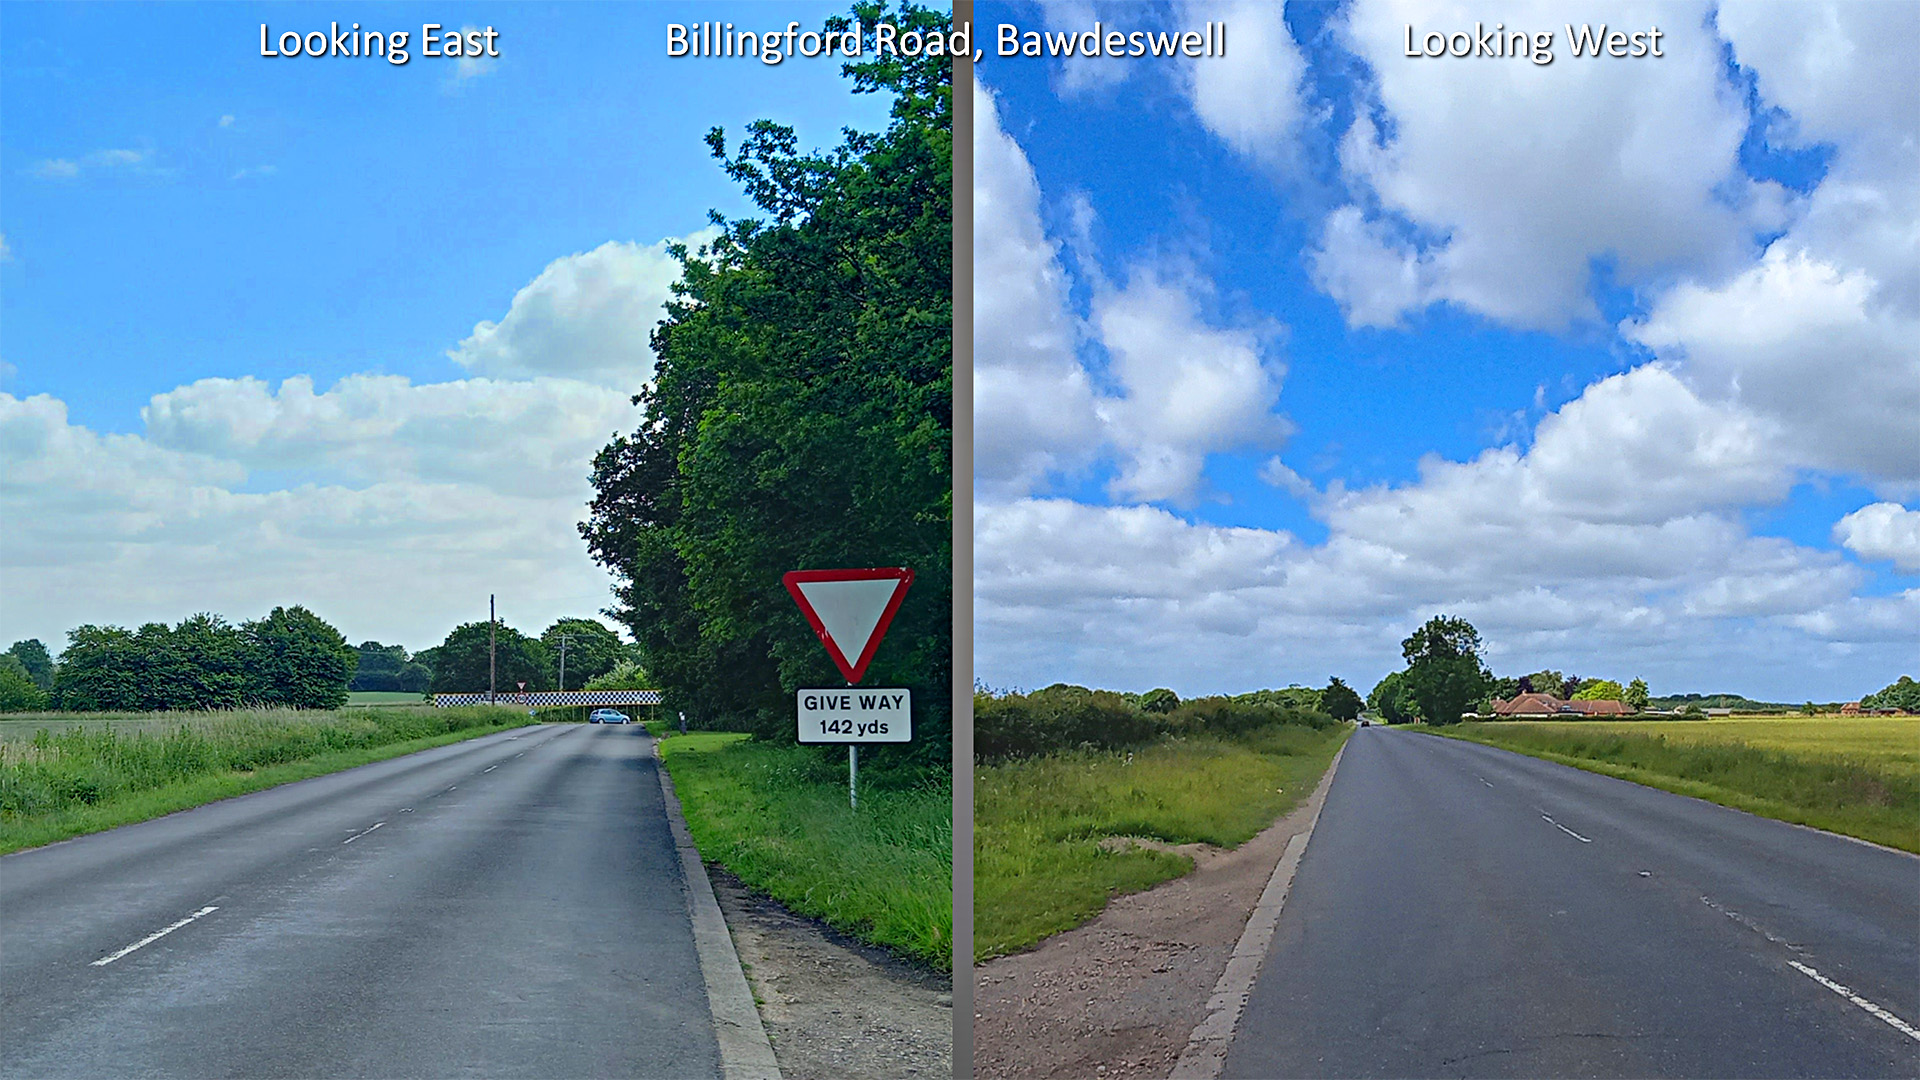
Roman Road west of Bawdeswell Left - we are looking back towards Bawdeswell and that checker hoarding is a well-known sight blocking the Roman line at Bawdeswell Bypass. The Roman line was of course straight on across the village. Right - slightly further west than above and looking towards Billingford. Typically Roman with a wide land-take and a ditch obvious on the right (north) side. Images: DR |
Click for larger view |
 |
Lidar Image and Route Map 4 The Roman line through Bawdeswell was probably straight rather than that depicted in the HER, which shows it swinging to the south. After passing through Bawdeswell the final stretch is overlaid by the B1145. |
Click for larger view |
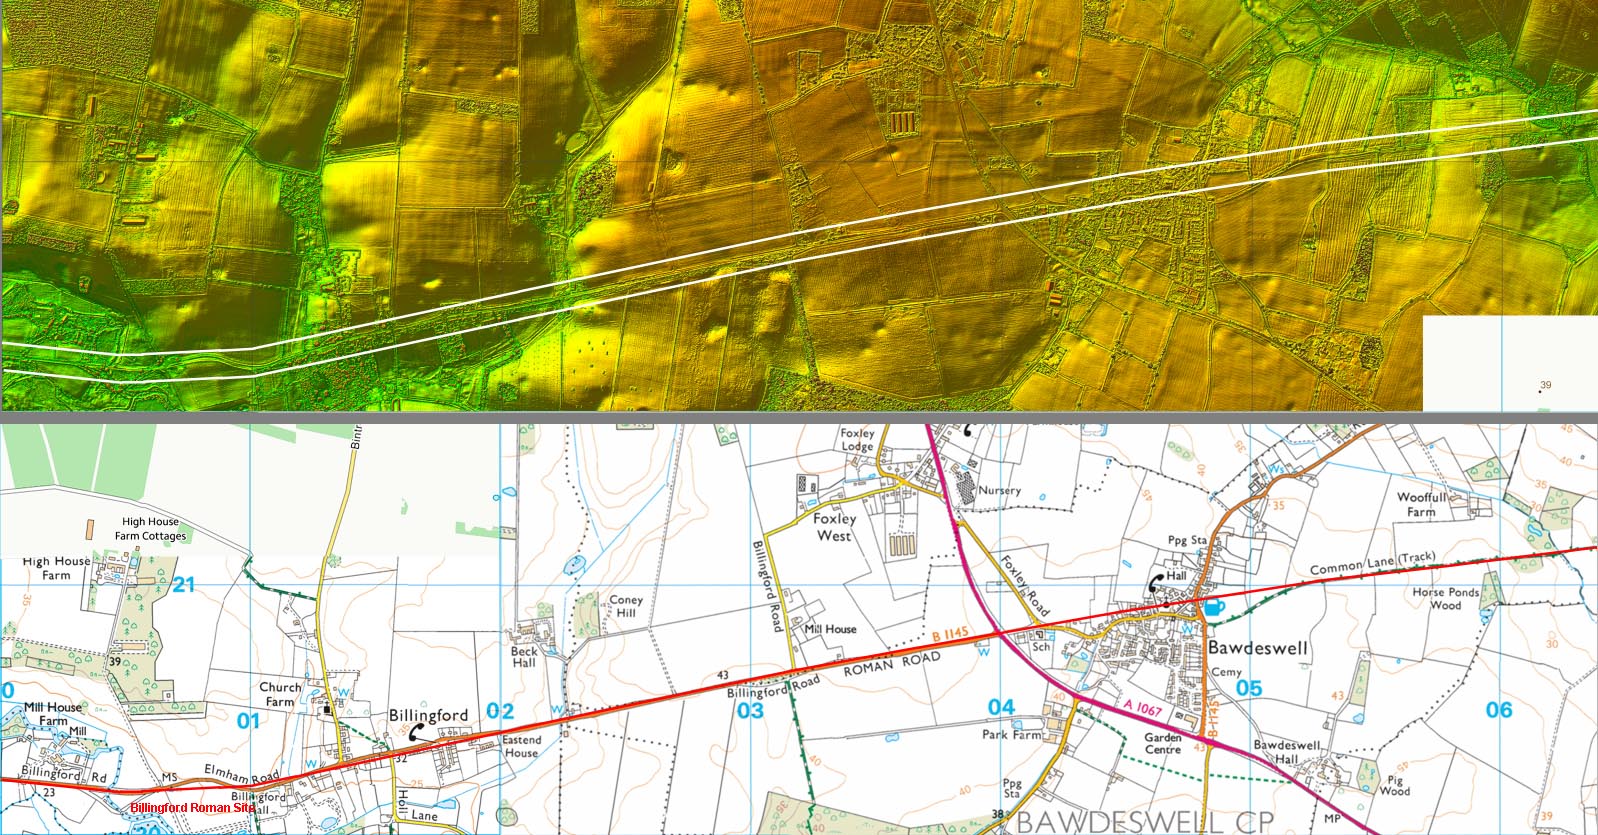 |
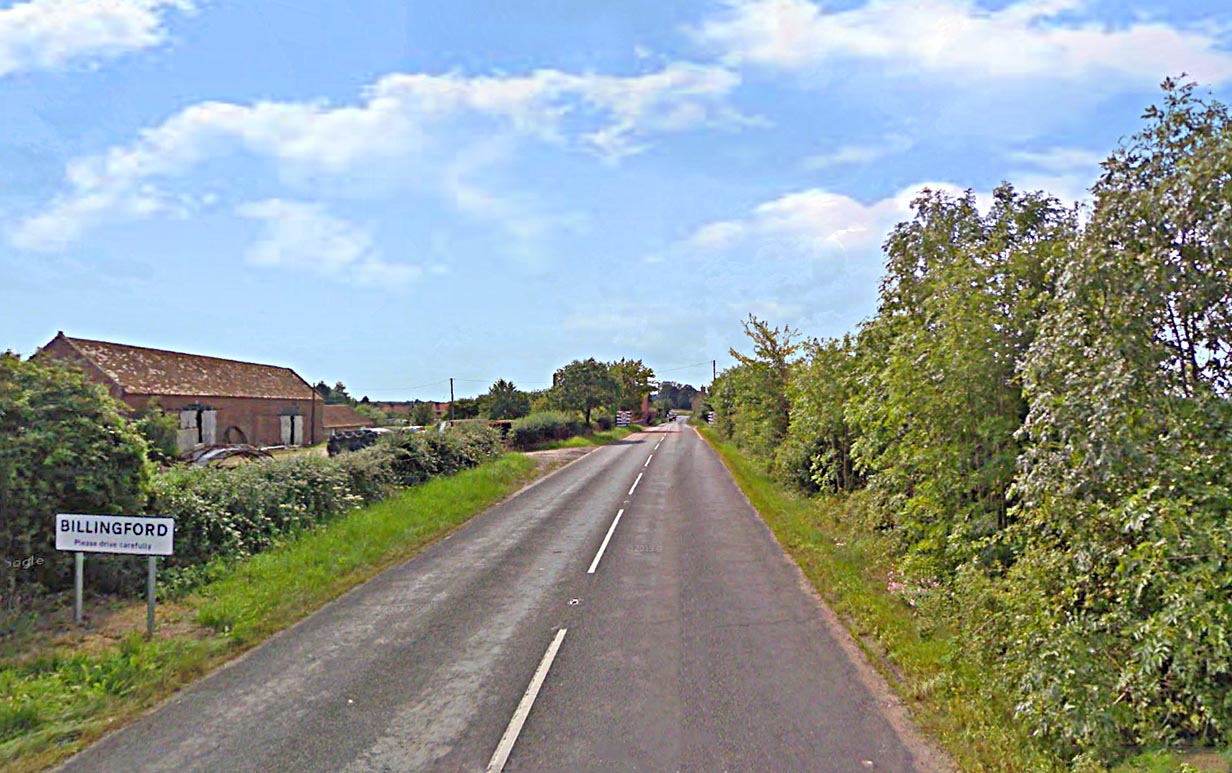
Roman Road at Billingford Village We are now approaching the village of Billingford and its roadside Roman Settlement. Image: Google
|
Click for larger view |
|
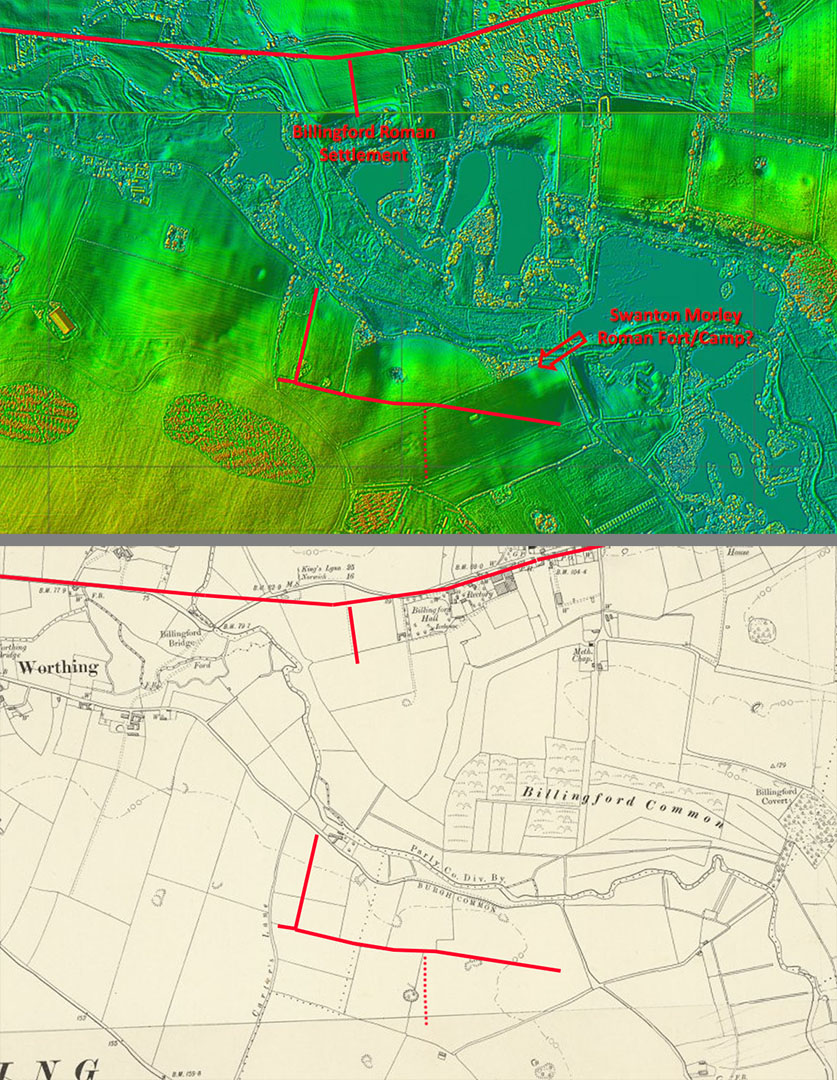
Lidar Image and First Edition Map - Billingford & Swanton Morley Sites The settlement at Billingford appears to have evolved from the early Roman fort at Swanton Morley. Dating for the latter would suggest it had a short life (HER 17486). There are clearly roads on the south bank serving Swanton Morley - they show up well on the 3D lidar below.
|
Click for larger view |
|
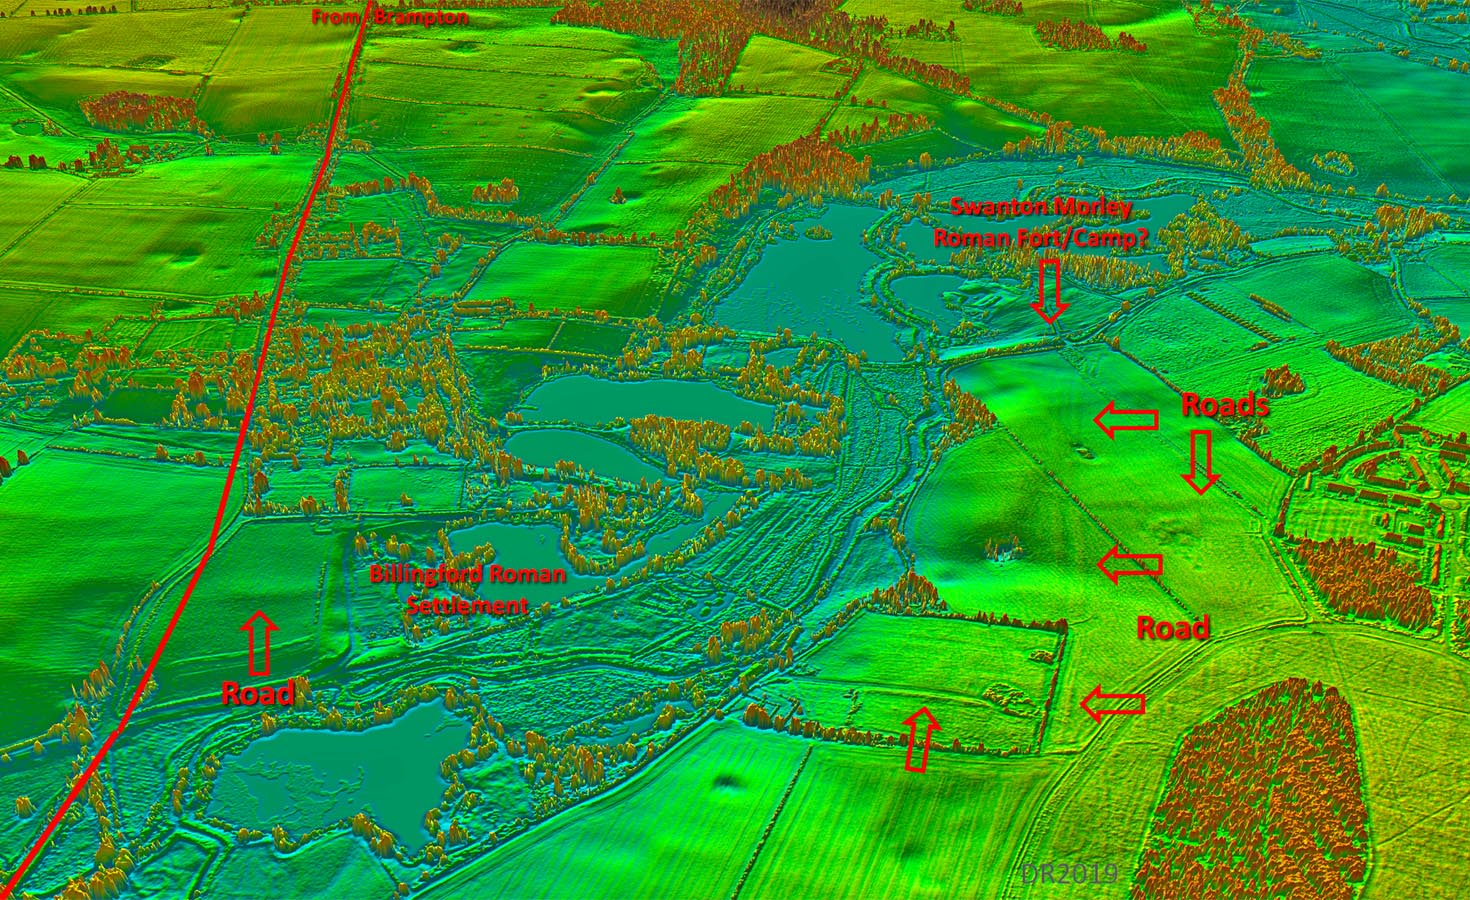
Oblique 3D Lidar Image - Billingford and Swanton Morley Lidar doesn't really help with Swanton Morley, the fort. If early and built as a turf fort then perhaps we should not expect much to have survived. Aerial photos reveal its ditches. Amazingly the liely roads to it have survived much better.
|
Click for larger view |
|
|
|
|
Last update: June 2022 |
© David Ratledge |